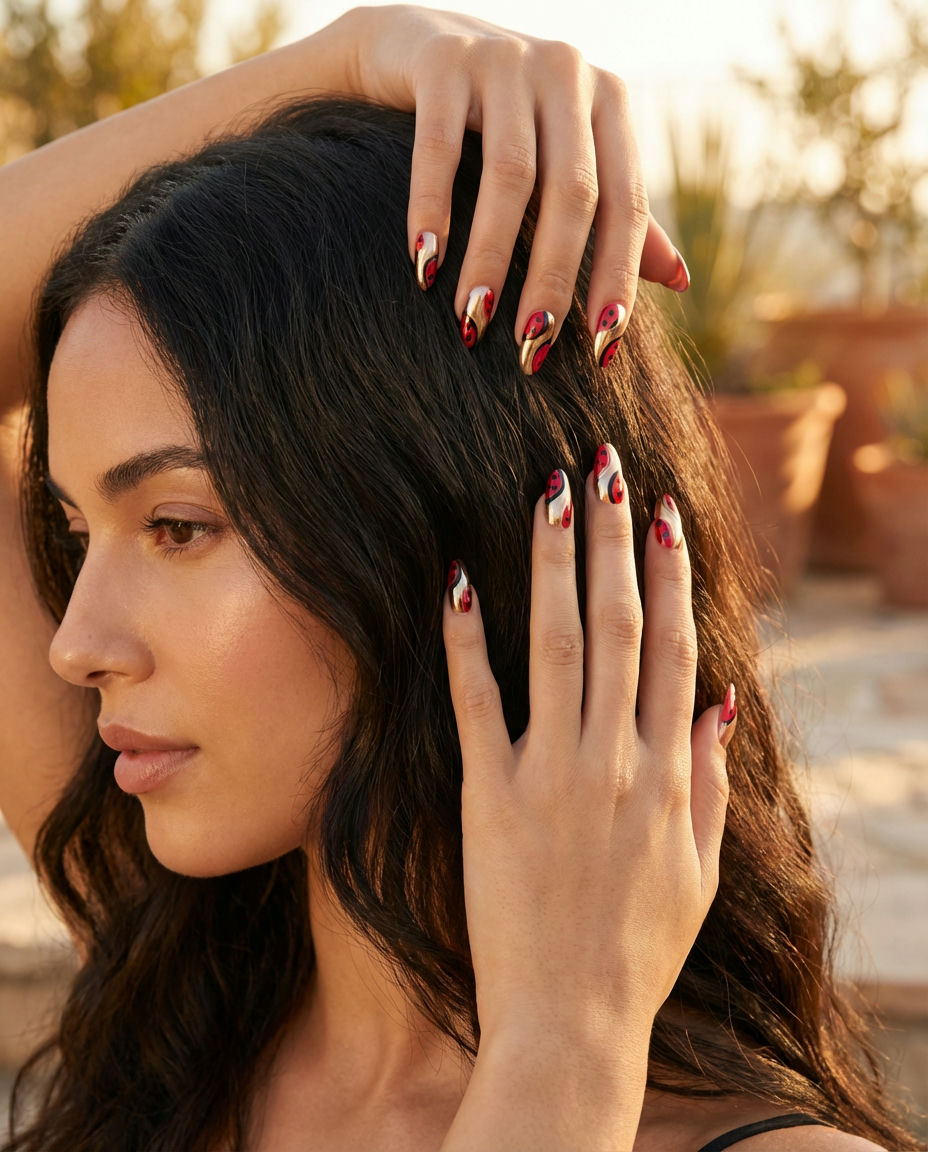
31 Playful Ladybug Nail Designs to Inspire Your Next Manicure
Get ready to buzz with excitement because ladybug nails are making a HUGE comeback in 2026, and they’re cuter and more playful than ever! Forget everything you thought you knew about these classic critters; we’re diving deep into fresh, trendy designs that are perfect for adding a pop of whimsical charm to your fingertips. Whether you’re a seasoned nail art pro or just looking for some adorable inspiration, this guide is packed with ideas that will have you channeling your inner Miraculous Ladybug in no time. Prepare to fall head over heels for these charming mani makeovers!
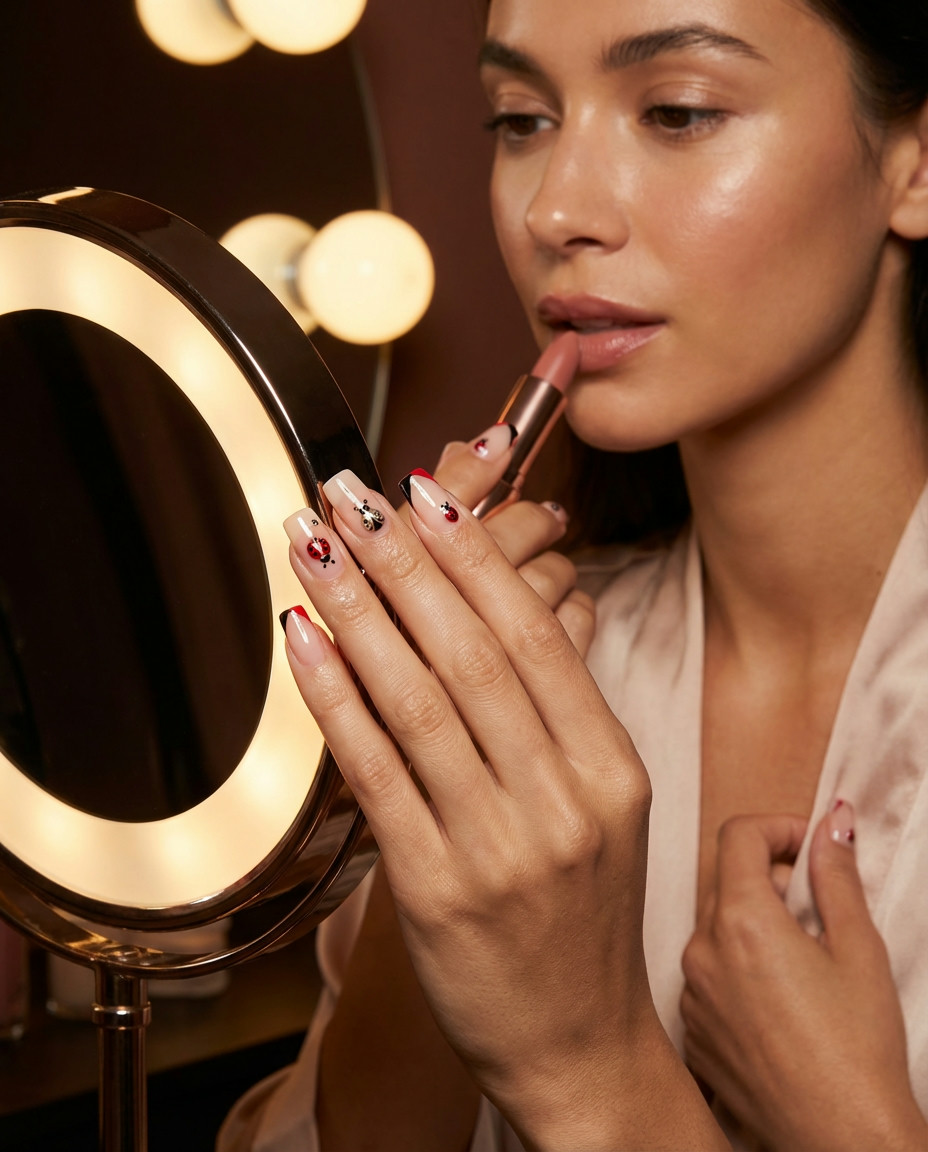
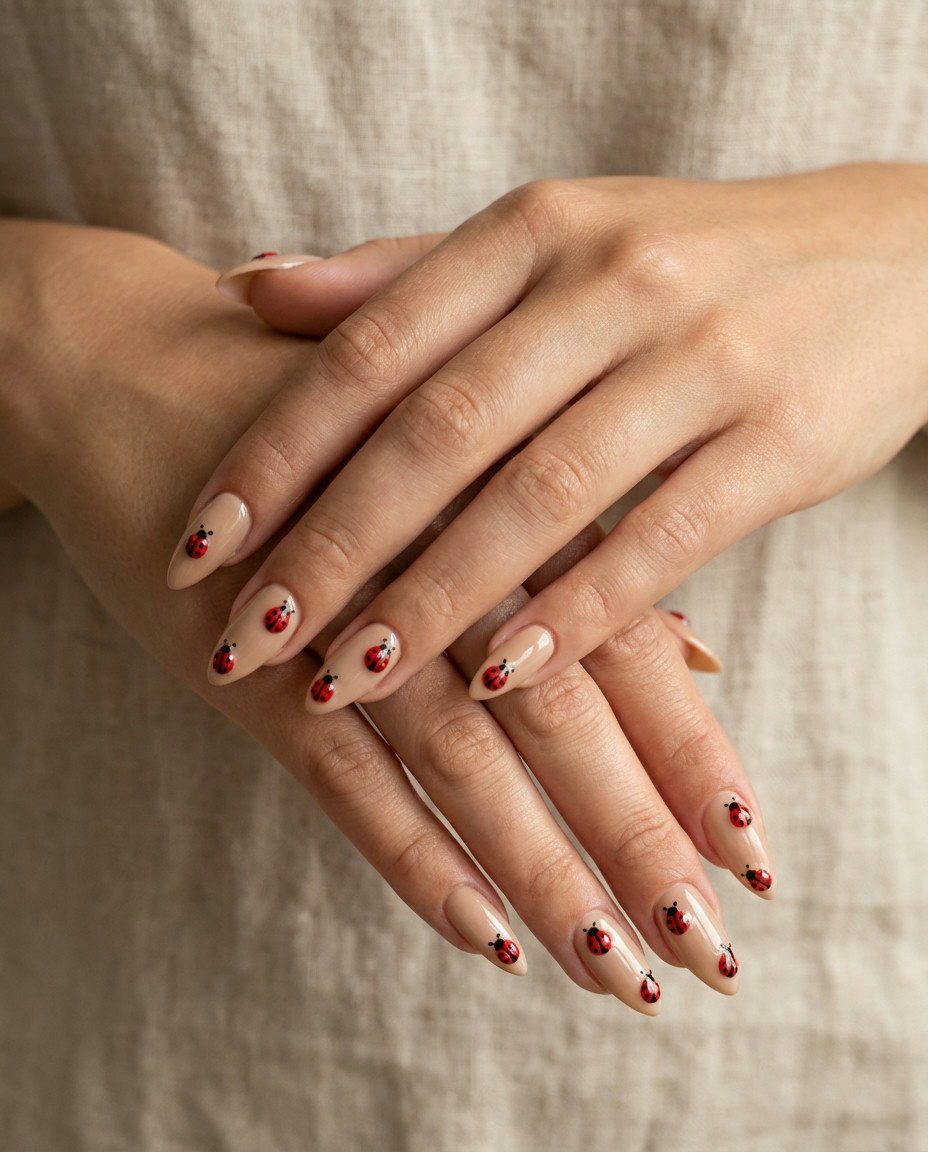
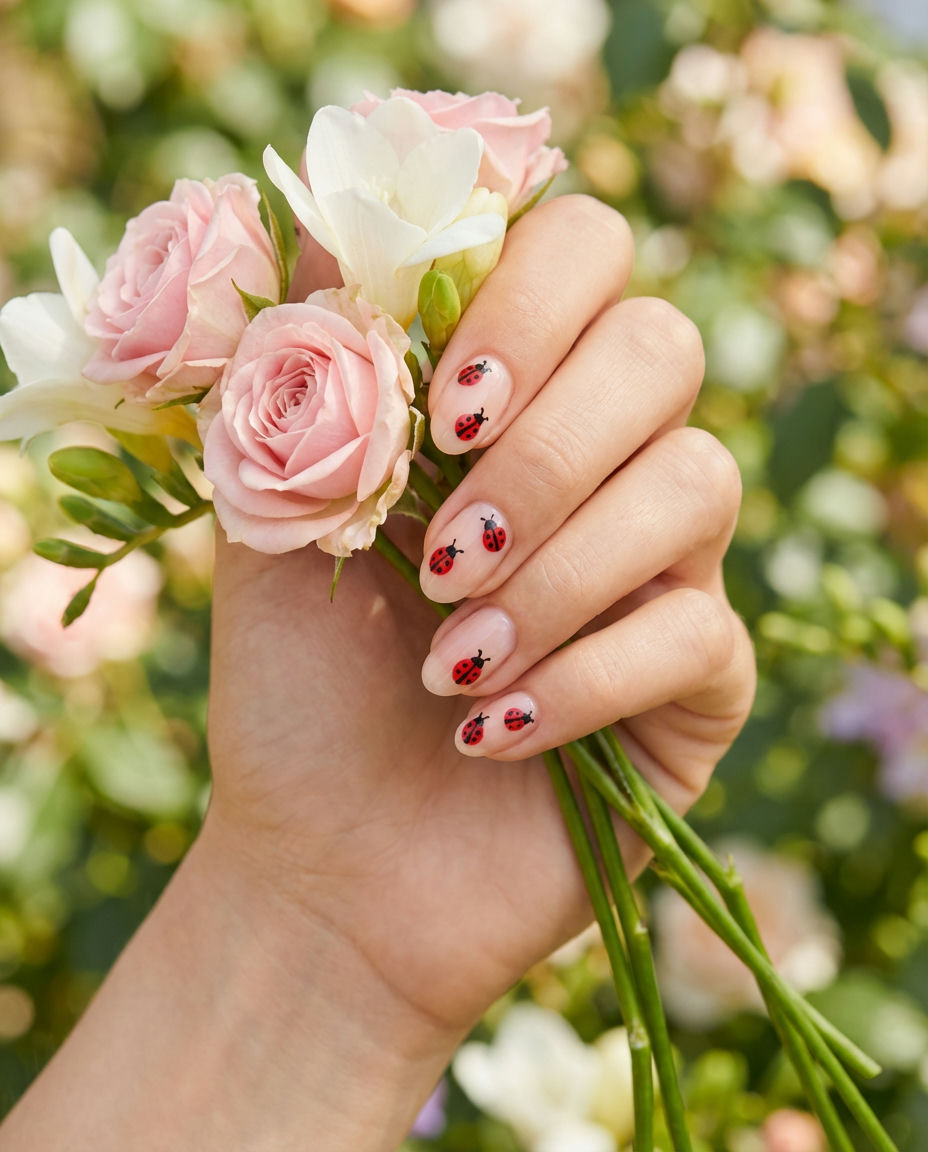
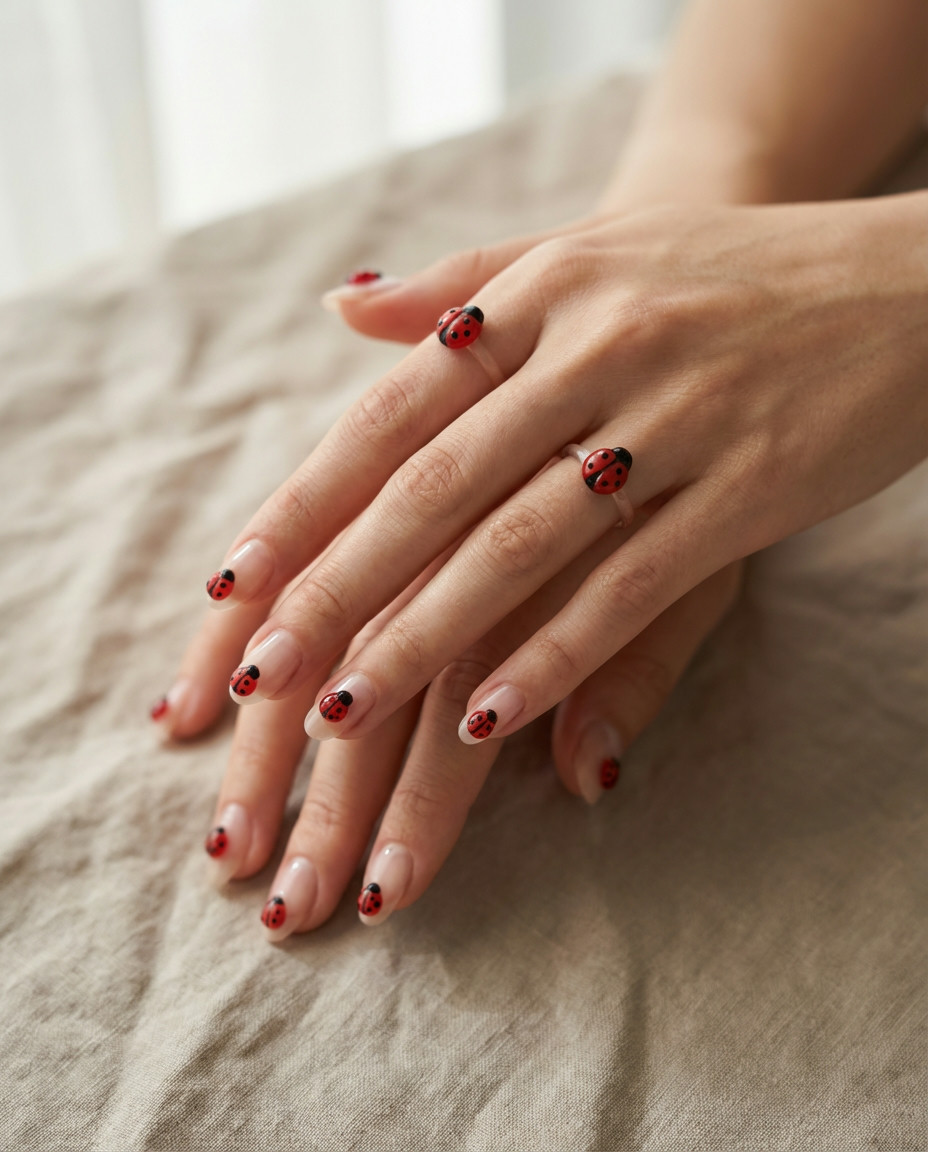
1. Classic Red & Black Dot Delight
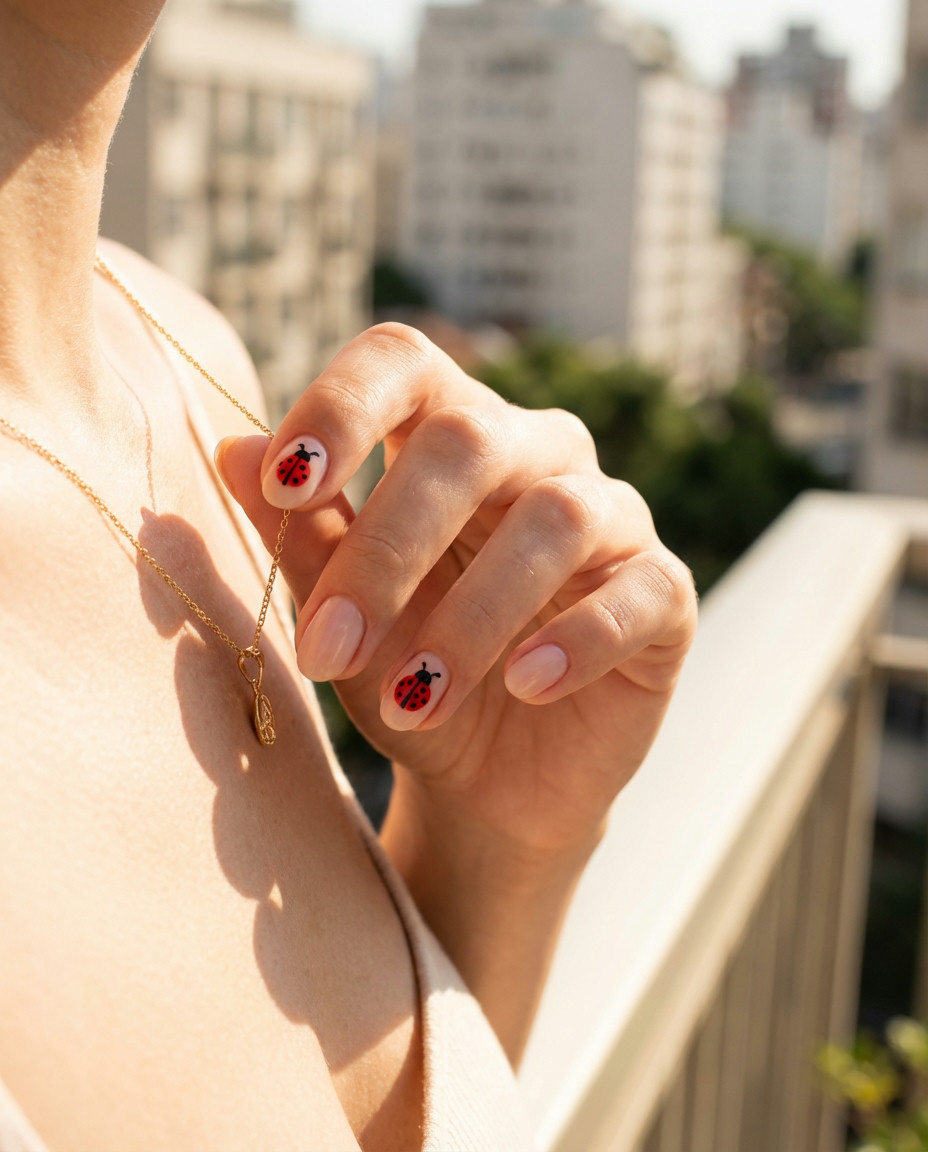
This timeless design brings the iconic ladybug aesthetic right to your fingertips. Featuring a vibrant red base adorned with meticulously placed black dots, it’s a foundational look for anyone exploring ladybug nails playful designs. It’s both simple and striking, embodying the pure essence of these charming insects. This style serves as a fantastic base for more elaborate Art later on, proving that sometimes, the classic approach is truly the best.
To achieve this clean look, start with a flawless red opaque polish. Once dry, use a dotting tool or even a bobby pin end dipped in black polish to create perfectly round dots. For added durability and a glossy finish, seal with a high-quality top coat. This works beautifully on any nail length, making it a versatile choice for your next manicure. Remember to let each layer dry completely to prevent smudging.
2. Pink Ladybug French Tips
Who said ladybugs only come in red? This sweet rendition features delicate Pink tips on a natural base, accented with tiny black dots to mimic the beloved insect. It’s a softer, more feminine approach to ladybug nails playful designs, perfect for those who adore a subtle pop of color. The French tip style adds an elegant touch, making this a chic and unexpected way to wear this charming theme.
Start with a sheer nude or clear base. Once dry, carefully apply a pastel pink polish to the tips of your nails, creating a traditional French manicure line. Use a fine-tipped brush and black polish to add small dots to the pink tips. A clear top coat will protect your pretty design and give it that salon-fresh gleam. This particular style looks fantastic on both natural and Acrylic nails.
3. Miraculous Ladybug Inspired Power Mani
Channel your inner superhero with these Miraculous Ladybug inspired nails! This design takes cues directly from the popular cartoon, featuring bold red and black patterns, perhaps with a subtle nod to the character’s costume. It’s an energetic and vibrant option for those who want their nails to tell a story. These fun Designs are guaranteed to turn heads and spark conversations, making your manicure truly super.
For this look, a crisp red base is essential. Some nails can feature the classic black dots, while others might incorporate more intricate patterns or even tiny charms representing the Miraculous symbols. If you’re feeling ambitious, try a half-and-half design on one nail. Ensure your lines are clean and sharp, using striping tape if needed for precision. Finish with a gel top coat for extra shine and long-lasting wear.
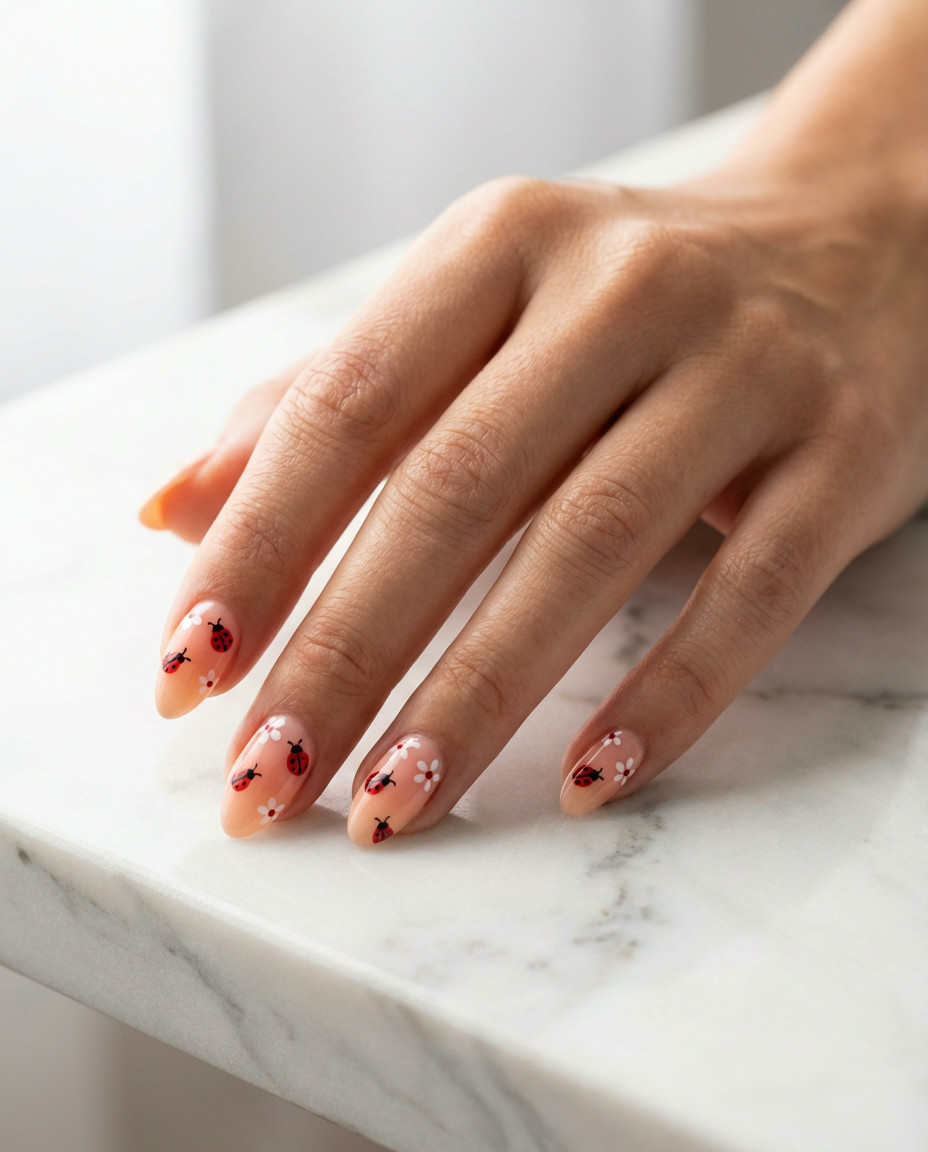
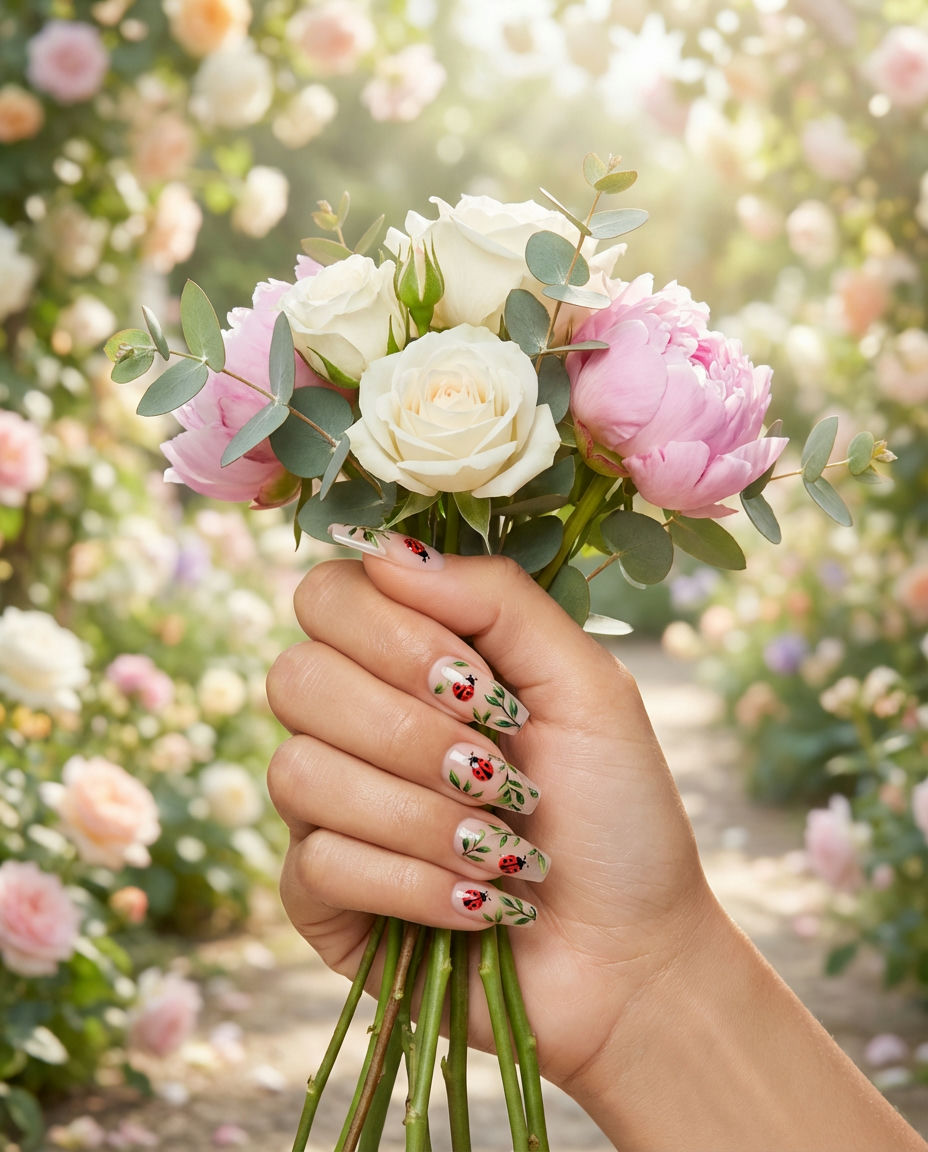
4. Minimalist Short Ladybug Accents
Sometimes less is more! This design focuses on simple, delicate ladybug accents on a few nails, keeping the rest clean and polished. It’s perfect for those with Short nails who still want to embrace the playful theme without overwhelming their smaller canvas. These minimalist ladybug nails playful offer an understated elegance with a touch of whimsy, proving that even tiny details can make a big impact.
Opt for a neutral base color like nude, beige, or a soft white on most nails. On one or two accent nails, paint a small red circle or half-circle at the cuticle or tip, then add two tiny black dots. A fine-tipped brush or toothpick will be your best friend for these delicate details. Keep the dots small and spaced evenly. A clear, glossy top coat will help seal the design and give a professional finish.
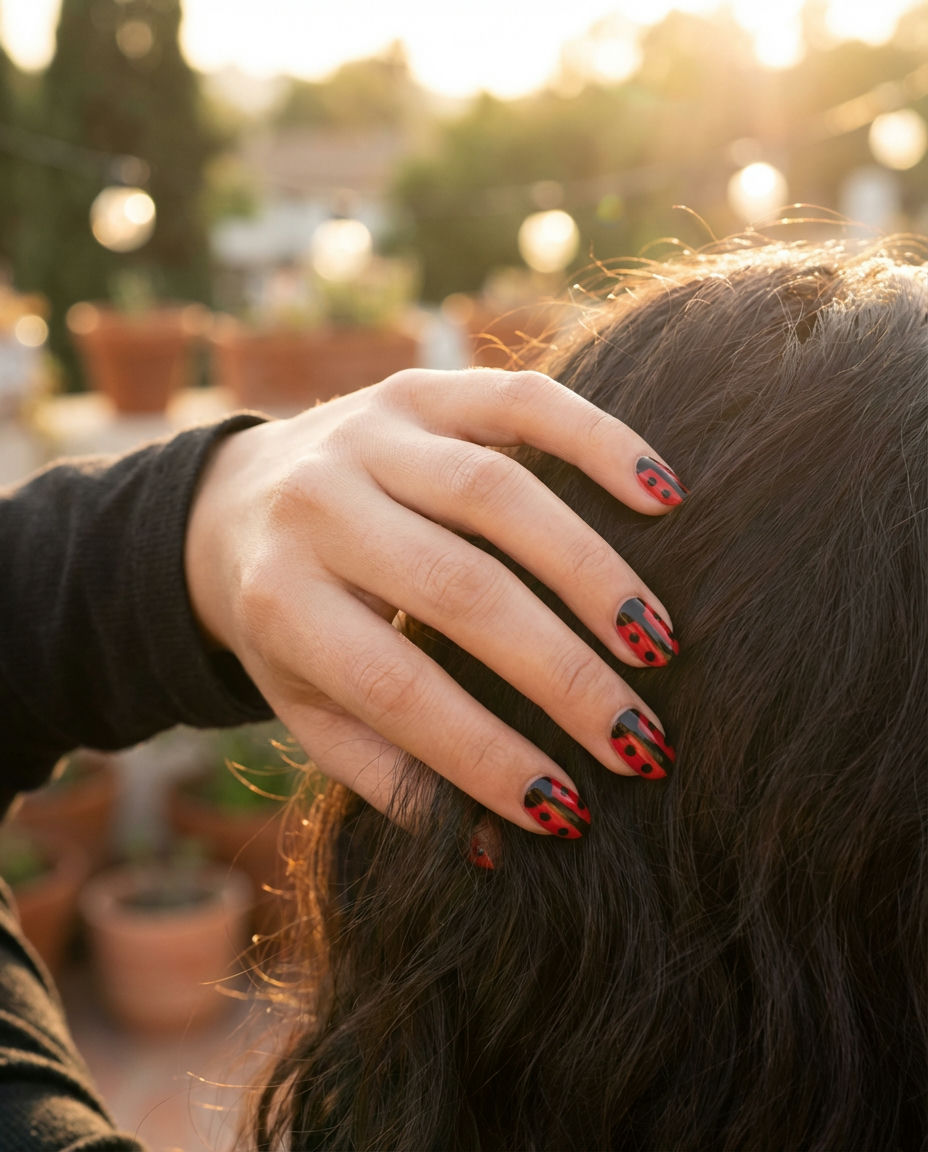
5. Abstract Ladybug Art Swirls
Get artsy with this abstract interpretation of the classic ladybug! Instead of precise spots, think swirling patterns of red and black, perhaps with a dash of white or gold for added flair. This creative approach to Art allows for more fluidity and unique expression in your ladybug nails playful repertoire. It’s a modern take that still captures the essence of the insect while adding a sophisticated, artistic edge.
Start with a lighter base, perhaps a creamy white or light grey. Use a thin nail art brush to create organic swirls and abstract shapes in red and black polish. Don’t aim for perfection; the beauty is in the free-flowing lines. You can gently marble the colors while wet for a blending effect. Seal with a matte top coat to give it a contemporary art gallery feel, or a glossy one for a polished look.
6. Glitter Bomb Ladybug Tips
Add some sparkle to your ladybug look with dazzling glitter tips! This design incorporates a playful glitter-infused red or black tip, making your ladybug nails playful and glamorous. It’s a fun way to elevate the classic design, perfect for a special occasion or just when you want to feel a little extra. The shimmer catches the light beautifully, making your hands truly stand out with these adorable Designs.
After applying a base coat, paint your nails with a sheer nude. Then, using a fine glitter polish in red or black, paint the tips, either covering the entire tip or creating an ombre effect. For a crisp line, use nail guides. Once dry, you can add tiny black dots (or red dots if your tips are black glitter) near the cuticle for that ladybug touch. A strong top coat will ensure your glitter stays put and shines bright.
7. Matte Black Ladybugs on Nude
For a sophisticated spin on the classic, consider matte black ladybugs against a chic nude base. This elegant approach provides a subtle contrast that’s both modern and understated. These ladybug nails playful embrace a minimalist aesthetic while still being undeniably charming. It’s a fantastic choice for those who prefer refined Designs and want a hint of whimsy without being overtly bold.
Apply a neutral, opaque nude polish as your base. Once thoroughly dry, use a black matte nail polish and a fine detailing brush to paint small, abstract ladybug shapes or just the distinctive black dots. You can alternate matte and glossy top coats on different nails or simply use a matte top coat over the entire design for a uniform, velvety finish. This style works exceptionally well on Short to medium length nails.
8. Whimsical Daisy & Ladybug Combo

Embrace springtime joy with a delightful combination of daisies and ladybugs! This design pairs cute little ladybugs with sweet white daisies, creating an utterly charming and fresh look. It’s one of the most delightful Art Designs you can choose, perfect for adding a touch of nature-inspired beauty to your manicure. These ladybug nails playful burst with cheerfulness and a youthful vibe.
A light pastel green or sky blue base would complement this look perfectly. Paint small white daisies with a dotting tool for petals and a yellow center. On alternating nails, add your red and black ladybug designs. You can even have a tiny ladybug “crawling” on one of the daisy petals for extra cuteness! Seal with a glossy top coat to make your floral and insect friends shine.
9. Ombre Pink to Red Ladybug Tips
Blend delicate Pink into vibrant red with an ombre effect, then top it with classic ladybug dots! This gradient style adds depth and a modern twist to the traditional ladybug print. It’s a sophisticated take on ladybug nails playful that beautifully transitions from soft to bold. The ombre technique elevates the overall look, making it incredibly chic and visually captivating among other Designs.
Apply a white or nude base. Using a sponge, gently dab and blend pink and red polishes together on your tips to create the ombre. Once dry, add the characteristic black dots to the red section of the ombre. A thin line of black separating the colors can also enhance the ladybug feel. Finish with a high-shine top coat to smooth out any texture from the sponging and seal the vibrant colors.
10. Cartoonish Miraculous Character Nails
Bring your favorite hero to life with these cartoonish Miraculous character nails! This design can feature tiny, hand-painted Ladybug faces or even subtle elements from her costume that fans will instantly recognize. It’s an incredibly detailed and fun way to showcase your love for the series. These ladybug nails playful are packed with personality and character, making them perfect for fans of all ages.
This look is best achieved by a skilled nail artist due to the intricate details. If you’re attempting it yourself, consider using nail decals for the faces or complex logos. Otherwise, start with a solid color base (red, black, or blue). Use fine brushes and a steady hand for painting the character elements. A clear, protective top coat is crucial to ensure these adorable faces last as long as possible.
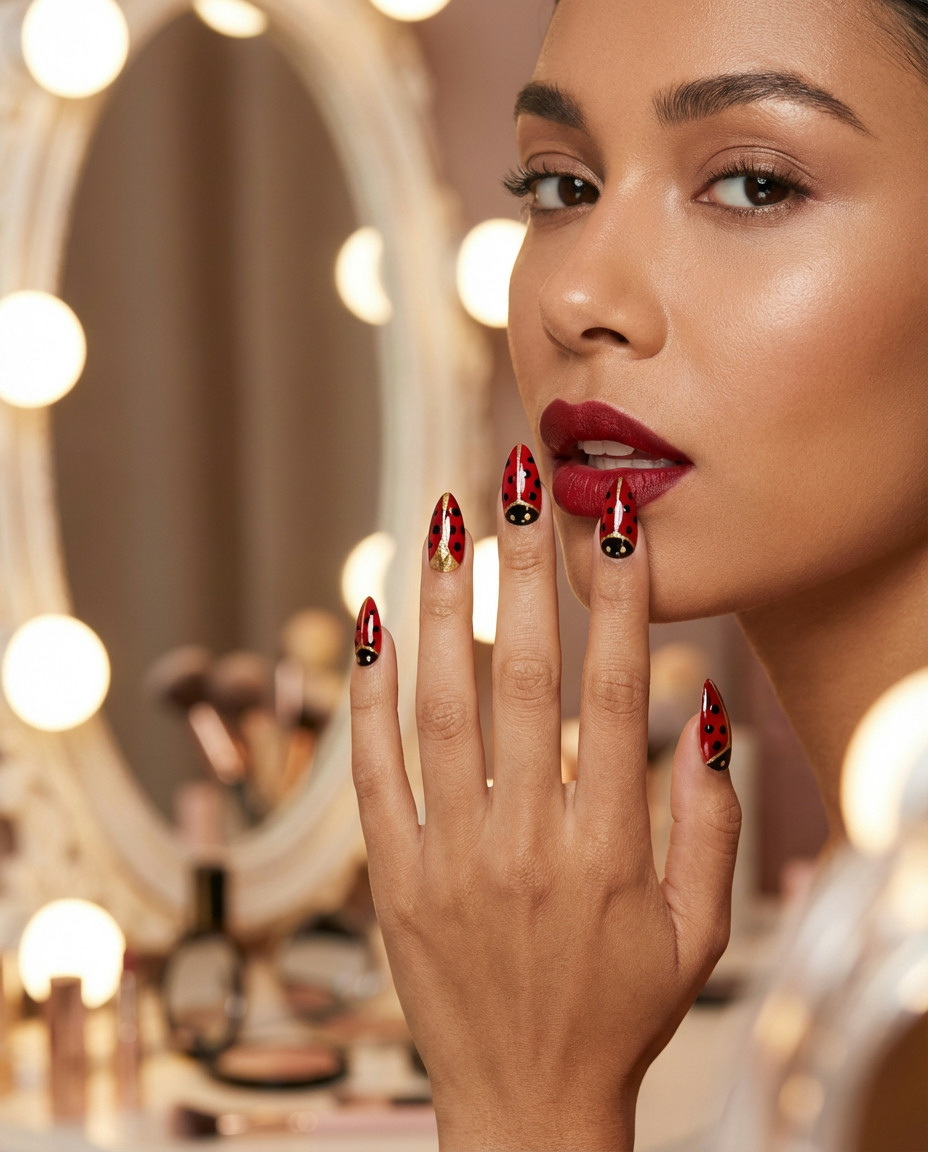
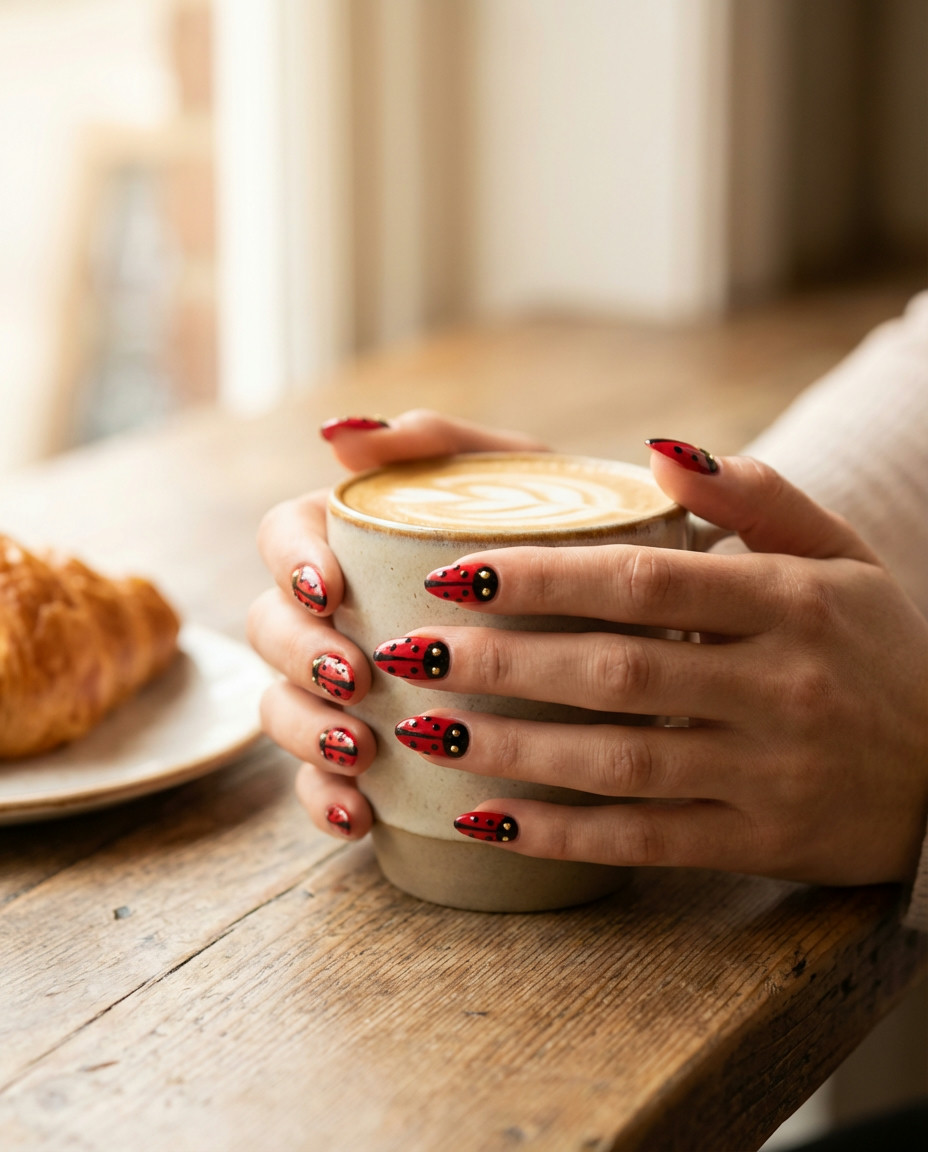
11. Gold Accented Ladybug Art
Elevate your ladybug manicure with a touch of luxury! Incorporating shimmering gold accents alongside the classic red and black creates a stunning and opulent look. This adds a sophisticated twinkle to your ladybug nails playful, making them suitable for both everyday wear and special occasions. The gold elements truly make these Art designs pop with an unexpected elegance.
Paint a classic red base with black dots. Once dry, use a fine brush or a gold foil transfer to add delicate gold details—this could be a thin line outlining the dots, a small gold “horn” for the ladybug, or even a tiny gold glitter polish accent on one nail. The contrast of the gold against the red and black is simply gorgeous. Seal with a top coat to secure the gold additions and provide a brilliant shine.
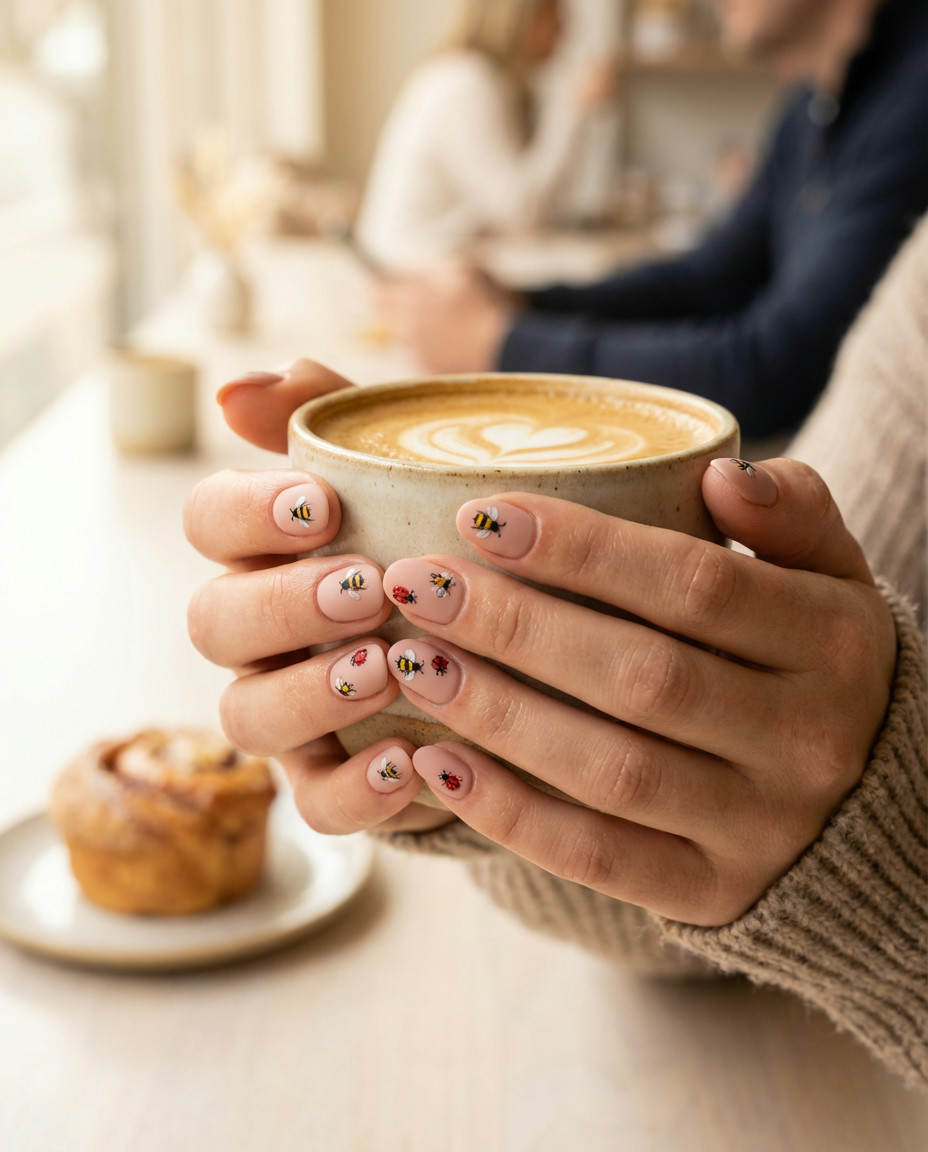
12. Bee and Ladybug Friendly Mani
Celebrate two of nature’s cutest insects with a delightful Bee and ladybug combination! Alternate between cheerful yellow and black stripes for bees and classic red and black dots for ladybugs on different nails. This playful pairing is bursting with natural charm and makes for incredibly engaging Art on your fingertips. It’s a vibrant and friendly design that is sure to bring a smile to anyone’s face.
For the bee nails, apply a yellow base, then use striping tape or a fine brush to create neat black stripes. For the ladybug nails, use a red base with black dots. You can also paint tiny bee bodies with wings on some nails, and a full ladybug with antennae on others. A glossy top coat will make these little garden dwellers truly shine. This look is fantastic for springtime or summer fun.
13. Gradient Ladybug Shell Designs
Imitate the smooth, captivating curve of a ladybug’s shell with a beautiful gradient effect. This design uses a blend of reds, from deep burgundy to bright scarlet, creating a stunning visual depth before adding those signature dots. These Designs offer a more artistic and refined approach to ladybug nails playful, moving beyond simple flat colors. It’s a sophisticated way to wear the theme.
Start with a white or pale red base. Using a makeup sponge, apply two shades of red (e.g., a dark red and a bright red) to create a gentle ombre effect across each nail. Once dry, carefully add the black dots using a dotting tool. For an extra touch, you can use a fine brush to add a subtle black line down the center of the nail, mimicking the ladybug’s wing division. Finish with a high-gloss top coat.
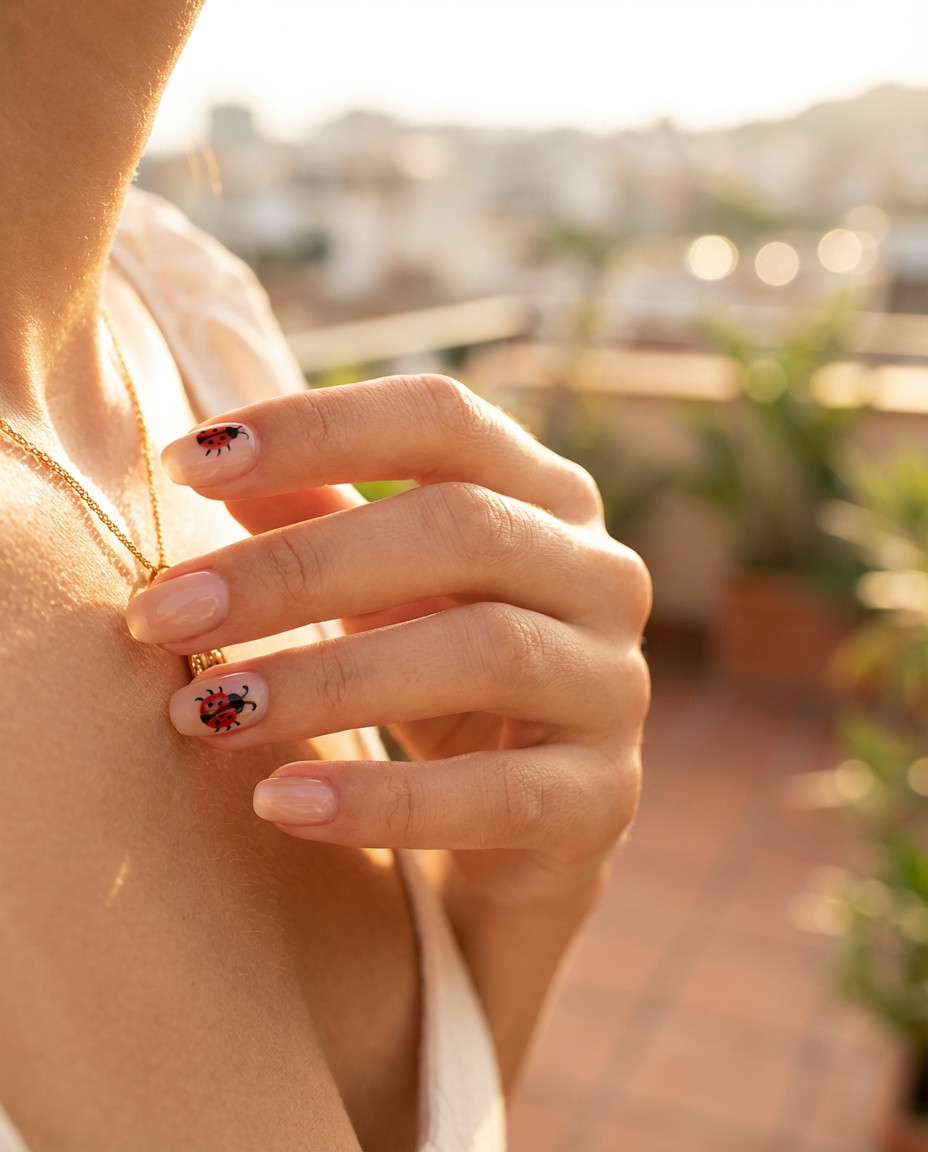
14. Elegant Oval Short Ladybug Nails

Embrace sophistication with oval-shaped, Short nails featuring delicate ladybug details. The oval shape naturally lends itself to a refined aesthetic, and when combined with subtle ladybug Designs, it creates a look that’s both cute and chic. This is a perfect example of how ladybug nails playful can still be incredibly classy and suitable for various settings without being over-the-top.
Ensure your nails are filed into a smooth, elegant oval shape. A sheer nude or pale pink base works wonderfully here. Apply a single, perfectly painted ladybug on one accent nail, or place a few scattered black dots on a red or pink base. Focus on precision and neatness. A high-gloss top coat will enhance the elegance of the oval shape and protect your delicate design.
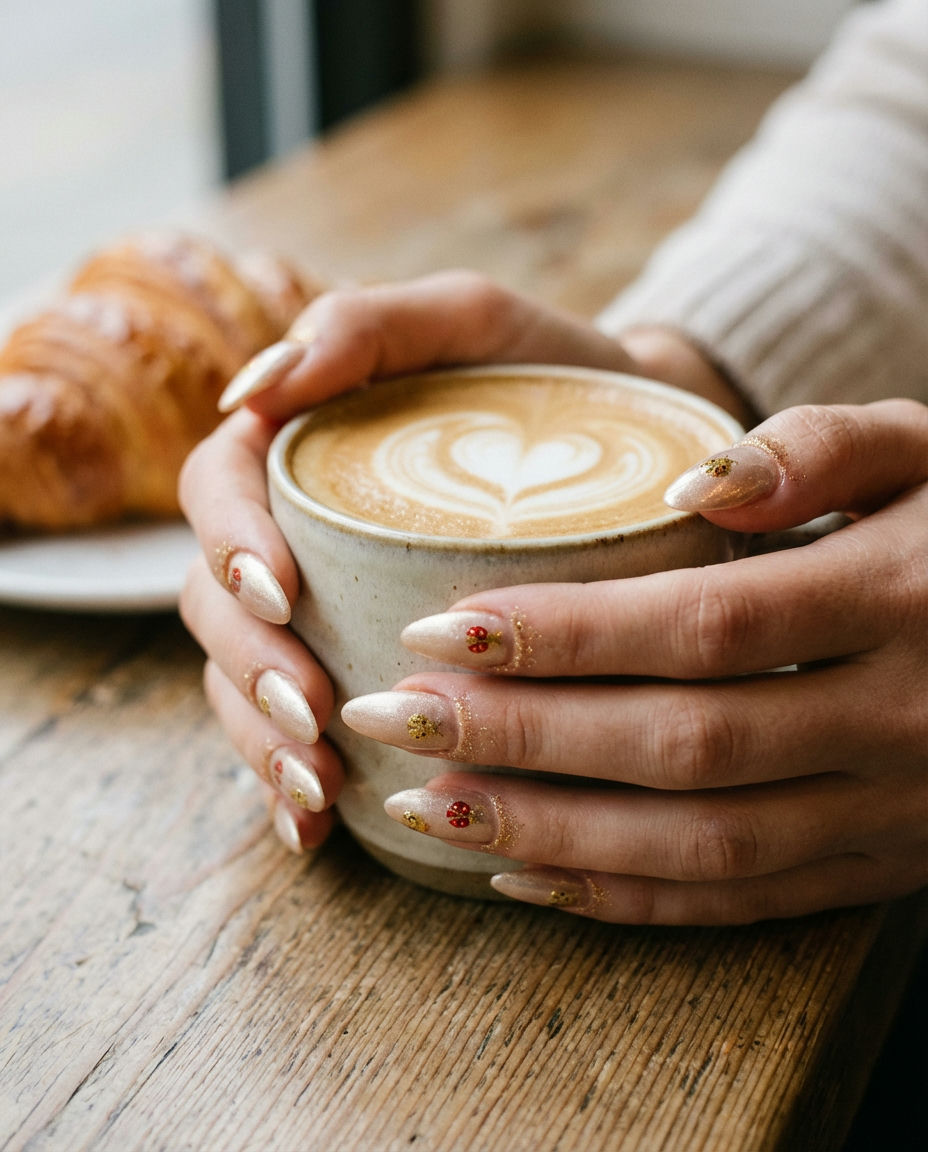
15. Sparkling Miraculous Gemstone Nails
Bring on the bling with these truly sparkling Miraculous gemstone nails! This luxe design incorporates tiny rhinestones or jewel-like embellishments along with the classic ladybug pattern. It’s a dazzling way to interpret the ladybug nails playful theme, adding a touch of glamour and shine that makes your manicure feel extra special. These shimmering designs catch the light beautifully.
Apply a vibrant red polish as your base. Once dry, carefully place small black rhinestones or nail jewels in the pattern of ladybug spots, using tweezers and nail glue. You can also use a fine brush to paint black dots around the gems for added definition. For extra sparkle, you can add a clear glitter top coat. Ensure all gems are firmly secured to prevent them from falling off prematurely.
16. Playful Acrylic Ladybug Tips
Extend your canvas and your creativity with Acrylic nails featuring whimsical ladybug tips! The longer length of acrylics allows for more intricate and spread-out ladybug Designs, making them truly stand out. This option is perfect for those who love bold statements and want their ladybug nails playful to be seen from a mile away. The added length provides more space for larger dots or even tiny ladybug characters.
When getting acrylics, specify that you want a bright red or even black tip, leaving the base clear or nude. Your nail tech can then hand-paint the black dots onto the red tips (or vice versa). You can also embed small ladybug decals within the acrylic for a smoother finish. A high-gloss top coat over the acrylic will seal the design and provide incredible shine and durability.
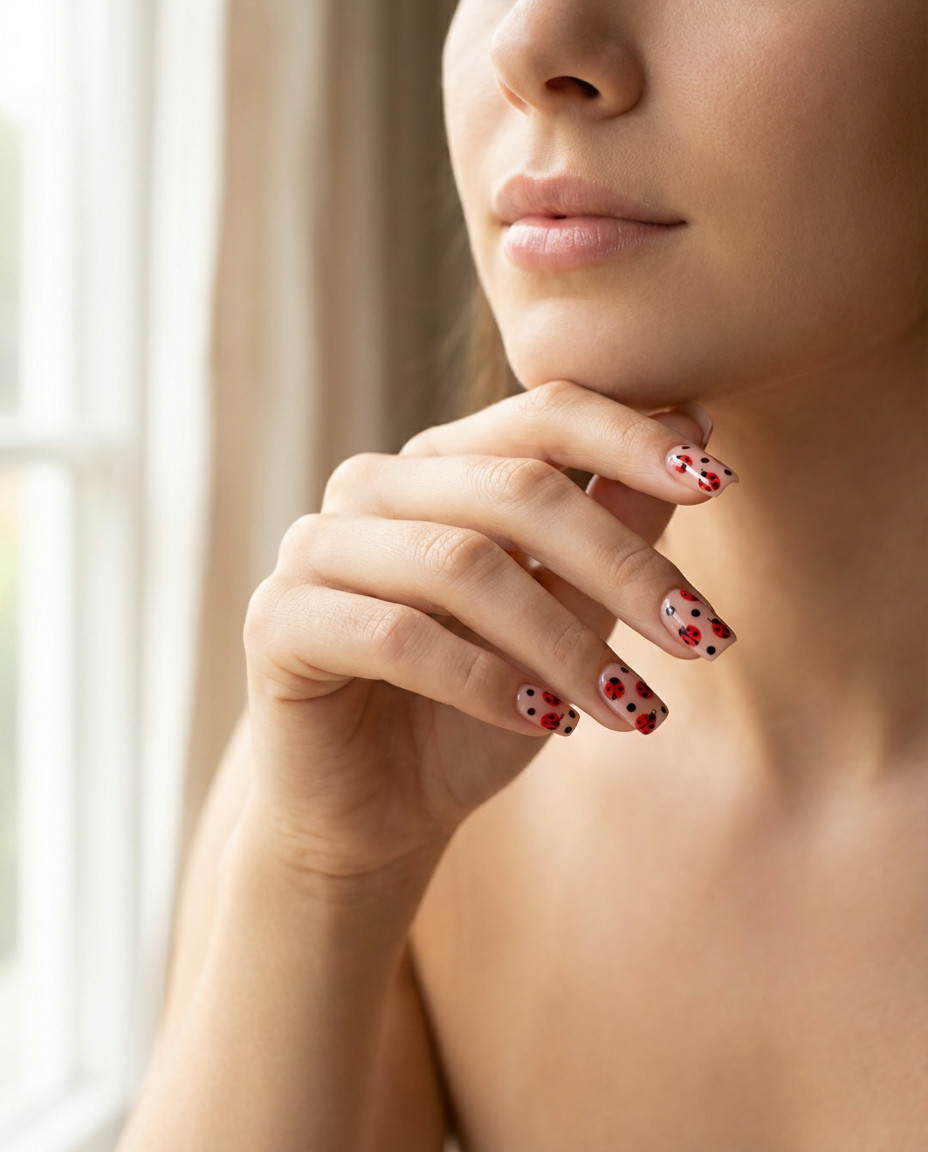
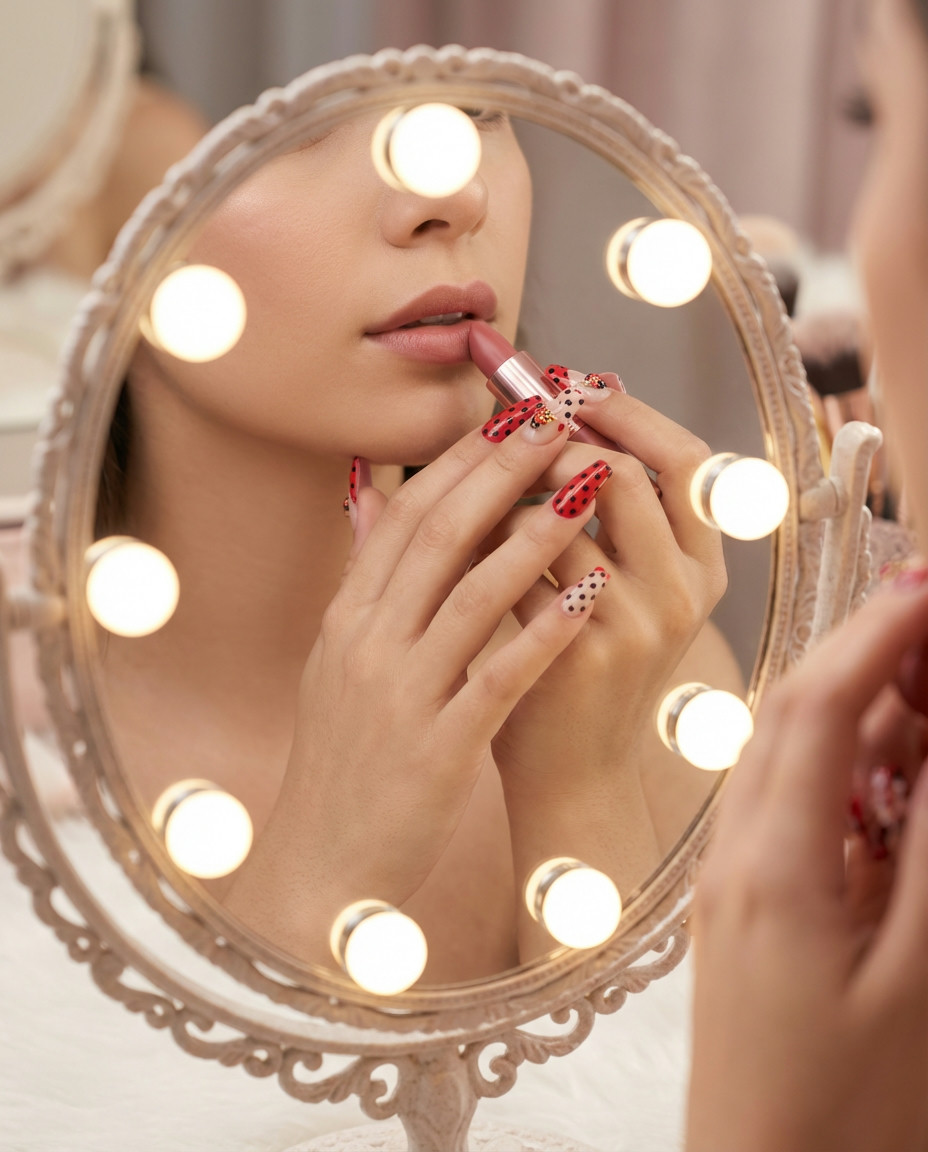
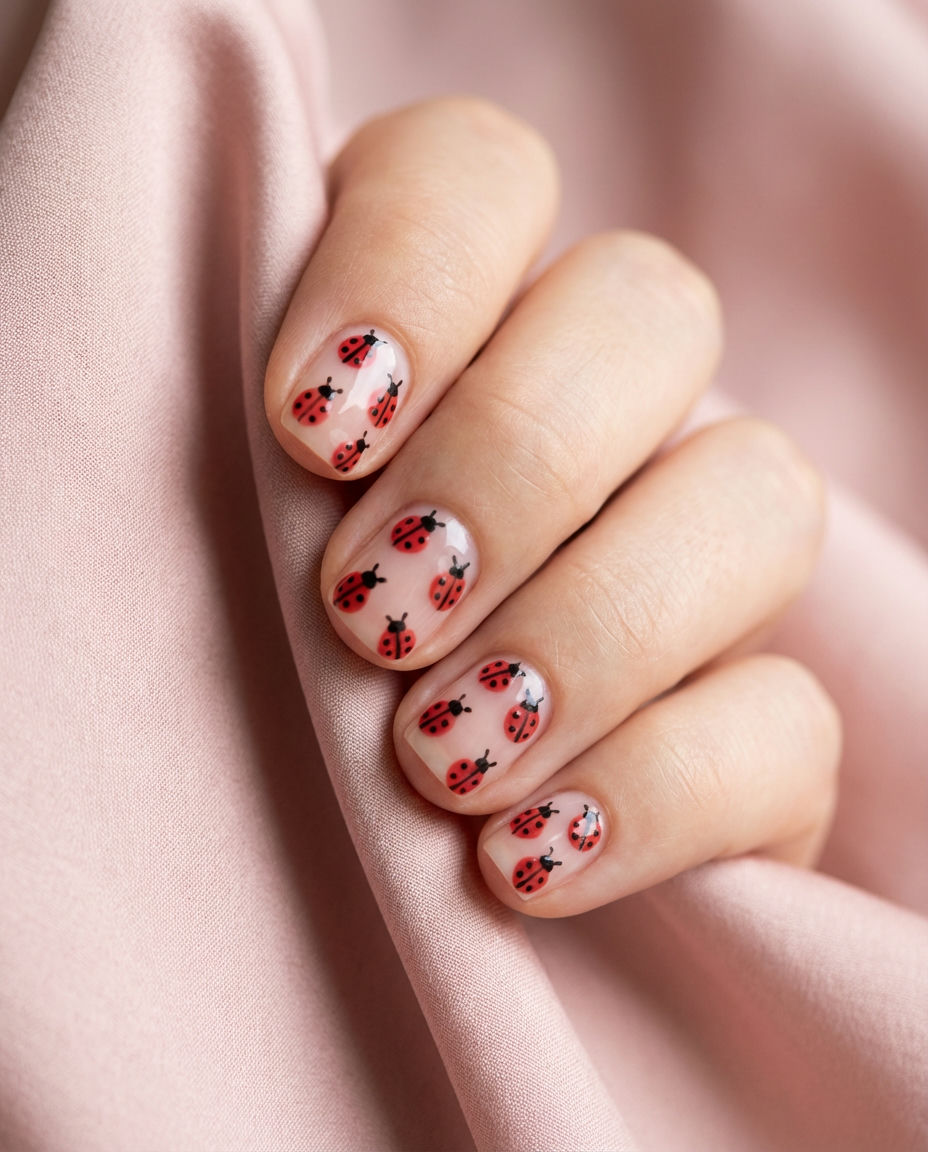
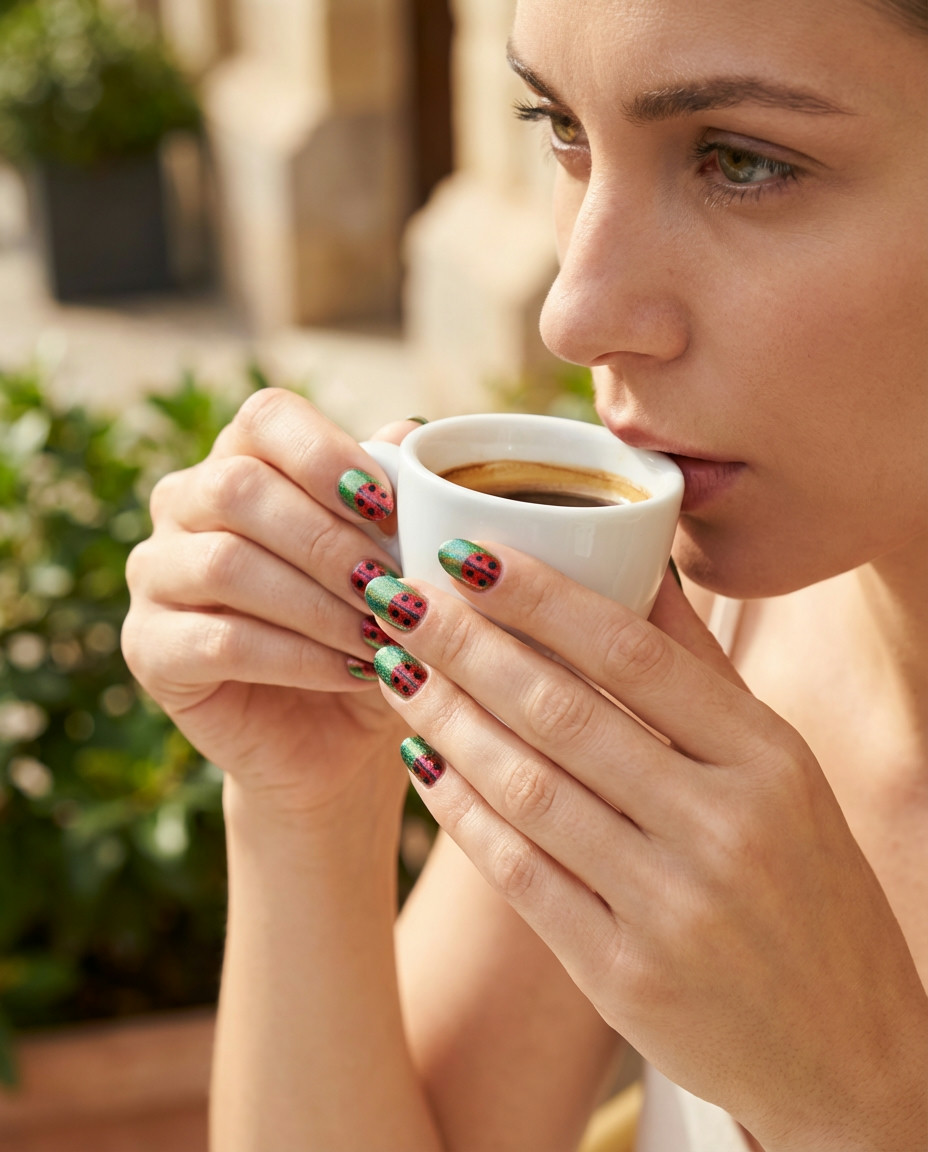
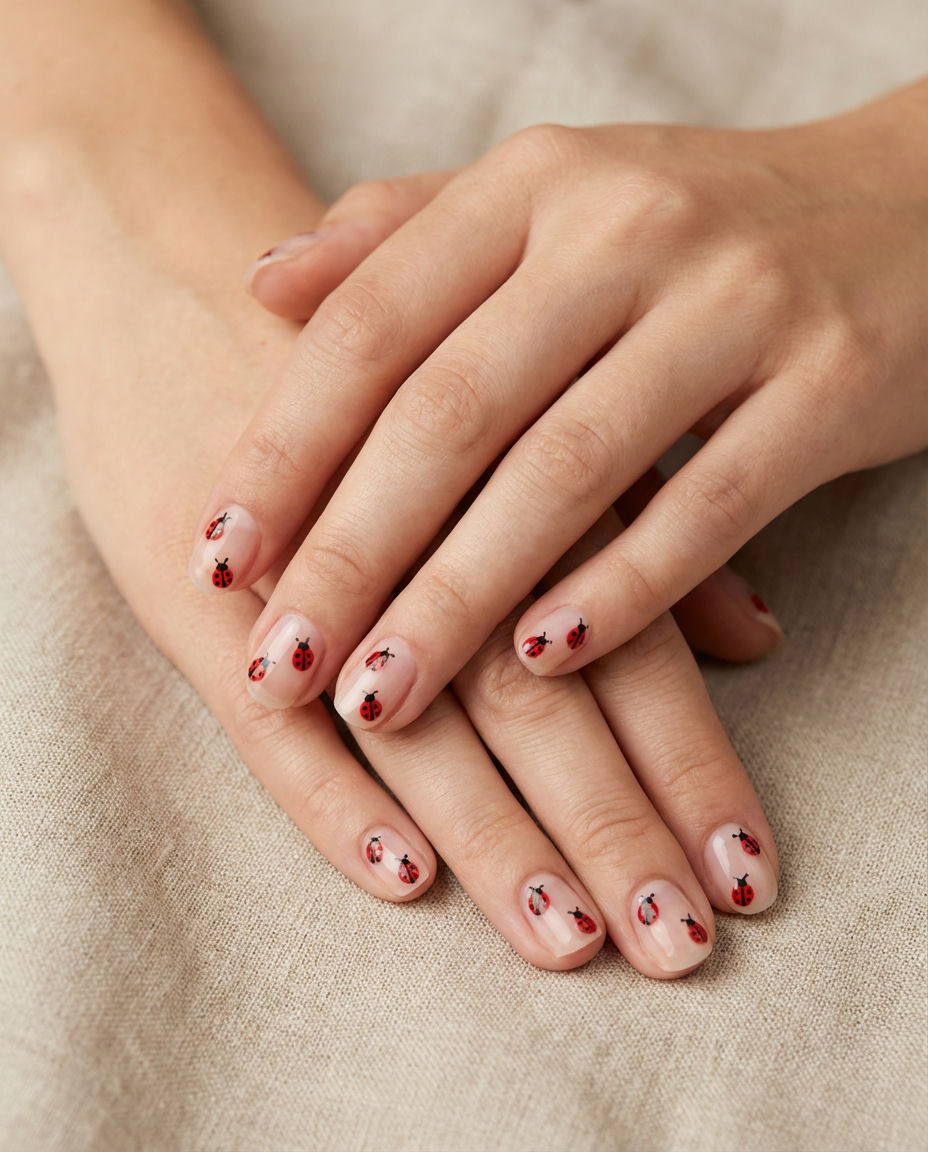
17. Polka Dot Party Ladybug Ideas
Embrace the ultimate polka dot party with these fun and festive ladybug Ideas! This design goes beyond simple red and black, incorporating various sizes of dots, perhaps even different colors, all unified by the playful ladybug theme. It’s a vibrant and energetic take on ladybug nails playful that truly captures the joy of the insect. Think explosion of dots for maximum impact and cheer.
Start with a base color that complements red and black, such as white, cream, or even a pale yellow. Use various sized dotting tools to create a mix of black, red, and possibly even white polka dots. Ensure a good distribution across your nails. You can dedicate one nail to a larger, more defined ladybug, while others are simply a delightful array of dots. Finish with a clear, glossy top coat to tie all the playful elements together.
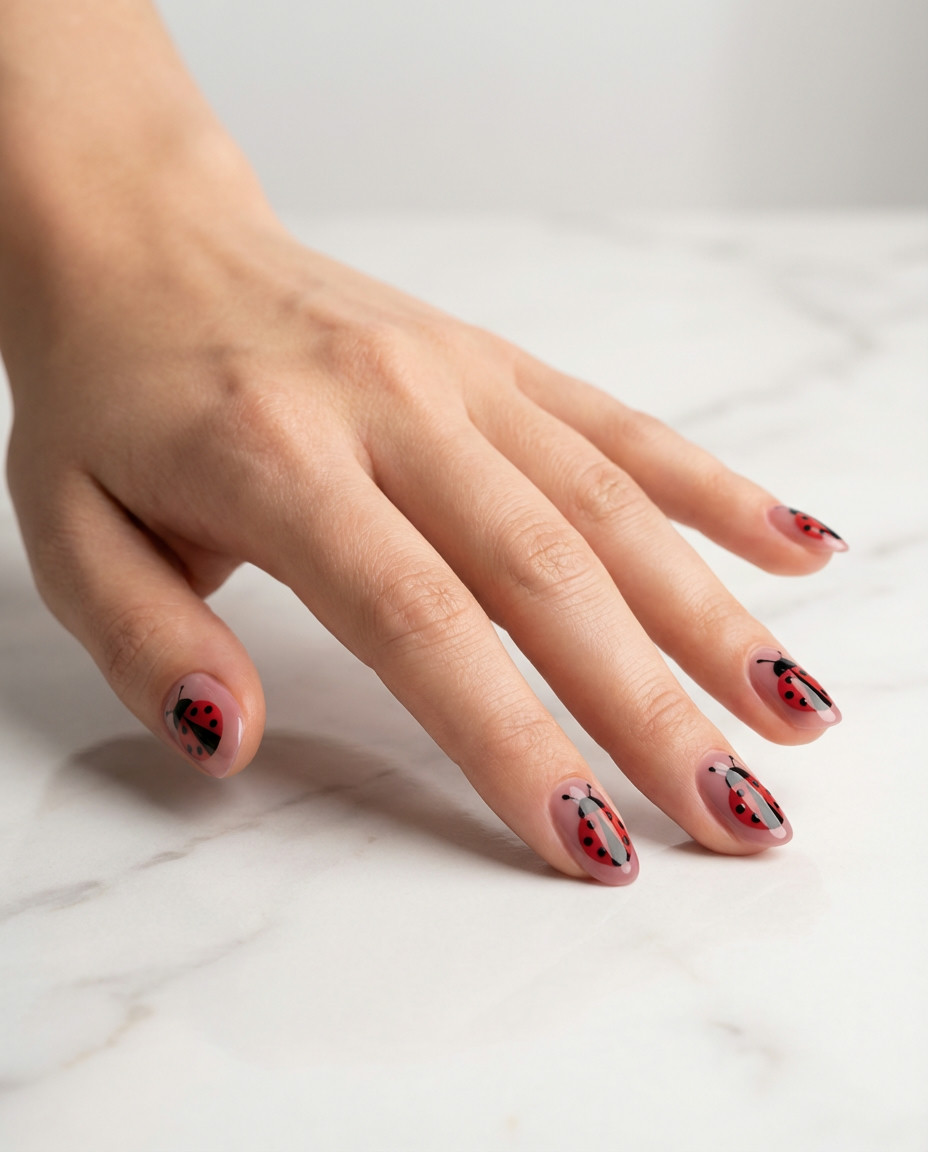
18. Cartoon Faces Miraculous Ladybugs
For the ultimate fan, why not feature adorable cartoon faces of the Miraculous Ladybug on your nails? These charming portrayals bring the beloved character to life in a super cute way. This specific trend of ladybug nails playful is perfect for tapping into your inner child and showing off your fandom. These intricately designed faces are captivating ladybug Ideas that truly stand out.
This is a more advanced nail art technique and might be best left to a professional nail technician, or achieved with high-quality nail decals if you’re doing it yourself. Start with a solid red base on the nails where you plan to place the faces. Use a very fine brush and black, white, and blue (for the eyes) polishes to carefully paint the facial features. A clear gel top coat will protect these tiny masterpieces.
19. Bumble Bee and Ladybug Duo
Double the cuteness with this adorable Bee and ladybug pairing! Alternating between detailed bumblebees and classic ladybugs on your nails creates a harmonious and charming garden theme. It’s a wonderfully balanced collection of Cute designs that feels fresh and bright. These ladybug nails playful radiate positive vibes and are perfect for nature lovers and those who appreciate whimsical nail art.
For the bee nails, paint a bright yellow base, then add black horizontal stripes. You can even add tiny white wings with a fine brush for extra detail. For the ladybug nails, go with a vibrant red base and black dots. Ensure the proportions are visually pleasing when alternating between the two creatures. A high-gloss top coat will perfectly finish this cheerful garden party on your fingertips.
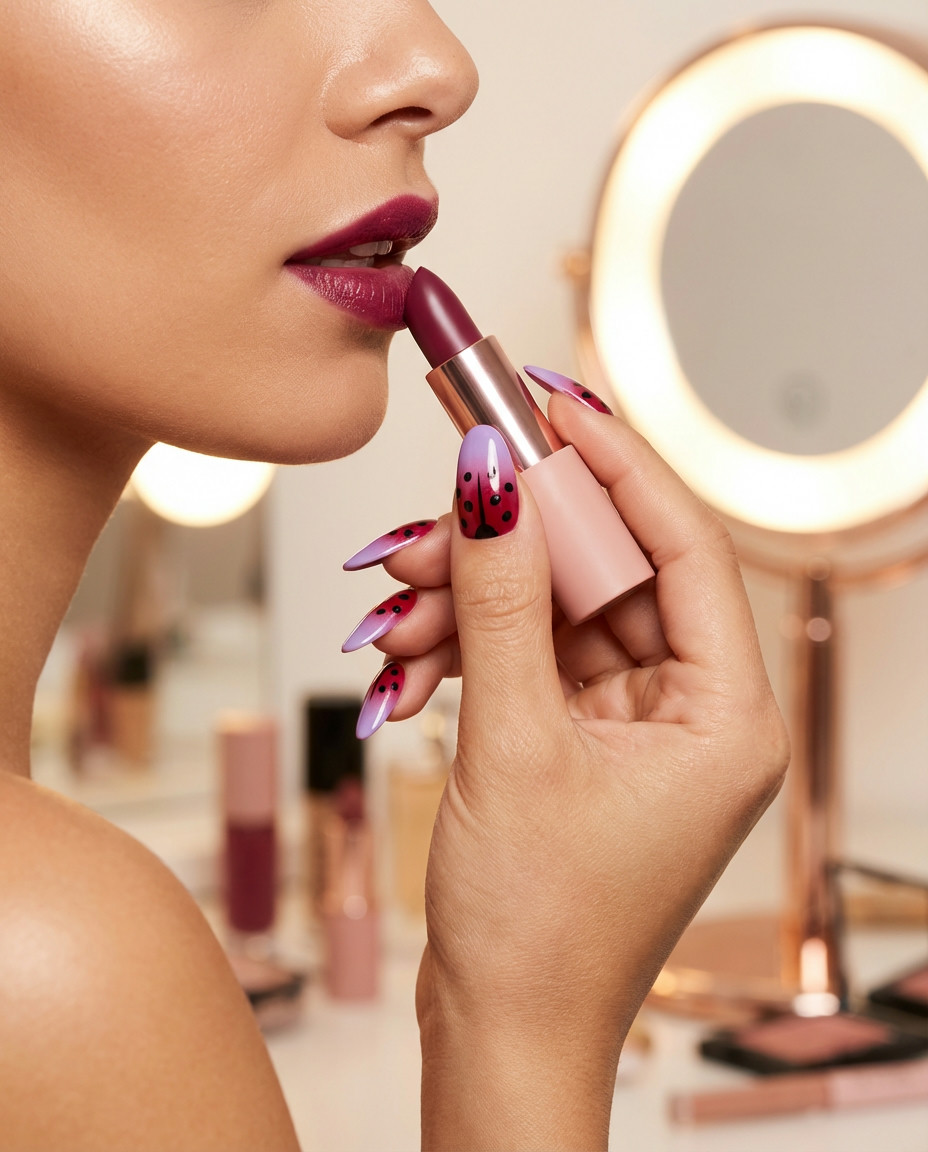
20. Pink & Black Ladybug Playfulness
Move over, red! Embrace a softer, yet equally charming, palette with Pink and black ladybug designs. This trend offers a fresh and feminine twist on the classic look, making your ladybug nails playful without being overtly bold. The contrast of soft pink with crisp black spots is unexpectedly chic and brings a modern flair to these classic Designs. It’s truly a sweet and stylish pairing.
Choose your favorite shade of pink, from pastel blossom to hot fuchsia, as your base color. Once dry, use a black nail polish and a dotting tool to create the signature ladybug spots. For an extra touch of cuteness, you could add tiny black antennae near the cuticle of one of the pink spotted nails. Seal with a clear, shiny top coat to protect your charming pink and black creations.
21. Geometrically Precise Ladybug Art
For a sleeker, more modern aesthetic, try geometrically precise ladybug Art. This involves clean lines, sharply defined shapes, and perhaps even some negative space to create a contemporary interpretation of the classic insect. It’s a sophisticated way to wear ladybug nails playful without sacrificing a polished look. These Designs demonstrate impeccable precision and a chic, minimalist vibe.
Start with a clear or white base to really make the geometric shapes pop. Use striping tape to create sharp lines for the red and black sections, ensuring each area is perfectly filled. Use a fine-tipped brush or dotting tool for perfectly round, evenly spaced black dots. Consistency is key for this design. A matte top coat can enhance the modern, graphic feel of this geometric ladybug art dramatically.
22. Short & Sweet Miraculous Minis
Even on Short nails, you can still rock a powerful Miraculous vibe! This design focuses on compact, impactful ladybug elements that are perfect for smaller nail canvases. Think tiny ladybug symbols or simplified red and black patterns. These ladybug nails playful are ideal for those who prefer practicality but still want to unleash their inner superhero with adorable, concise motifs. They pack a punch in a petite package.
Keep your nails neatly trimmed and filed. A bright red or black base is a good starting point. On a few accent nails, use a tiny dotting tool to create small, deliberate black dots. You could also try a half-ladybug design, where just the top half of a ladybug’s shell is depicted near the cuticle. A strong top coat will ensure your mini designs last, keeping them looking fresh and vibrant.
23. Fuzzy 3D Ladybug Textures
Take your love for ladybugs to another dimension with fuzzy 3D textures! Imagine tiny flocking powder or raised gel dots that give your ladybug Art a tactile, realistic feel. These luxurious and unique Designs are guaranteed to be conversation starters. It’s an incredibly creative take on ladybug nails playful, adding a delightful sensory element that makes your manicure truly unforgettable.
After applying a red base, use a thick gel polish to create slightly raised black dots. Before curing, carefully sprinkle black flocking powder over the wet dots. Gently tap off the excess and then cure. For a full ladybug, you can create the bodyShape with red gel, then add black texture. This technique requires an LED/UV lamp and is best sealed with a no-wipe top coat to preserve the texture.
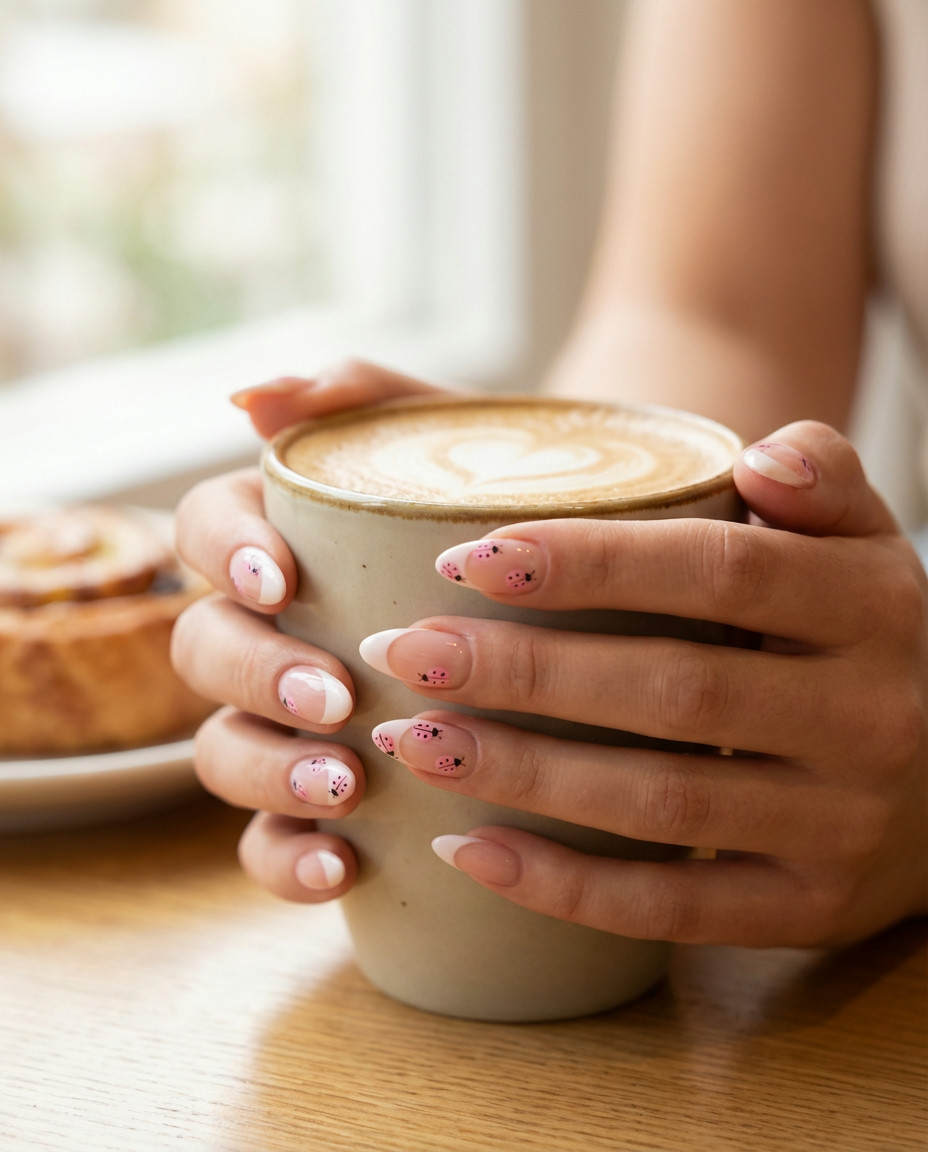
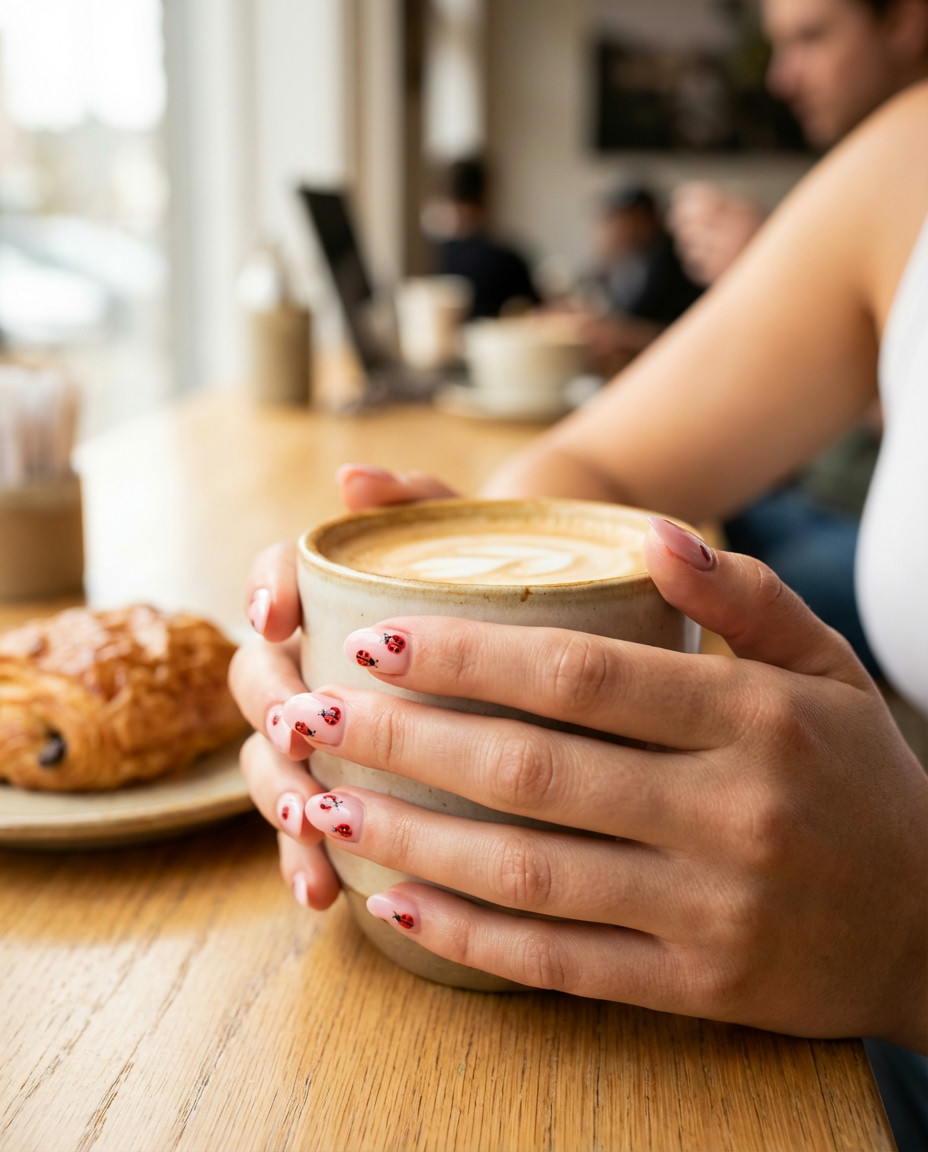
24. Pastel Pink & Black Ladybug Dreams

Dreamy and delicate, this design combines soft pastel Pink with classic black ladybug spots for a truly enchanting look. It’s a gentler, more romantic interpretation of ladybug nails playful, perfect for those who adore subtle beauty. The pastel hue brings a certain softness, transforming the bold ladybug into something unexpectedly sweet and utterly charming. These are truly Cute and beautiful designs.
Apply two coats of your chosen pastel pink polish for a smooth, opaque finish. Once completely dry, use a small dotting tool and black polish to carefully apply the ladybug spots. Ensure the dots are uniform in size and evenly spaced for a polished look. Finish with a high-shine top coat to give your nails a beautiful, glossy sheen that protects your delicate design.
25. Reverse French Ladybug Acrylics
Give your Acrylic nails a modern edge with a reverse French manicure featuring a ladybug twist! Instead of colorful tips, the focus is on the cuticle area, adorned with a delicate red arch and tiny black dots. This sophisticated take on ladybug nails playful is unexpectedly chic and fresh. It’s a fantastic way to showcase both elegant nail shaping and whimsical Designs simultaneously, providing a unique visual interest.
This design is often easier to achieve with acrylics due to the smooth surface for precise lines. Apply a clear or neutral base over the entire nail. Then, using a fine brush, create a curved red line at the base of the nail, following the cuticle line. Add tiny black dots to this red curve. The rest of the nail can remain clear or be painted a complementary sheer color. Seal with a durable top coat.
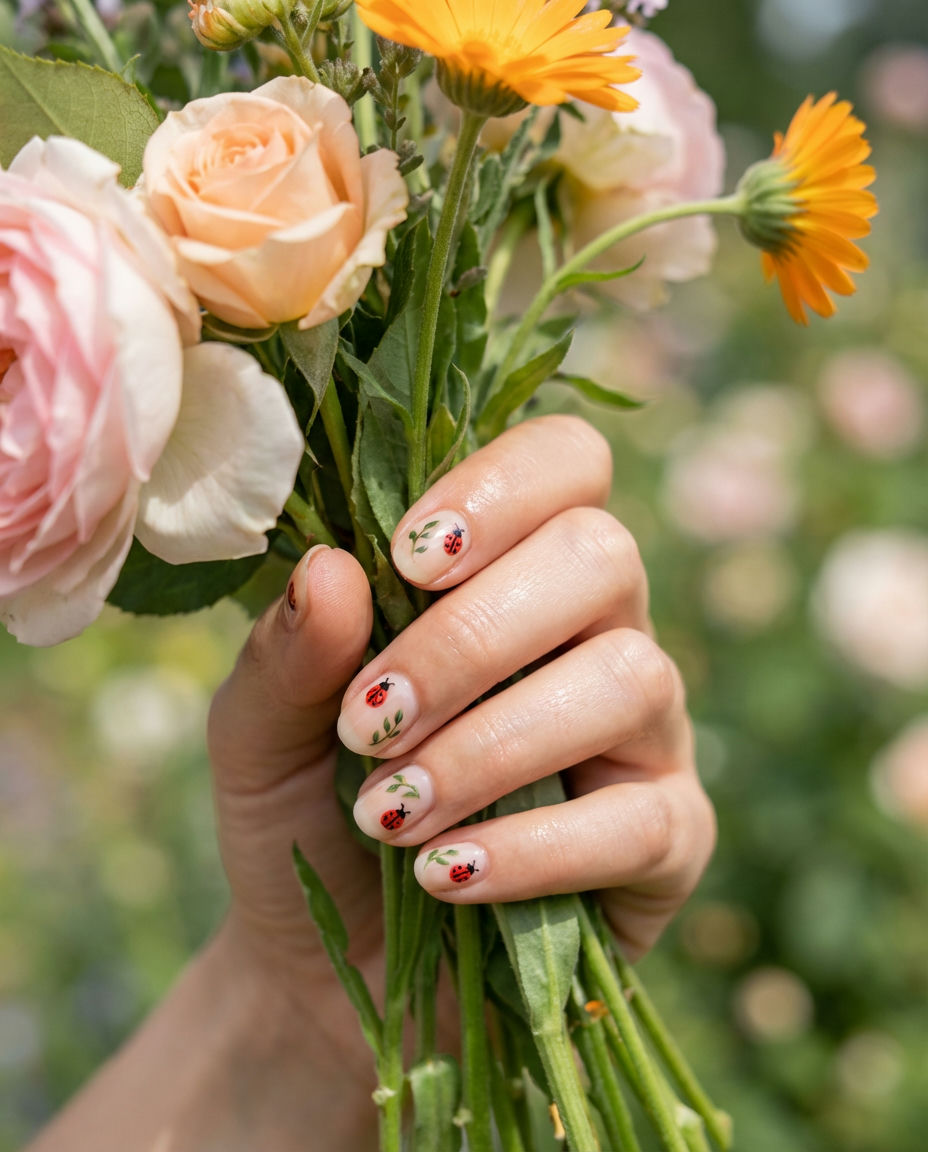
26. Whimsical Ladybug & Floral Art
Combine the charm of ladybugs with beautiful floral Art for a truly magical garden party on your nails! Think delicate blossoms intertwining with tiny ladybugs, creating a vibrant and enchanting scene. This romantic take on ladybug nails playful is perfect for spring and summer, showcasing intricate Designs that are both artistic and incredibly sweet. It’s a celebration of nature’s beauty on your fingertips.
Start with a light, fresh base color like sage green, sky blue, or creamy white. Use fine brushes to paint small flowers such as daisies, roses, or tiny sprigs of leaves. Once these are dry, carefully add your ladybug elements – a single ladybug crawling on a petal, or several tiny black dots on a red background. A glossy top coat will make your floral and insect composition truly bloom.
27. Abstract Dot Pattern Ladybug Ideas
Step outside the box with abstract dot patterns inspired by ladybugs. Instead of symmetrical spots, consider a more free-form arrangement of red and black dots, varying their sizes and placement for an artistic, modern look. These creative ladybug Ideas offer a unique and expressive take on the classic insect. It’s a wonderfully inventive variation of ladybug nails playful that embraces bold and unconventional aesthetics.
Choose a neutral or even a metallic base for a contemporary feel. Use different sized dotting tools to create a scattered, almost randomized pattern of black and red dots. Don’t worry about perfection; the beauty is in the playful irregularity. You can even layer translucent dots over opaque ones for added depth. Finish with a matte top coat to give the abstract dots a sophisticated, less glossy finish.
28. Holographic Miraculous Glaze Nails
Infuse your ladybug nails with a futuristic, dazzling twist using a holographic glaze! A red holographic base with black dots adds an incredible shimmer and multi-dimensional effect, making your Miraculous nails truly stand out. This is an electrifying approach to ladybug nails playful, combining classic charm with cutting-edge sparkle. These shimmering Designs are guaranteed to catch every eye and make a statement.
Start by applying a holographic red polish as your base. Ensure it’s fully dry before moving on. Use a black nail art pen or a fine brush with black polish to carefully create the ladybug spots. The holographic effect will shine through the black dots, creating a stunning contrast. Seal with a non-smear gel top coat that is suitable for holographic polishes to maintain their vibrant rainbow effect.
29. Cute Ladybug Faces on Short Nails
Embrace maximum cuteness with tiny ladybug faces adorning your Short nails! This design focuses on adorable, simplified depictions of a ladybug’s head, complete with little antennae and eyes. It is undeniably one of the most charming and Cute ladybug nails playful styles. Perfect for those who love all things miniature and whimsical, these designs are bound to bring a smile to your face with every glance.
Even on short nails, precision is key. A light pink or nude base helps the faces stand out. Use a fine-tipped brush and black polish to paint a small semi-circle for the head, then tiny dots for eyes. Add two thin lines above the head for antennae. You can dedicate one accent nail to the full face and others to just the classic red and black dots for balance. A clear top coat will protect these precious little bug faces.
30. Two-Tone Pink Ladybug Accents

Explore the versatility of Pink with a two-tone ladybug design. Use a light pink base with a darker pink for the ladybug spots, or vice versa, creating a subtle yet playful contrast. It’s a sophisticated variation of ladybug nails playful that brings depth and interest to the design. These two-tone Designs are perfect for those who want a softer, more nuanced take on the classic ladybug motif.
Choose two complementary shades of pink. Apply the lighter pink as your base color. Once dry, use a dotting tool and the darker pink polish to create the ladybug spots. For added flair, you could incorporate a thin black line outlining some of the spots. Finish with a glossy top coat to enhance the colors and provide a smooth, professional finish that really makes these accents pop beautifully.
31. Geometric Miraculous Bee and Ladybug Mashup
Unleash your inner artist with a striking geometric mashup featuring both Miraculous ladybugs and bold Bee and patterns. This design combines sharp lines and distinct shapes to create a contemporary and graphic interpretation of these beloved insects. It’s an incredibly unique take on ladybug nails playful, bringing a modern, artistic edge to classic nature themes. These complex Designs are truly for the adventurous spirit.
This intricate design requires precision. Use striping tape to create clean, sharp geometric sections on your nails. Fill some sections with red and black dots for the ladybug, and others with yellow and black stripes for the bee. You can even try combining elements on a single nail. Opt for a mix of matte and glossy top coats on different sections to further enhance the geometric contrast. Take your time for clean lines!
Hopefully, these 31 playful ladybug nail designs have sparked your imagination and given you tons of inspo for your next manicure! Whether you’re all about the classic red and black or keen to experiment with pinks, abstracts, or even a touch of Miraculous magic, there’s a ladybug look for everyone in 2026. Don’t forget to save your favorite ideas to Pinterest and show off your adorable new nails!