30+ Sweet Funny Bunny Nail Designs That Will Absolutely Melt Your Heart in 2026
Alright, nail enthusiasts! Get ready to hop into the cutest trend of 2026: funny bunny nails! This playful vibe is popping up everywhere, from our favorite beauty blogs to the feeds of top nail artists. It’s safe to say that folks are ready to embrace a dose of adorable whimsy right at their fingertips. We’re talking fresh interpretations of classic bunny motifs, unexpected color combos, and a whole lot of personality. Whether you’re a minimalist or love to go all out with your nail art, bunny nails are here to charm their way into your heart, offering endless possibilities for expressing your fun side. Get ready to scroll and get inspired!
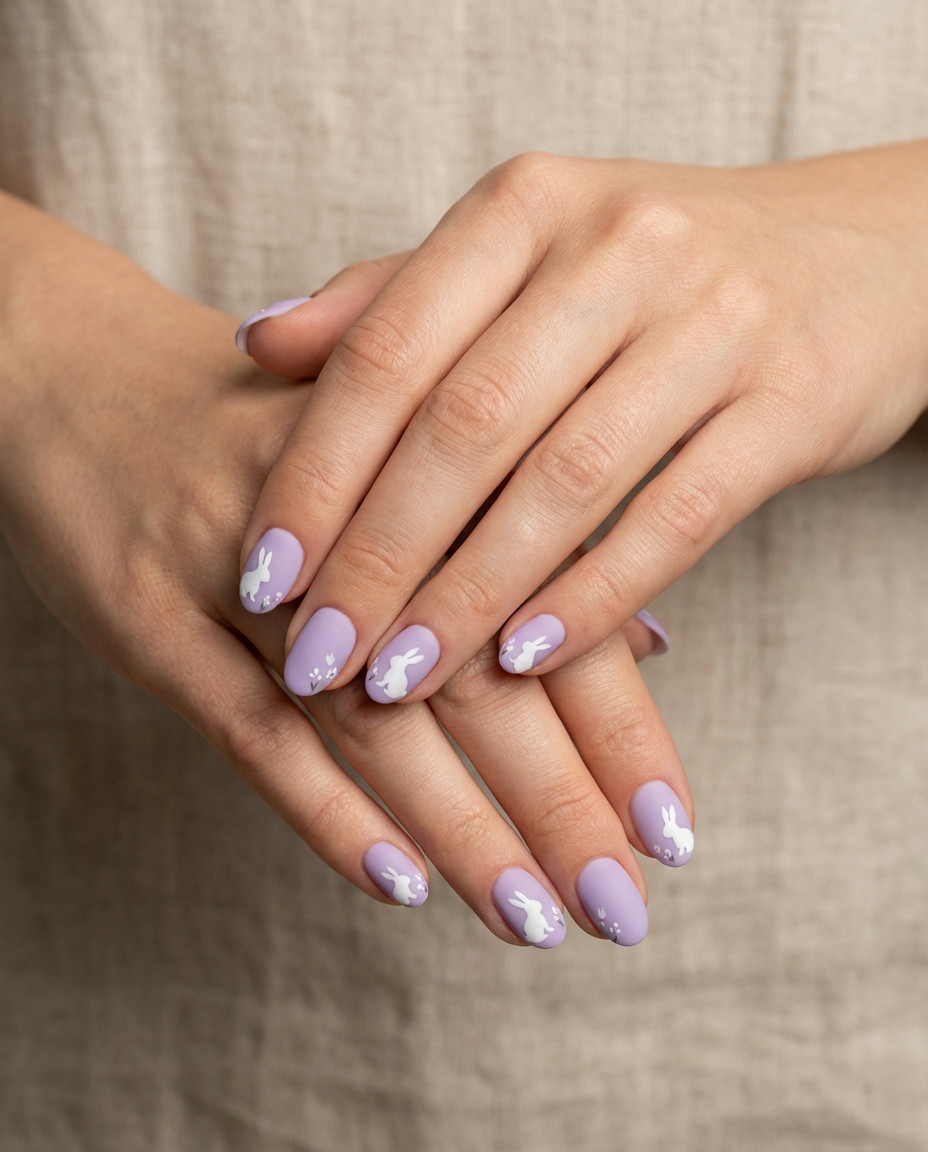
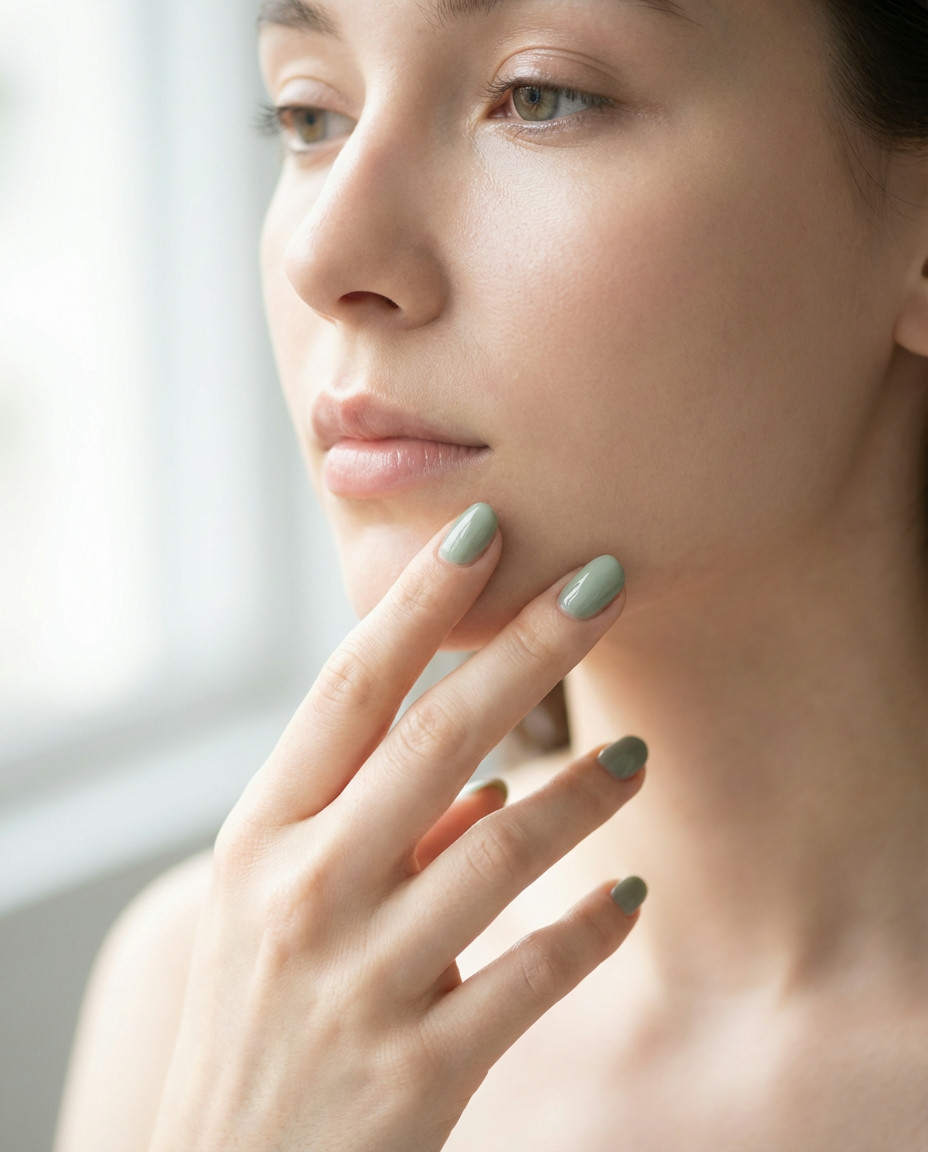
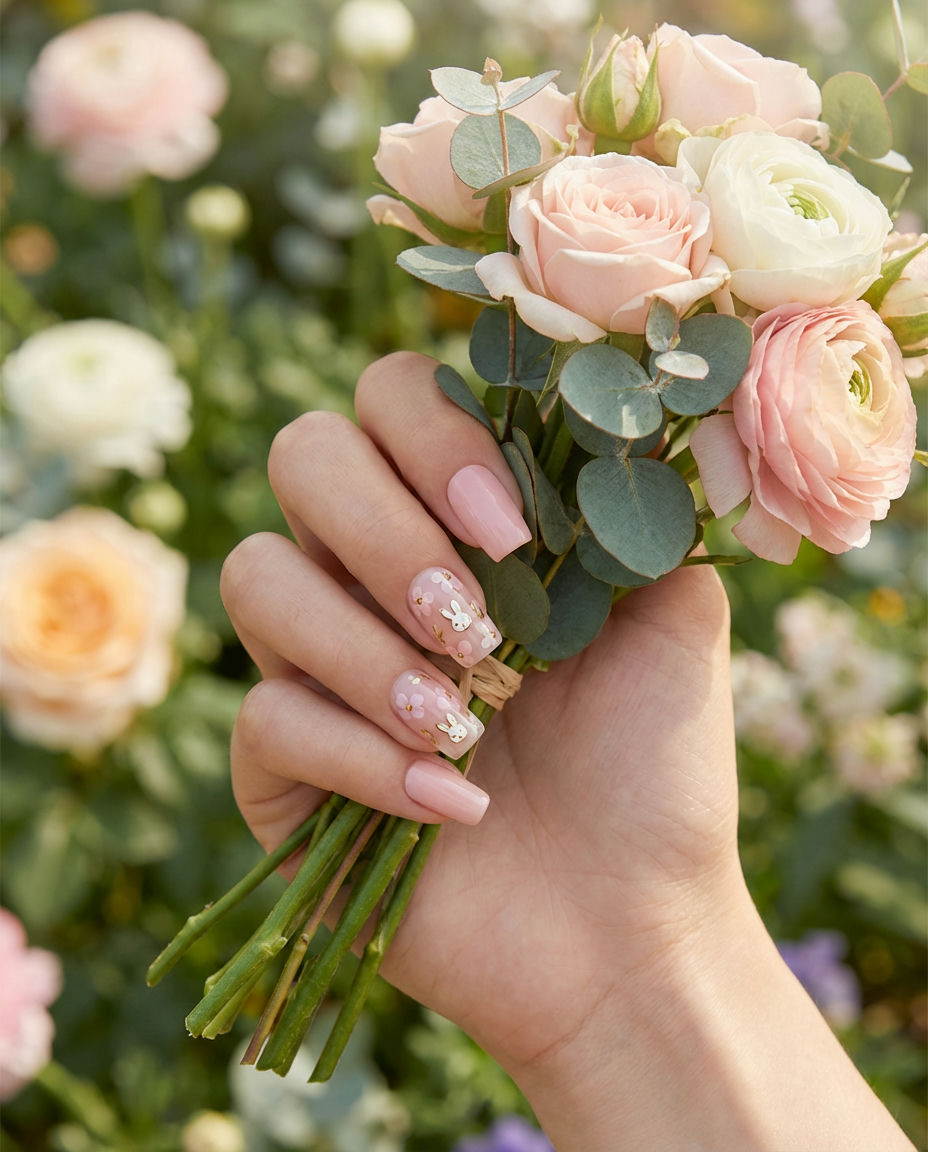
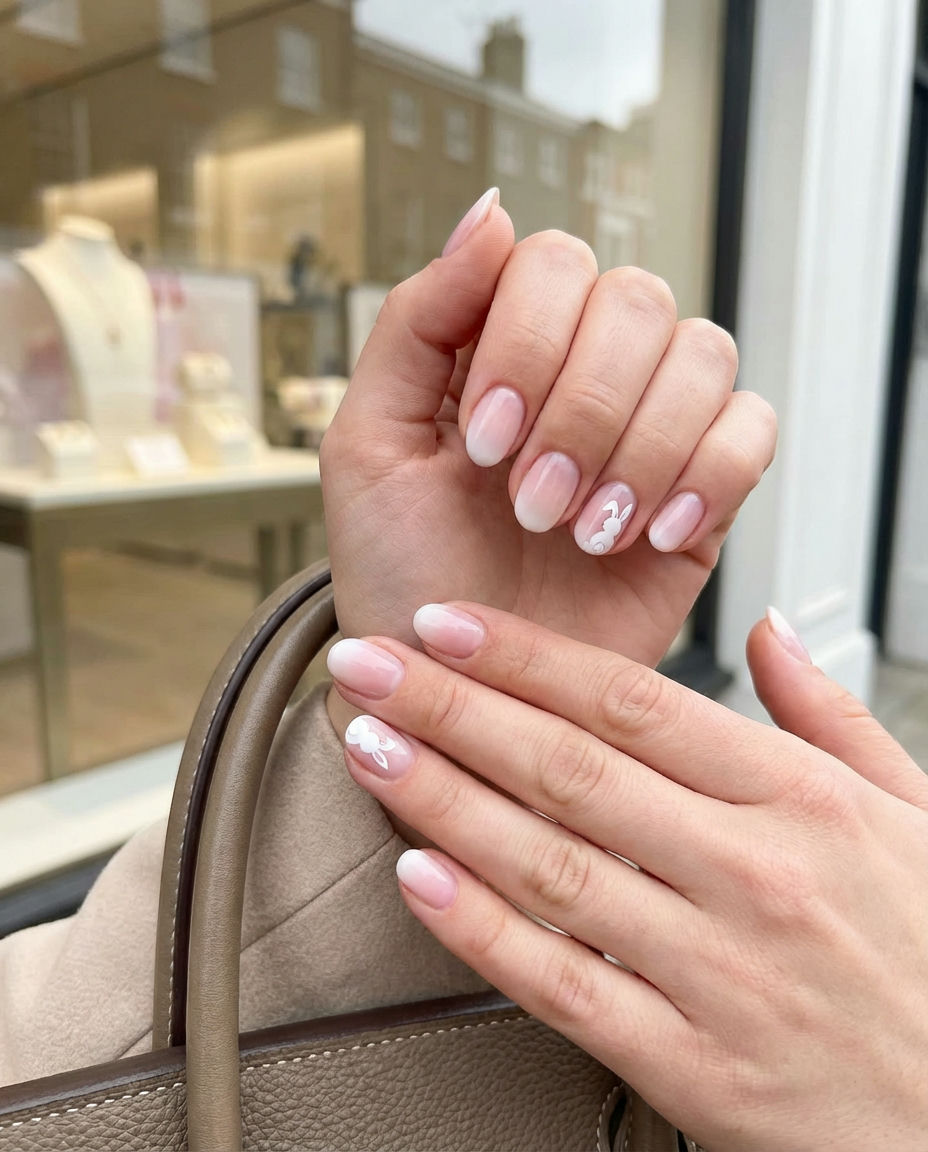
1. Pastel Bunny Silhouette Nails
Dainty and delightful, this look features subtle bunny silhouettes on a soft pastel base. Think mint green or baby pink as your primary Color, with a delicate white or sheer shimmer for the bunny outline. It’s a sweet, understated Design that’s perfect for everyday wear and looks especially chic on a shorter Nail type. The playful bunnies peeking out add just enough personality without overwhelming your manicure, giving a sophisticated twist to a whimsical theme.
To achieve this ethereal vibe, start with two coats of your chosen pastel Polish. Once completely dry, use a fine nail art brush and a contrasting sheer white to carefully draw small bunny silhouettes or just their little ears. A dotting tool can help create perfectly round heads and tails. Finish with a glossy topcoat to seal in your adorable design and enhance the luminous quality of the pastel shades.
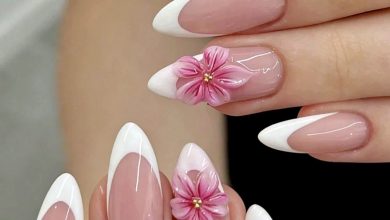
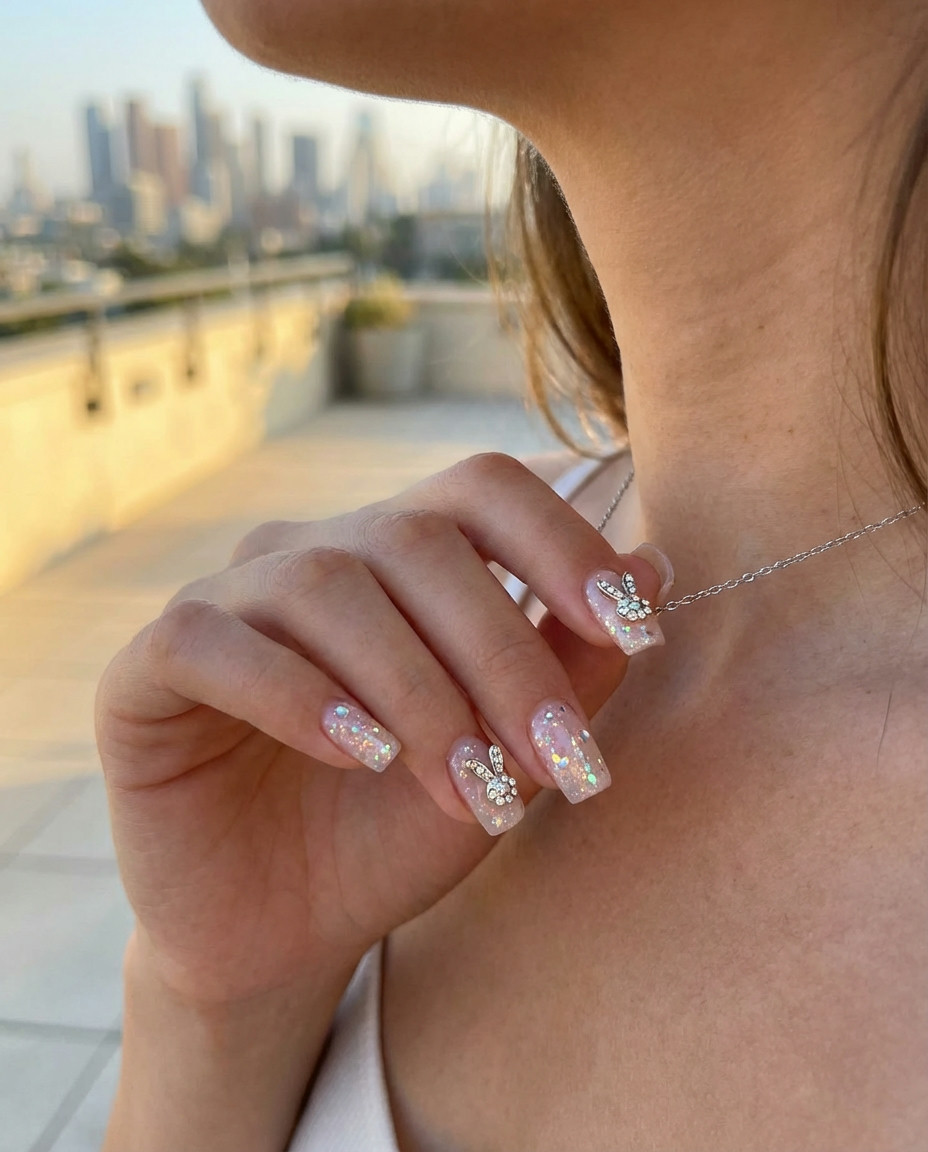
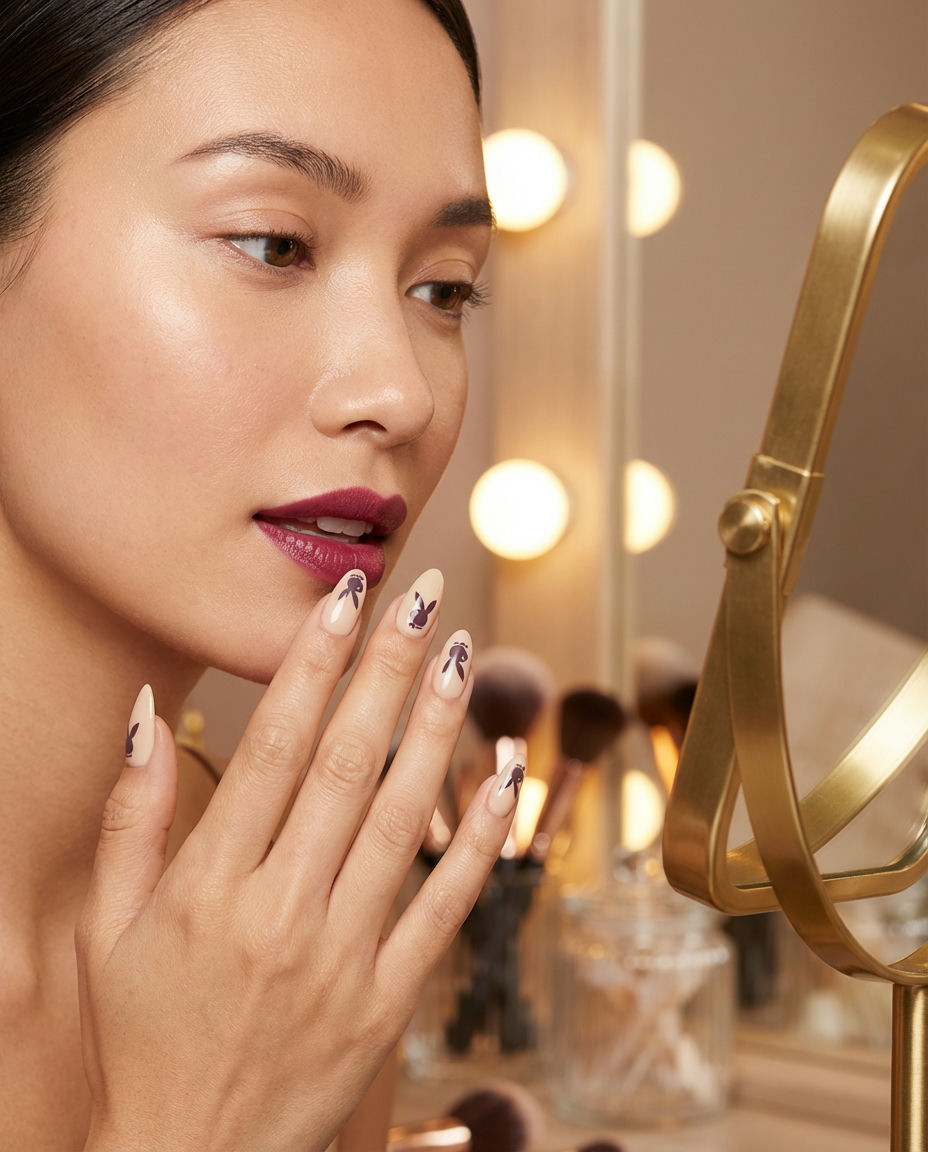
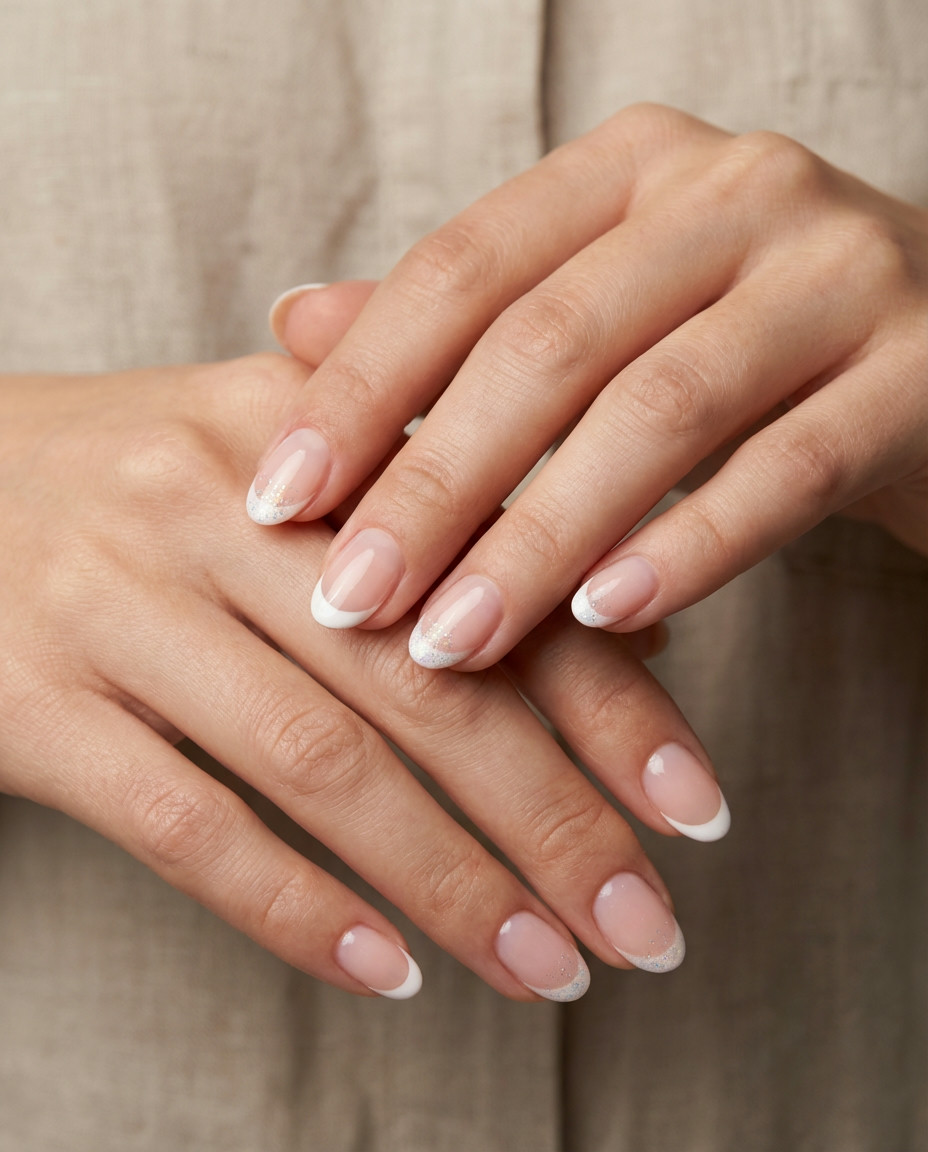
2. Bling Bunny French Tips
Elevate your classic French manicure with a touch of bunny-inspired sparkle! This design incorporates tiny, shimmering bunny ears or even a full bunny head along the tip, adorned with a hint of Bling. Imagine a traditional white French tip, but with a tiny rhinestone ear, or an entire tip formed into an adorable bunny shape. This combines elegance with whimsical charm, making it a truly unique Nail type that catches the light beautifully.
Start with a clean, perfectly executed French tip. Once the tip is dry, use a tiny amount of nail glue or a clear topcoat to carefully place small rhinestones or glitter pieces to form bunny ears or eyes. For an even more precise look, try using a pre-made bunny nail decal as your base for the bling. A clear gel topcoat over the finished Design will ensure your embellishments stay put and add a high-shine finish.
3. Playful Hopping Bunnies
This dynamic design captures bunnies in motion, adding an energetic and lively feel to your fingertips. Each nail might feature a different stage of a bunny hop or a cluster of tiny bunnies scattering across the nail bed. It’s a narrative approach to funny bunny nails that’s incredibly charming and provides endless opportunities for creativity and storytelling with various Color palettes. A perfect way to express your playful side!
Begin with a clean base coat in a neutral or complementary color. Use a fine-tipped brush and a contrasting Polish to draw stylized bunnies. Don’t worry about perfection; the charm comes from their whimsical, cartoon-like appearance. You can use different shades for each bunny to add variety, making sure to stagger their positions to create that sense of movement. Finish with a strong topcoat to protect your tiny leaping friends.
4. Bubble Bath Bunny Cheeks
Imagine your nails dipped in a dreamy Bubble bath, with little bunny cheeks peeking out! This design uses a milky, sheer pink or white base, reminiscent of the popular ‘bubble bath’ nail trend, with cute, rosy pink bunny cheeks and tiny white whiskers. It’s incredibly soft, feminine, and subtly adorable, making it a perfect choice for those who love a delicate yet playful Design. This style works beautifully on almost any Nail shape.
Start with two coats of a sheer, milky pink or white polish to get that soft, diffused look. Once dry, use a small dotting tool and a light pink Color to create two small, slightly overlapping circles for the bunny cheeks. With an even finer brush and white polish, paint tiny whiskers extending from the cheeks. A clear topcoat will enhance the glossy, ‘wet’ look, completing your bubble bath bunny masterpiece.
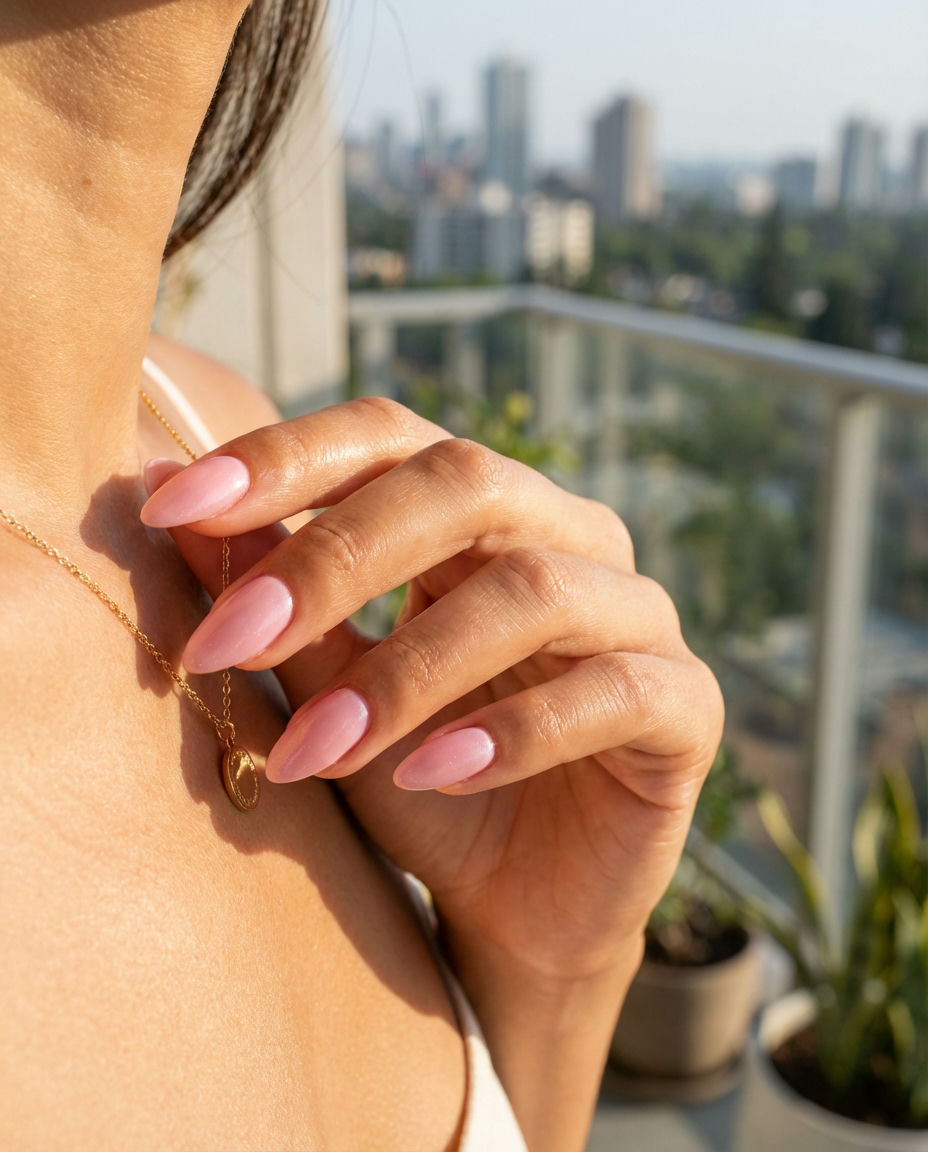
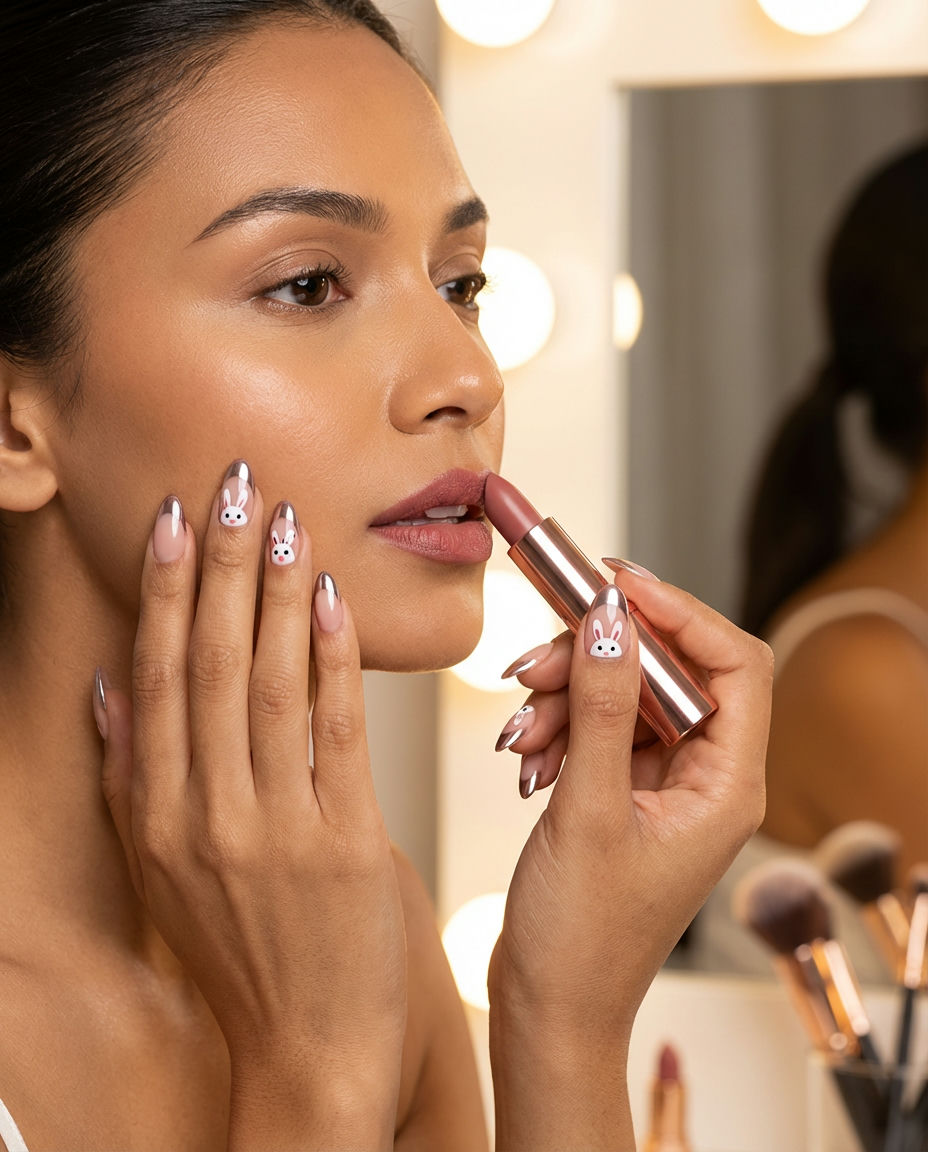
5. Chrome Bunny Accents
Amp up the glam with Chrome bunny accents! This design features subtle metallic bunny motifs, perhaps on a single accent nail or as outlines on a few nails. The reflective surface of the chrome instantly elevates the playful bunny theme to something chic and modern. It’s a fantastic way to incorporate the trend if you gravitate towards more edgy or sophisticated looks, especially stunning on a square or almond nail shape.
After applying your base Color and letting it fully cure (if using gel), apply a non-wipe topcoat. Then, using a silicone tool or applicator, gently rub your chosen chrome powder over specific areas where you want the bunny design. You can also use chrome stickers or stencils for crisper bunny shapes. A clear topcoat is essential to seal in the chrome and prevent chipping, ensuring your metallic bunnies stay perfectly shiny on your chosen Nail type.
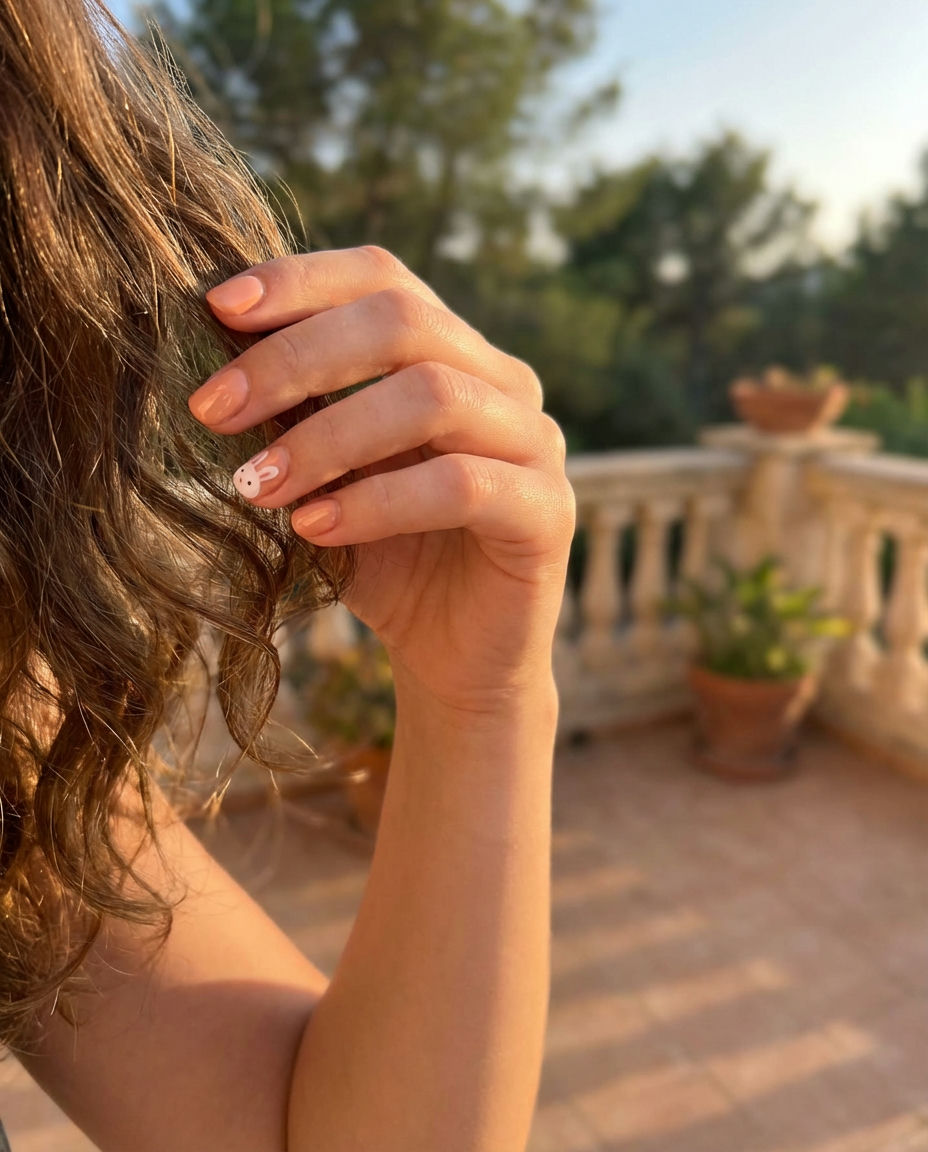
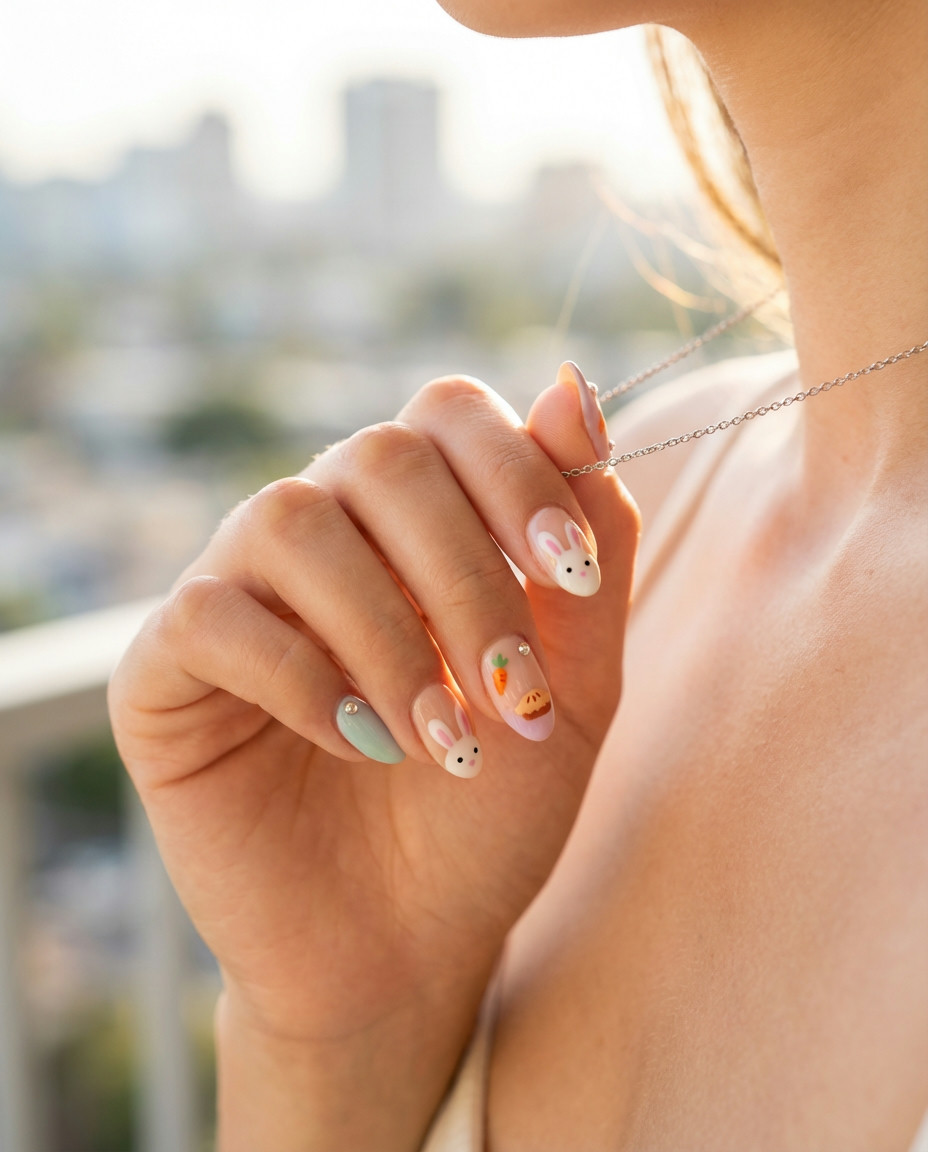
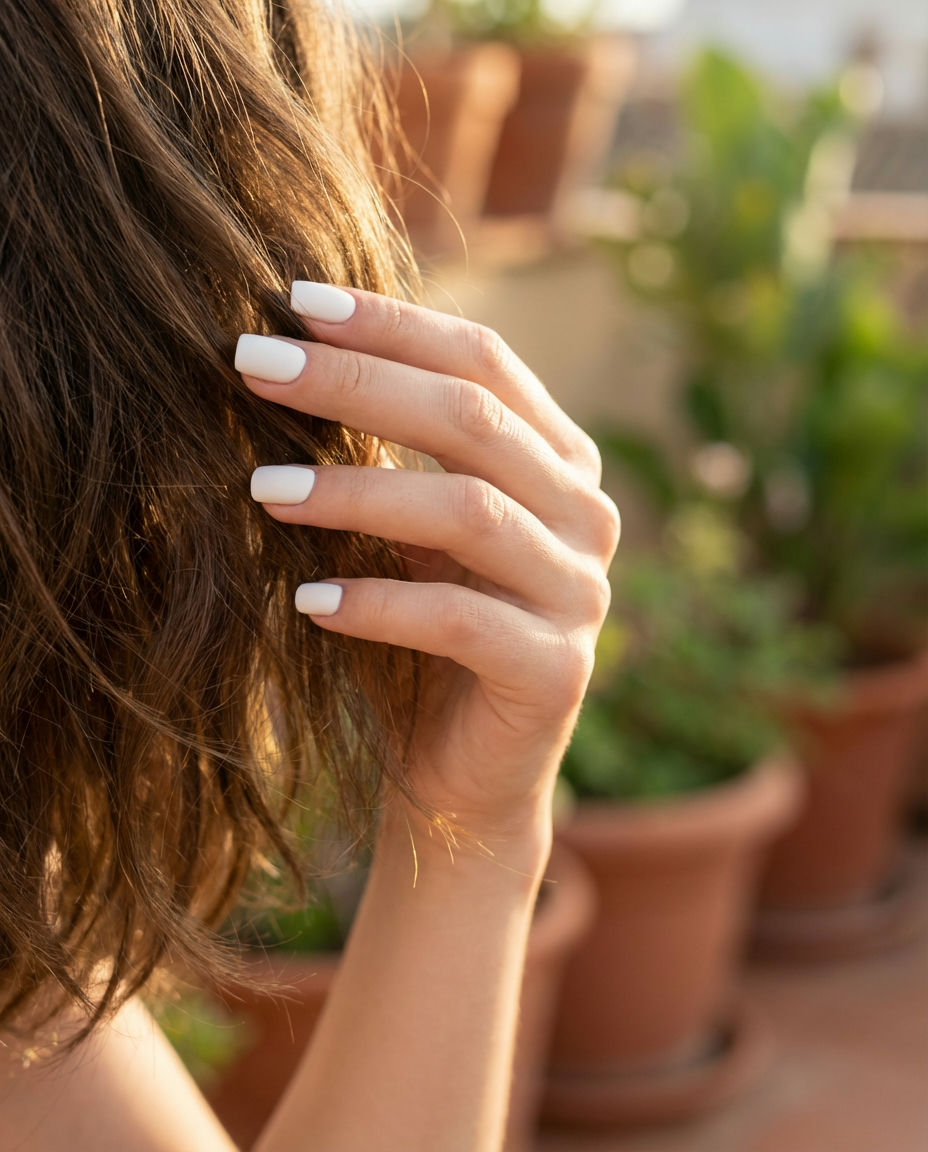
6. Short & Sweet Bunny Faces
Who says Short nails can’t be fun? This design is all about adorable, simplified bunny faces peeking out from the tip or base of your nails. It’s a fantastic option for those who prefer practicality but still want to embrace the playful aesthetic of funny bunny nails. The minimalist approach keeps it chic, while the cute faces add a touch of personality, making every glance at your hands a little moment of joy. This look works great on any natural Nail shape.
To recreate this look, start with a solid base Color that complements your skin tone. Once dry, use a small dotting tool and a contrasting polish (white, black, or light pink work well) to create two dots for eyes and a tiny ‘V’ shape for the nose. You can simply imply ears with two small arcs joining at the top. The key is to keep it simple and clean. Finish with a generous topcoat to smooth everything out and add shine to your cute face Design.
7. Geometric Bunny Outline Nails
For a contemporary twist on cute, try geometric bunny outlines. This design uses clean lines and angular shapes to form a stylized bunny silhouette, offering a minimalist yet impactful aesthetic. It’s a sophisticated take on funny bunny nails that appeals to those who love modern art and graphic elements. This particular Design shines when executed with a stark contrast between the outline and the base Color, making it a real head-turner.
Begin with a smooth, fully opaque base color. Using a very fine striping brush and a contrasting polish, meticulously draw the geometric angles that form your bunny. Think triangles for ears or a basic square for the head. Precision is key here, so take your time! Alternatively, you can use thin nail art tape to create crisp lines before filling in the outline. Seal your angular bunnies with a high-gloss topcoat.
8. Easter Egg Bunny Nails
Don’t reserve these cute critters just for spring! Easter egg bunny nails feature tiny bunnies peeking out from pastel-colored ‘eggs’ painted directly onto your nails. You can experiment with various pastel Color combinations for the eggs, making each nail a unique mini canvas. This festive and detailed Design is a charming way to celebrate spring or simply add a touch of playful intricacy to your manicure, ideal for those who love detailed art.
Start with a smooth base coat. For the ‘eggs,’ apply different pastel polishes on each nail, allowing them to fully dry. Once dry, using a fine detail brush, paint small bunny heads and ears peeking over the top curve of each ‘egg.’ Add tiny details like eyes and noses for extra cuteness with a contrasting Polish. Finish with a clear topcoat to protect your miniature works of art and give them a beautiful sheen.
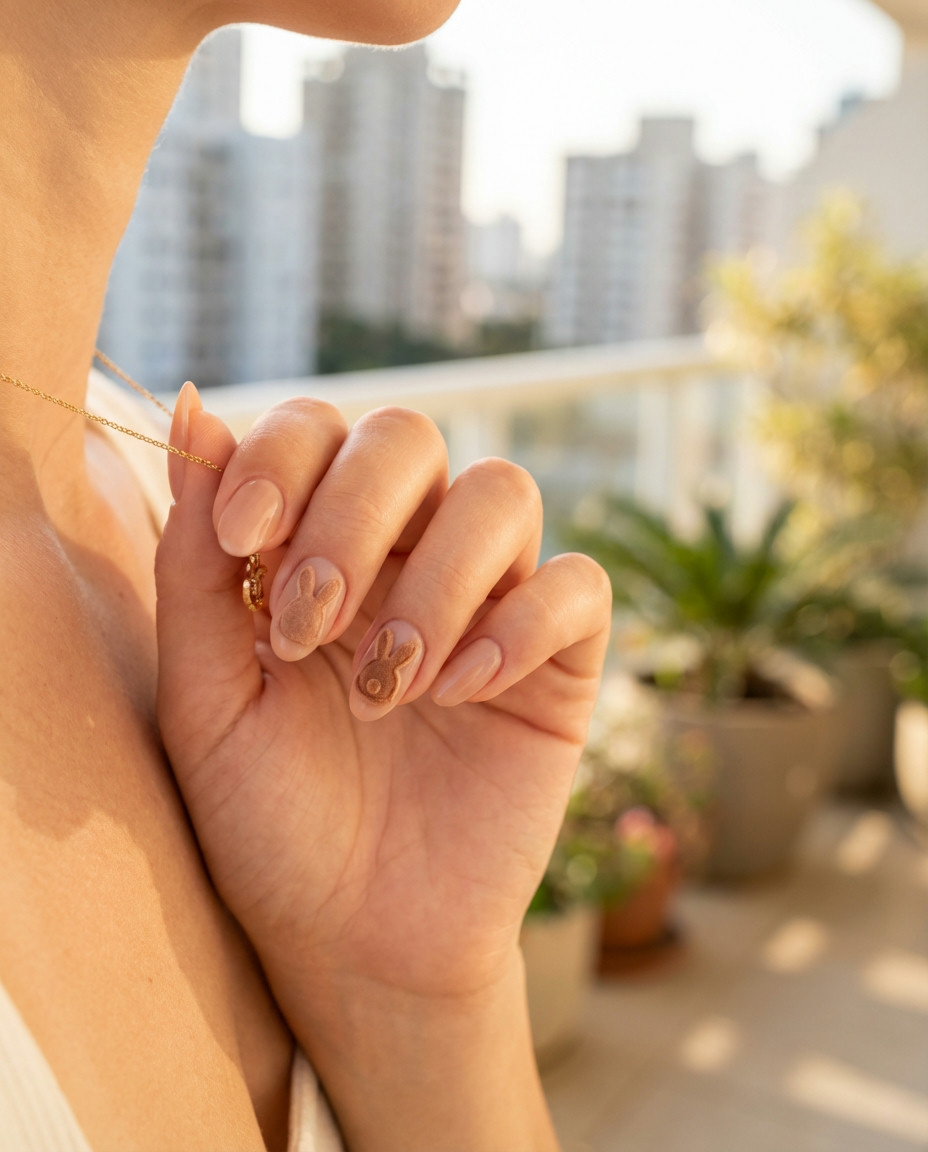
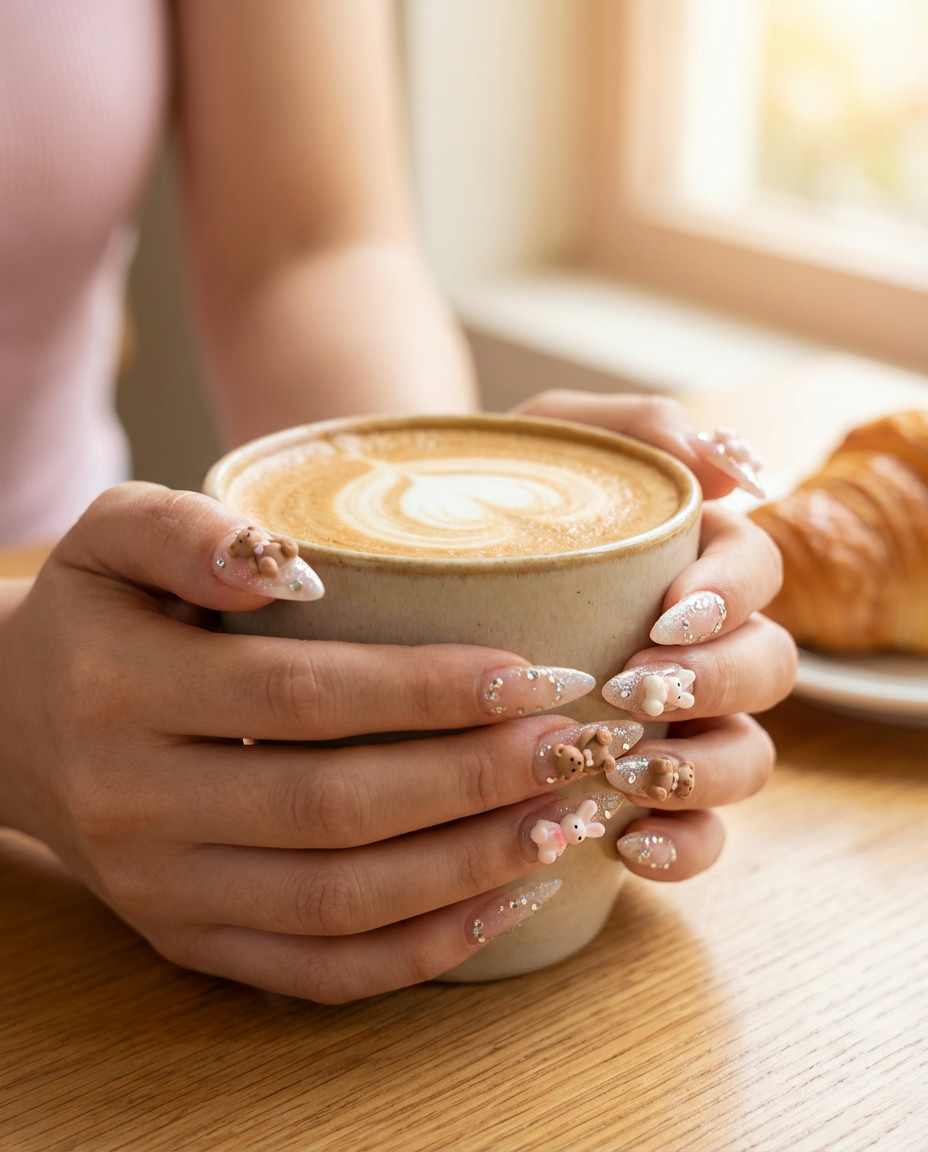
9. Velvet Flocked Bunny Nails
Bring texture into your funny bunny nails with velvet flocking powder! This luxurious and tactile design creates fuzzy bunny shapes that you can actually feel. Imagine a soft pink or white base with fluffy, velvet bunnies on top – it’s an incredibly unique and adorable look. This Nail type is a conversation starter and incredibly visually appealing, offering a tactile dimension to your manicure that’s anything but ordinary.
After applying your base Color and letting it dry, paint the bunny shape with a clear or white Polish. While the polish is still wet, liberally sprinkle velvet flocking powder over the bunny shape. Gently tap off the excess and use a soft brush to clean around the design. Avoid applying a topcoat directly over the flocked areas, as this will remove the fuzzy texture. This looks especially cute on Short nails for a subtle pop of texture.
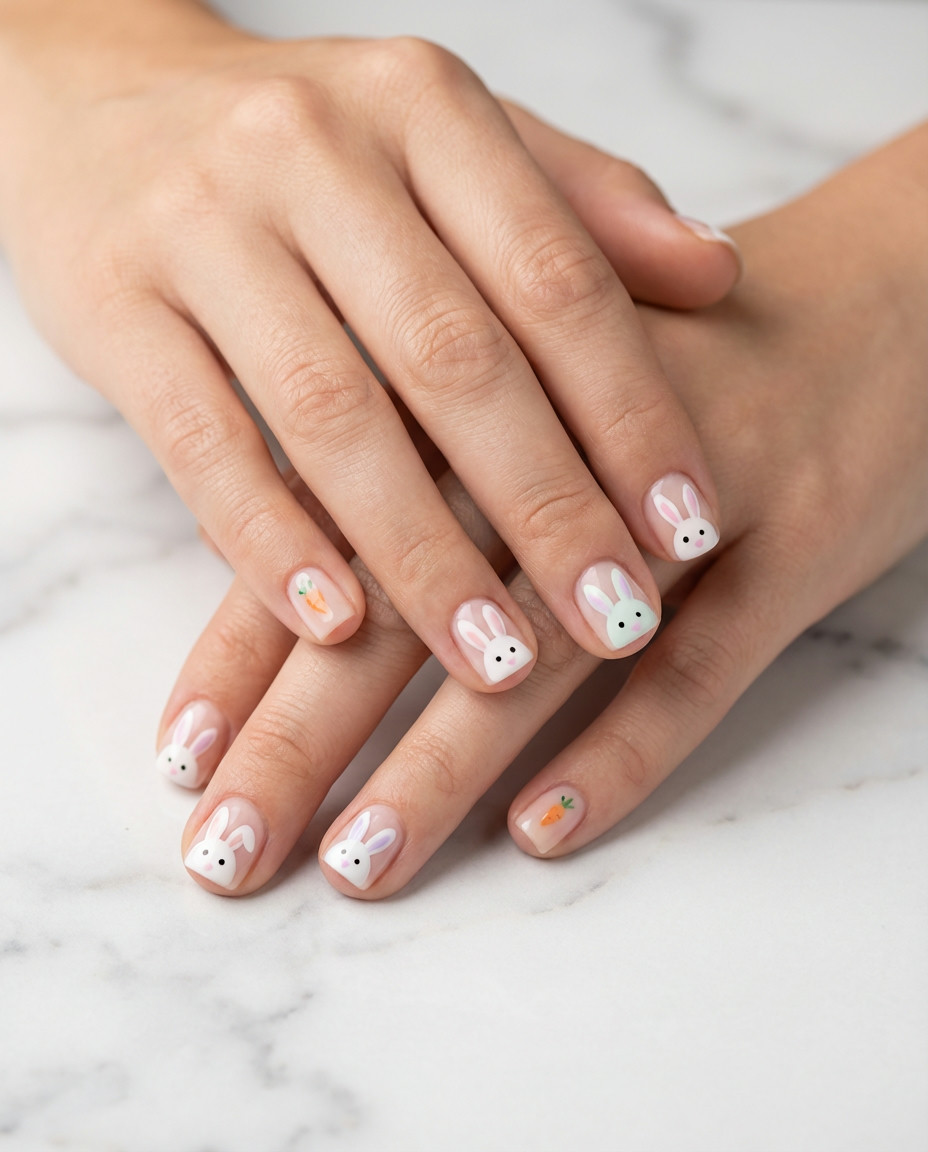
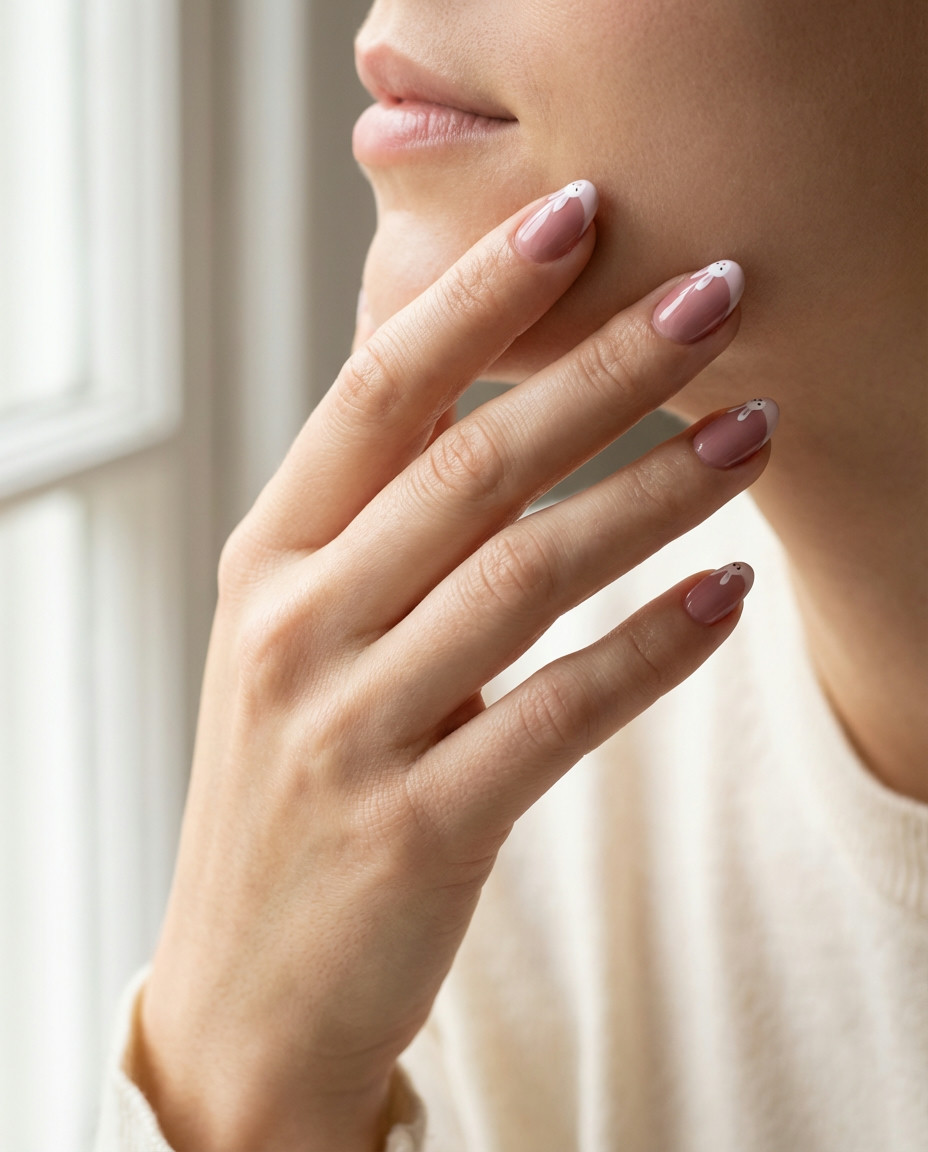
10. OPI Bubble Bath Bunny Tips
Combine the cult-favorite Opi ‘Bubble Bath’ shade with delicate bunny details for an iconic and elegant yet playful look. This soft, sheer pink provides the perfect natural base, making it look as if little bunnies are gently resting on your fingertips. It’s a sophisticated take on funny bunny nails that’s perfect for both casual and formal occasions, and universally flattering with its classic Color. This is one of the most requested Nail type looks due to its versatility.
Apply two to three thin coats of Opi Bubble Bath Polish for that signature sheer, milky finish. Once fully dry, use a fine nail art brush and white or a slightly darker pink polish to meticulously draw small bunny ears or a tiny bunny head on each nail tip, similar to a French manicure. The key is subtlety. Finish with a high-shine topcoat to enhance the glossy effect and protect your delicate design.
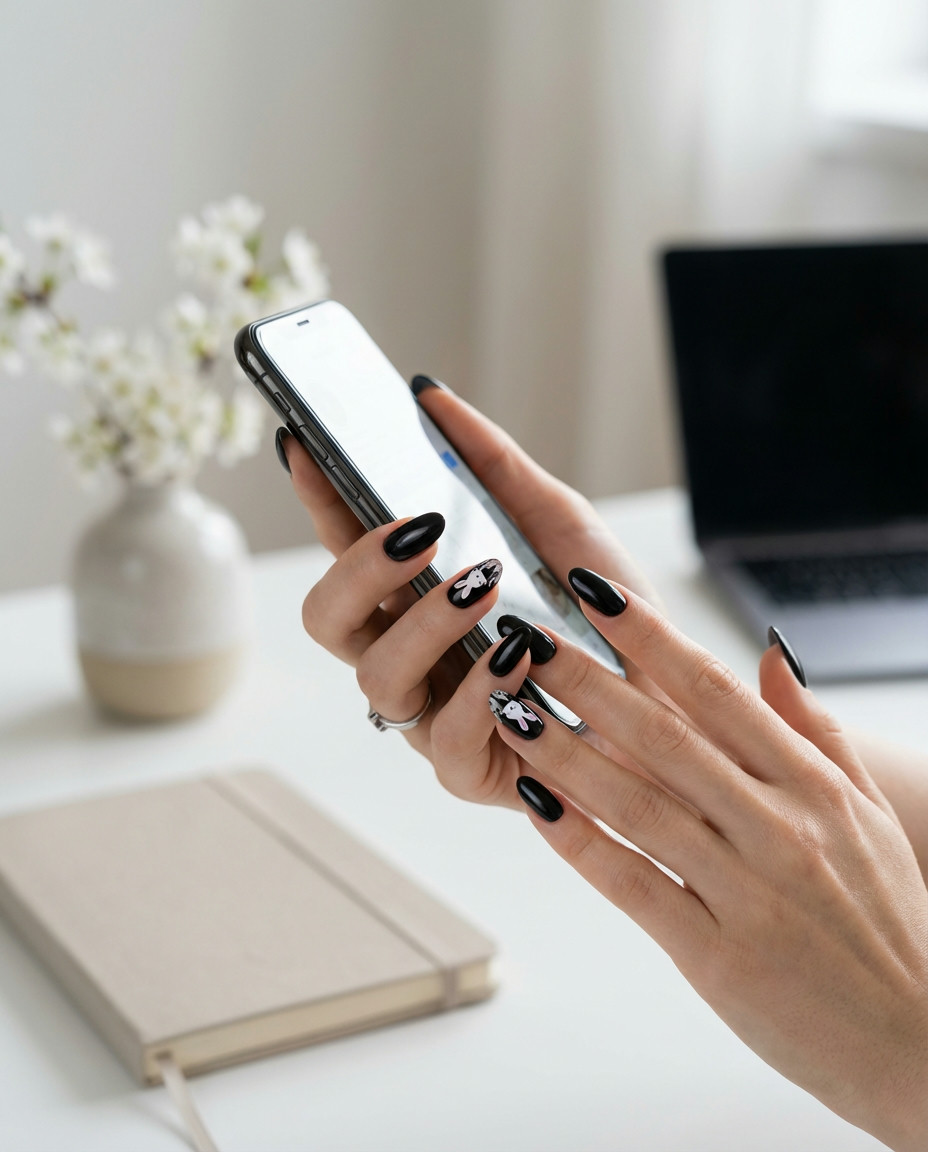
11. Bunny Outline with Chrome Detail

This design makes a statement by combining crisp bunny outlines with a touch of futuristic Chrome. Imagine a sleek black or white base with a minimalist bunny shape traced out in brilliant chrome powder. It’s an unexpected fusion of cute and edgy, perfect for those who want their Nail type to reflect a modern aesthetic. The reflective finish of the chrome really makes the bunny pop, creating a multi-dimensional Design.
Start with a fully cured base coat in your chosen Color (black and white look especially striking). Apply a no-wipe topcoat and cure. Then, using a fine liner brush, paint your bunny outline with a sticky gel polish, and before curing, rub your chrome powder onto the wet gel. Cure again. A final topcoat will seal everything in, making sure your chrome stays perfectly shiny and your Nail shape is perfectly accentuated.
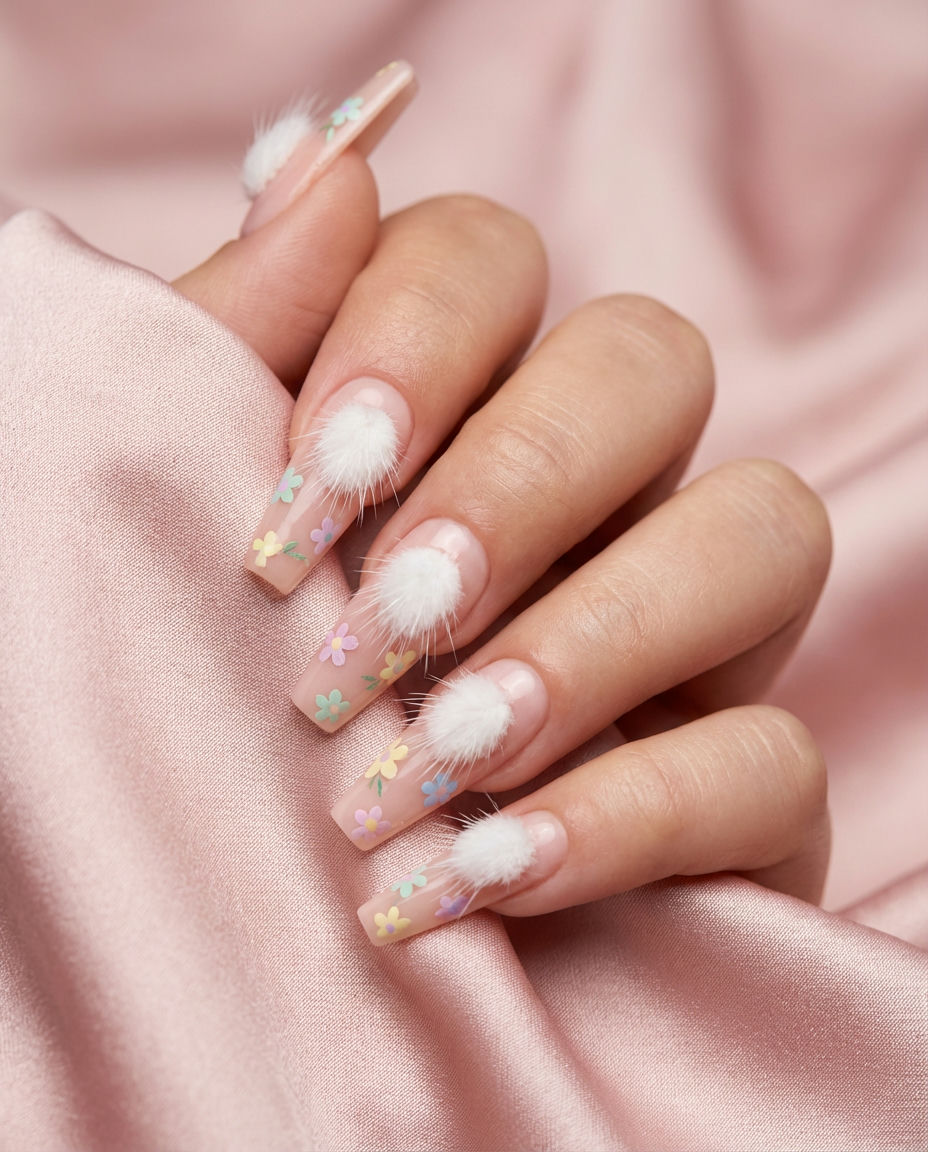
12. Gradient Bunny Tails
This adorable design focuses on the fluffy, disappearing bunny tail, often created with a subtle gradient effect for depth. Imagine a soft pastel base fading into a lighter shade, with a tiny, textured white ‘puff’ at the bottom representing the tail. The gradient adds a sophisticated touch to the playful theme, creating a dreamy and ethereal look. It’s a unique approach to funny bunny nails that works well with a variety of Color palettes, especially soft blues and pinks.
Start by creating a soft gradient on each nail using two complementary Polish shades. Once the gradient is dry, use a small dotting tool and white polish to create a small, slightly textured circle at the base of the nail for the bunny tail. You can gently tap the dotting tool in the wet polish to give it a fluffy appearance. Finish with a clear topcoat to seal the gradient and the delicate Design.
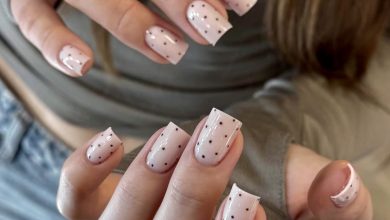
13. Minimalist Bunny Paw Prints
Sometimes less is more! This understated design features tiny, delicate bunny paw prints scattered across a nude or sheer base. It’s incredibly chic and subtle, a perfect nod to funny bunny nails without being overly illustrative. This minimalist take on a playful Design is ideal for those who prefer an elegant manicure with a hint of personality, and it looks beautiful on any Nail type, especially on Short nails for a clean look.
Begin with a sheer pink, nude, or clear base Polish. Once dry, use a small dotting tool and a contrasting color (white, light pink, or black works well) to create the paw prints. Start with one larger dot for the ‘pad’ and three smaller dots above it for the ‘toes.’ Space them out naturally as if a tiny bunny has just hopped across your nails. Seal with a glossy topcoat for a clean, polished finish.
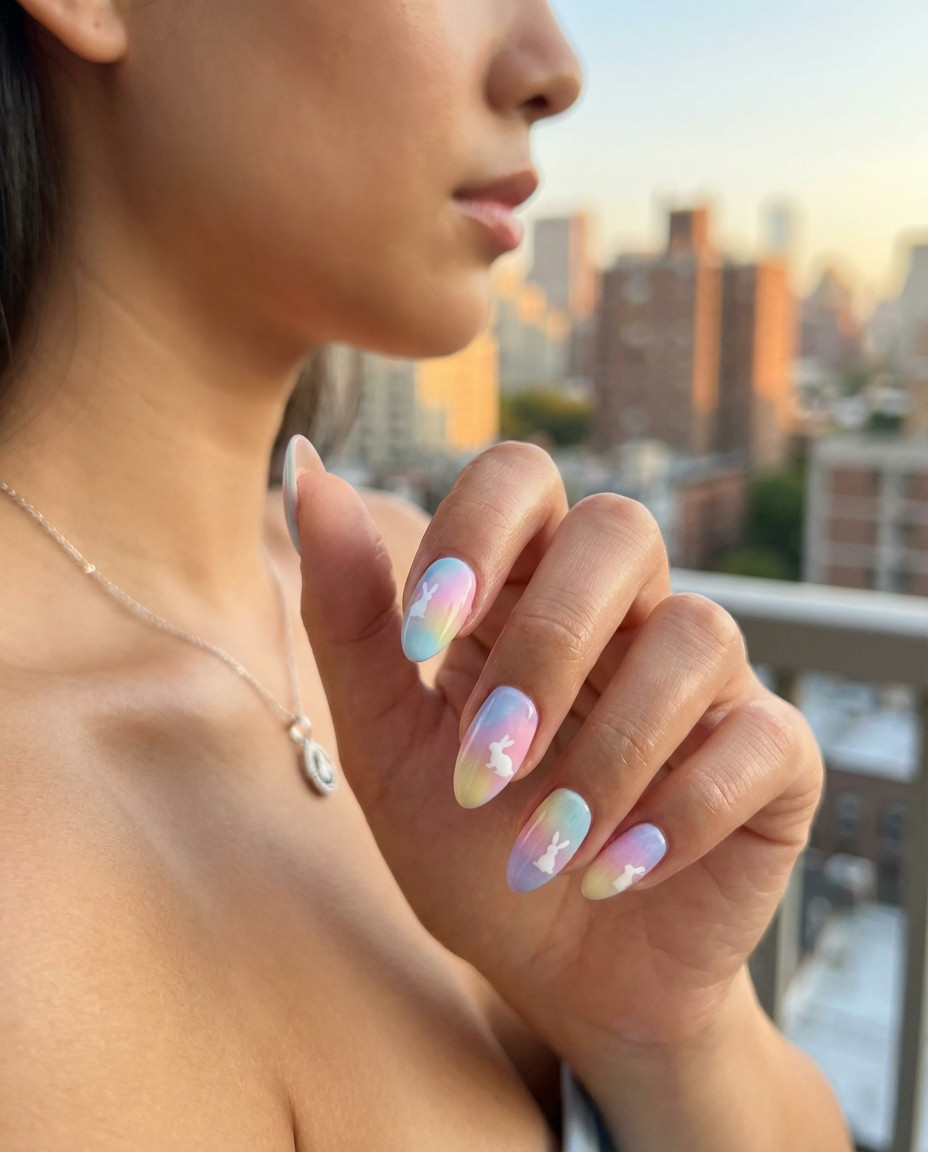
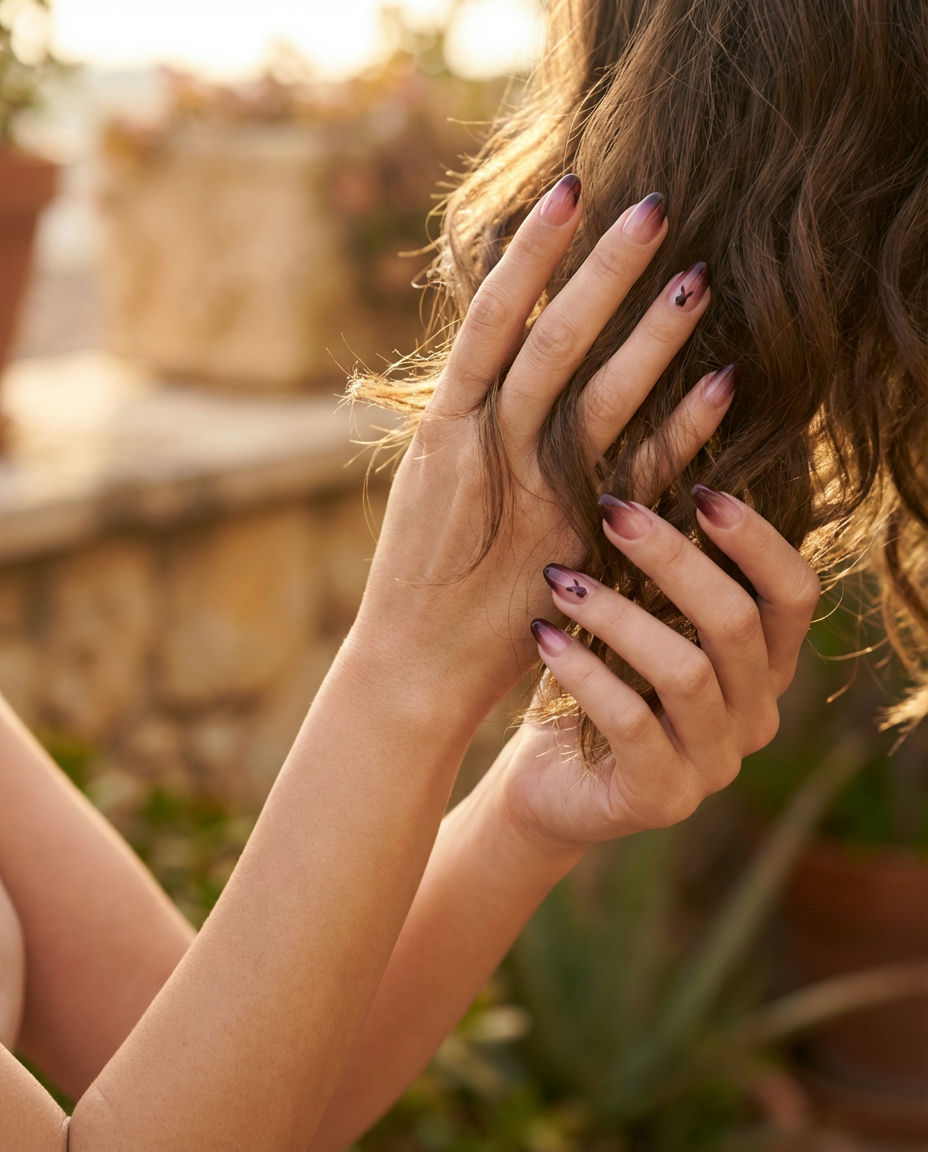
14. Almond Bunny Silhouettes at Sunset
Imagine the soft glow of a sunset captured on your nails, with elegant bunny silhouettes against the warm hues. This design uses a beautiful gradient of sunset colors (pinks, oranges, purples) as the backdrop, with a sleek black or dark grey bunny silhouette. The almond Nail shape really enhances the artistic flow of the sunset gradient and the delicate lines of the bunny, creating a truly artistic and romantic Design.
Create a stunning sunset gradient as your base, blending warm Color polishes vertically on your almond nails. Once the gradient is completely dry, use a fine nail art brush and black or dark grey Polish to meticulously paint the silhouette of a bunny. You can opt for a full body or just a head with ears. Precision is key to making the silhouette stand out against the vibrant background. Finish with a clear, high-shine topcoat.
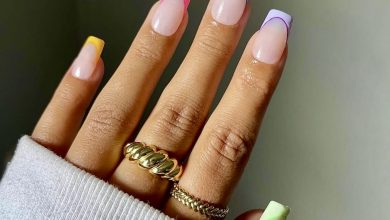
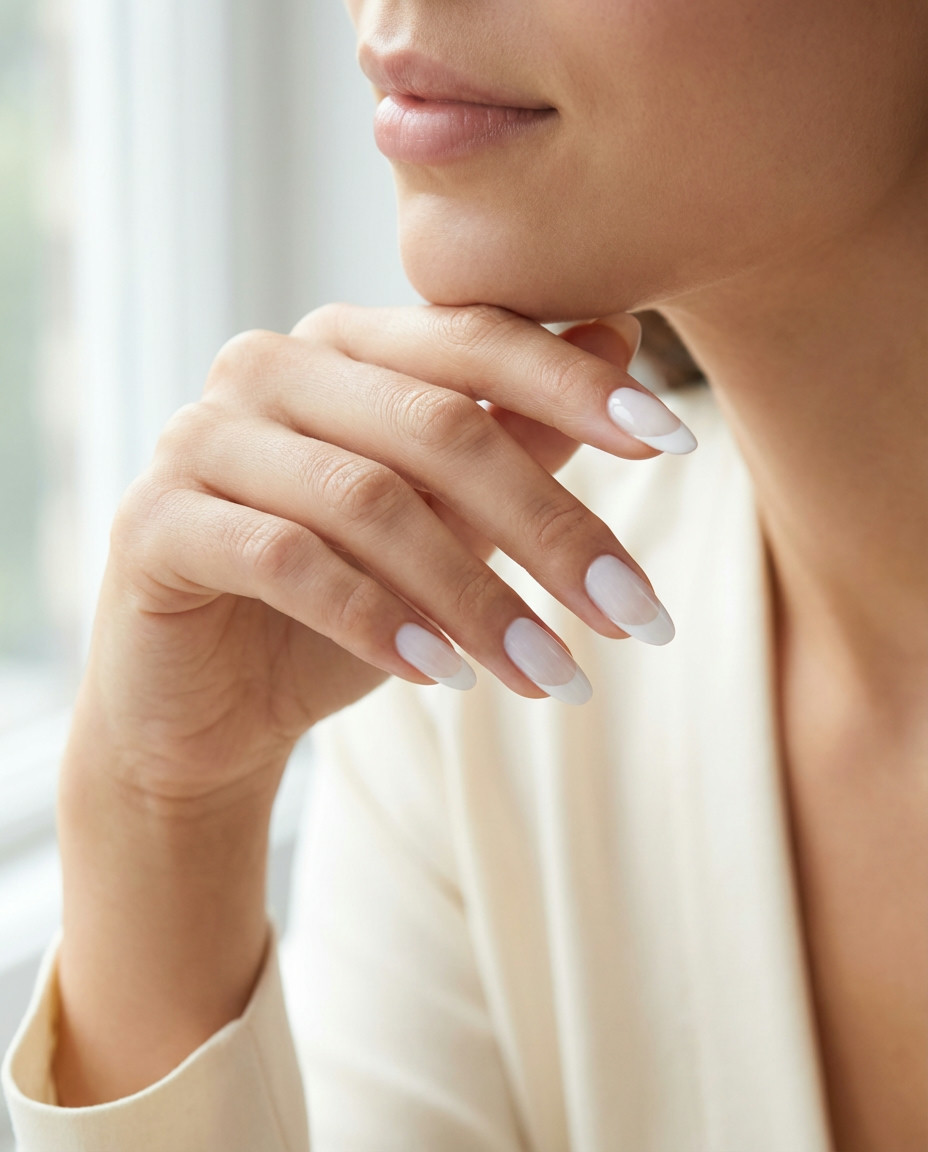
15. French Tip Bunny Ears
A fresh take on the classic French manicure, this design incorporates delicate bunny ears into the white tip. Instead of a straight or curved line, the tip is subtly shaped like two bunny ears. This playful modification maintains the elegance of a French tip while injecting a dose of adorable character. It’s a sophisticated way to wear funny bunny nails, proving that even a subtle tweak can make a big impact on a classic Nail type.
Begin with your preferred rosy or nude base, just like a traditional French. Then, using a crisp white Polish and a fine brush, carefully create two small, rounded points at the tip of each nail, shaping them into bunny ears. Ensure consistent height and symmetry for a polished look. A clear topcoat will not only protect your Design but also give that signature glossy finish to your updated French tips.
16. Blinged Out Bunny Eyes
Make your bunnies truly sparkle with a focus on their eyes – adorned with tiny rhinestones or glitter. This design takes a more abstract approach to funny bunny nails, allowing you to imply a bunny presence through dazzling eye placement. The addition of Bling adds an element of glam and luxury, turning a simple bunny motif into a show-stopping manicure. This works well on various nail shapes and emphasizes sparkle.
After your base Color and any other bunny features are painted and dry, apply a tiny dot of strong nail glue or thick clear topcoat where you want the bunny eyes to be. Gently pick up small rhinestones (clear, black, or even colored) with a wax pencil or tweezers and place them onto the glue. Allow to dry completely. Finish with a topcoat, being careful not to completely submerge the Bling if you want it to retain maximum sparkle.
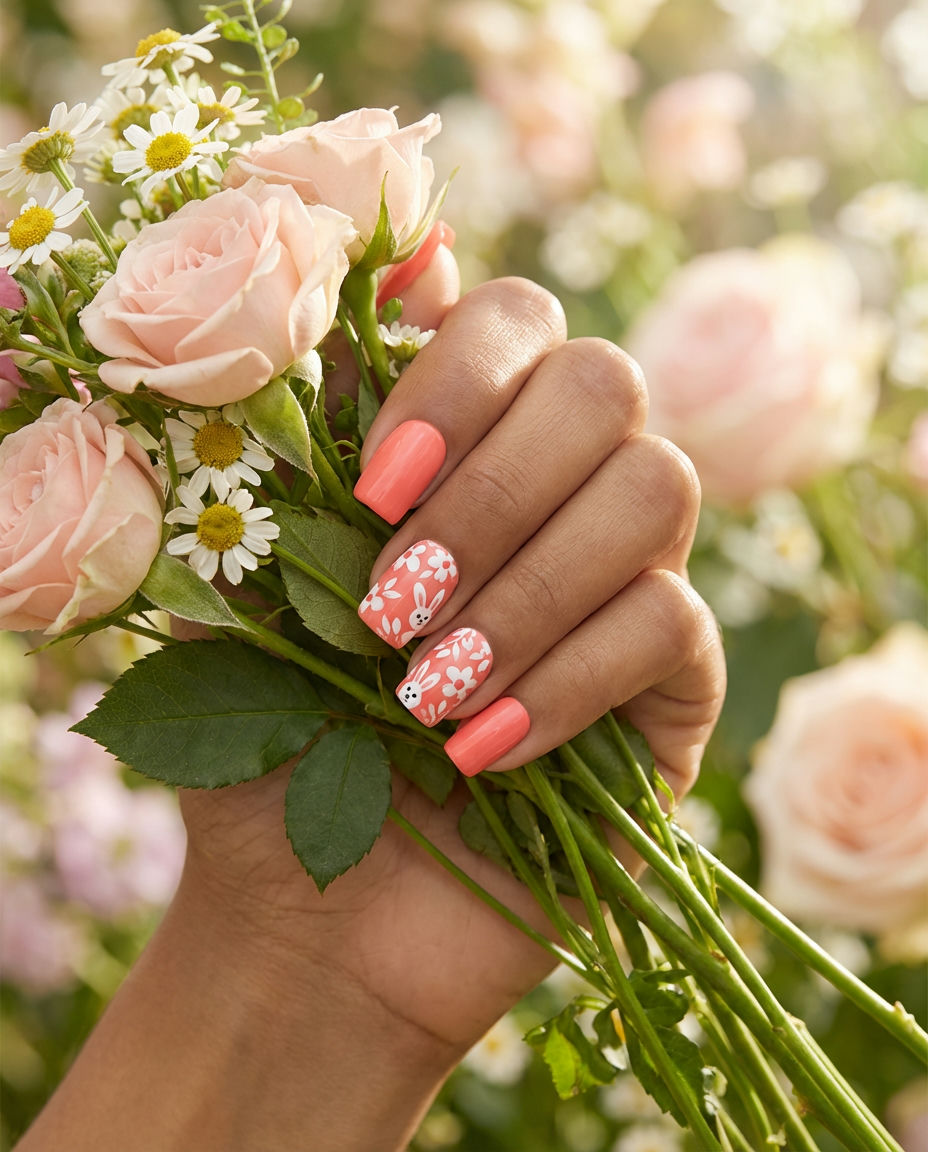
17. Candy Pink Funny Bunnies for All Skin Tones
Embrace a universally flattering candy pink base, adorned with whimsical bunnies that pop against any complexion. This design is built around the idea of a vibrant, cheerful main Color that looks stunning no matter your skin tone range. The playful bunnies can be white, contrasting dark, or even a different pastel, ensuring everyone can enjoy these adorable funny bunny nails. The key is selecting a bright yet balanced pink Polish that illuminates your hands.
Choose a vibrant but not overly neon candy pink Polish for your base. After two even coats, allow it to dry completely. Use a thin nail art brush and a contrasting white or black polish to paint simple bunny faces or full-body silhouettes. Consider adding tiny dots for eyes or small bow details for extra charm. A glossy topcoat will enhance the juicy look of the candy pink and protect your cute Design.
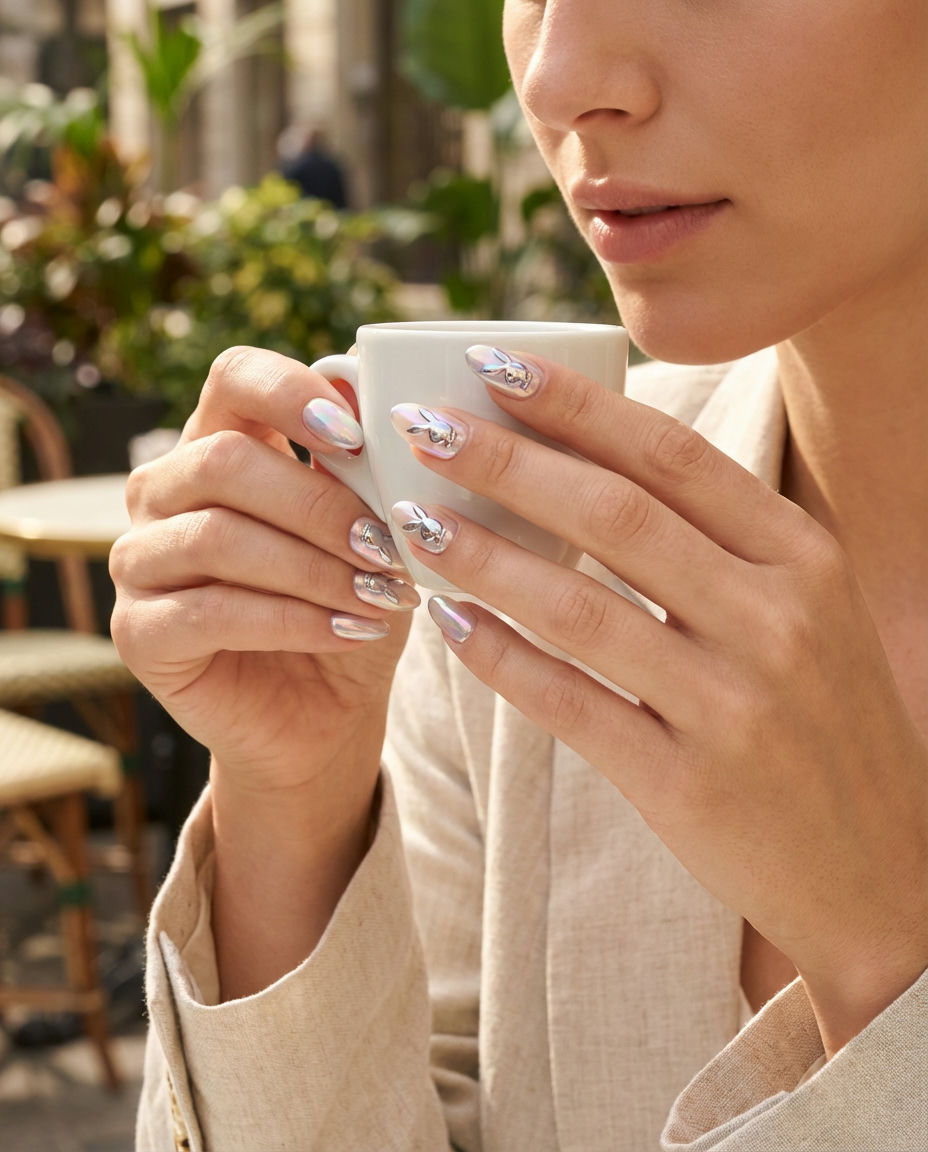
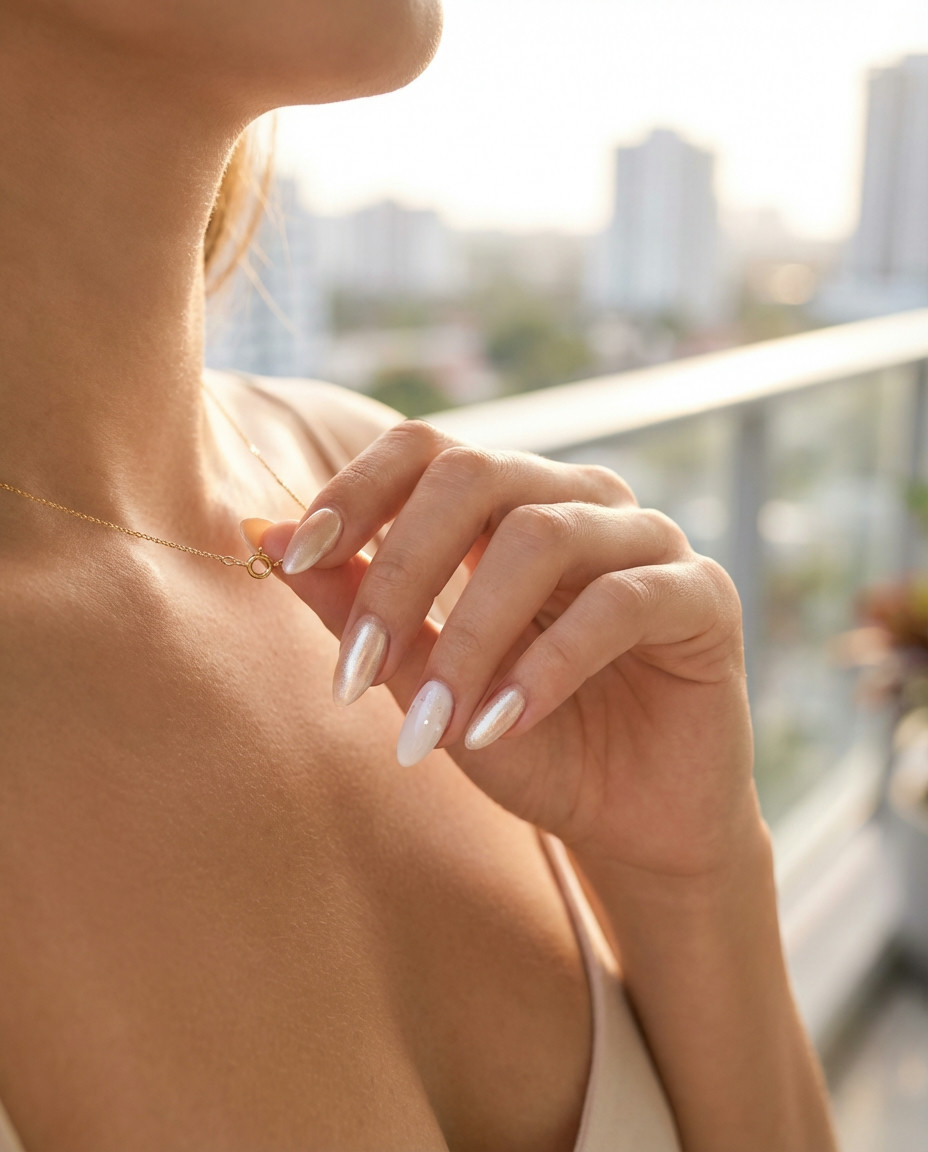
18. Holographic Bunny Ears
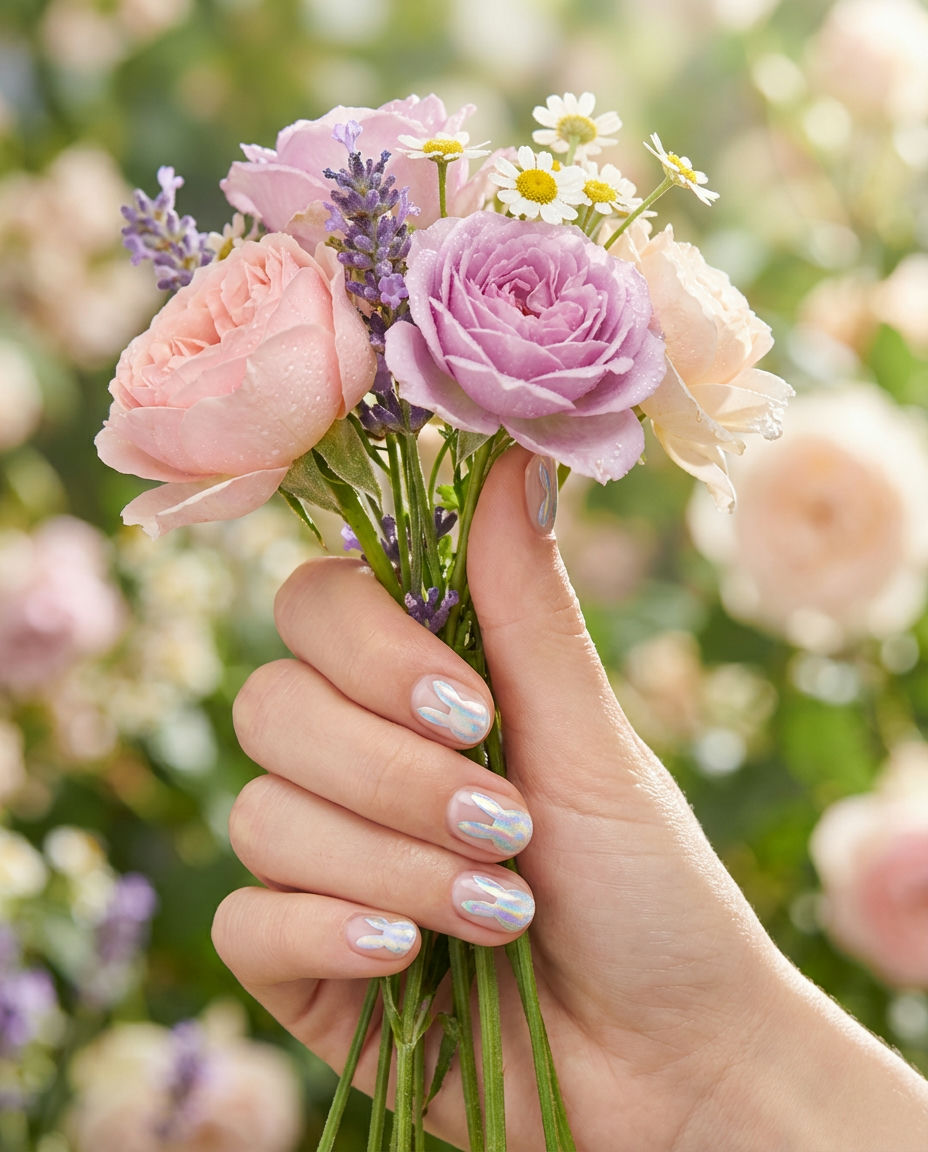
For a truly magical shimmer, incorporate holographic effects into your bunny design. Imagine holographic bunny ears peeking over a solid Color base, catching every ray of light with a rainbow sparkle. This creates an ethereal and futuristic feel for your funny bunny nails, combining playful imagery with cutting-edge Nail type trends. It’s a fantastic option for those who love bold, eye-catching manicures with unique textures and finishes.
After your base Color is applied and fully cured (if using gel), apply a no-wipe topcoat. Then, use a fine brush or stencil to apply holographic powder specifically onto the areas where you want your bunny ears. Rub it in gently to create that iridescent effect. You can also use holographic Polish or decals. Seal with another topcoat to protect the delicate holographic effect and maintain its brilliant shimmer.
19. Bunny in a Bubble Bath Vignette
This charming design creates a little scene on your nails: a tiny bunny appearing to be taking a luxurious Bubble bath! It involves a milky, sheer base (the ‘water’) with delicate white dots for bubbles and a partially submerged bunny peeking out. It’s an imaginative and detailed approach to funny bunny nails that evokes a sense of calm and cuteness, perfect for those who enjoy a story on their fingertips. The soft Color palette of this look is universally appealing.
Start with two coats of a sheer, milky white or light pink Polish to mimic the Bubble bath effect. Once dry, use a fine detail brush to paint a small bunny head and ears, as if just popping out of the ‘water.’ Then, use a dotting tool of varying sizes and white polish to create delicate ‘bubbles’ around the bunny. Finish with a clear topcoat to give it a glossy, wet look and protect your adorable scene.
20. Square Tip Bunny Paws
Give your square nails a touch of playful charm with bunny paw prints artistically placed on the tips. This design transforms the sharp edges of a square nail into a canvas for a soft, adorable motif. The graphic nature of the square Nail shape provides a wonderful contrast to the organic, rounded shapes of the paw prints, ensuring a modern yet exceptionally cute manicure. This adds a unique twist to classic funny bunny nails.
Apply your chosen base Color to your square nails. Once thoroughly dry, use a small dotting tool and a contrasting Polish (white, light pink, or black are classic choices) to create the bunny paw prints right on the tip. Opt for one larger ‘pad’ dot and three smaller ‘toe’ dots above it. Ensure the placement is consistent across your nails for a cohesive Design. Finish with a durable topcoat for longevity.
21. Bunny Pie Crust Details

Inspired by delectable baked goods, this design features intricate bunny shapes that mimic delicate pie crust artwork. Think tiny woven lattice patterns forming bunny ears or a full bunny outline, perhaps in a warm, toasted brown or creamy beige Color. It’s an incredibly artistic and unique take on funny bunny nails, bringing a cozy, homemade vibe to your manicure. This detailed Design showcases serious nail art skills and works beautifully on slightly longer nails.
Start with a nude or light, warm-toned base Polish. Once dry, use a very fine detail brush and a slightly darker, contrasting polish (like a warm brown or beige) to meticulously draw the pie crust patterns. You can opt for delicate cross-hatching to create a woven texture for your bunny shapes or carefully draw tiny dots to give the illusion of textured dough. Finish with a high-shine topcoat to make your ‘pie crust’ bunnies look freshly baked an irresistible.
22. Abstract Bunny Shapes with Chrome

Combine artistic expression with a touch of futuristic shimmer. This design features abstract, deconstructed bunny shapes – perhaps just a curve for a head and two lines for ears – rendered in brilliant Chrome. The metallic finish adds sophistication and an unexpected edge to the playful bunny motif. It’s a chic and modern way to wear funny bunny nails, perfect for those who appreciate contemporary art and unique textures on their Nail type.
After your base color is cured and you’ve applied a non-wipe topcoat, use a thin brush to paint abstract bunny elements with a sticky gel Polish. Before curing, gently rub your desired chrome powder onto these specific wet areas. Cure thoroughly. A final layer of topcoat will protect the Chrome effect and your artistic Design, giving it a high-gloss finish that really catches the light.
23. Gradient Bunny Ears
This ethereal design features soft, pastel gradient effects within the bunny ears themselves, creating a dreamy, almost watercolour-like appearance. Imagine tiny bunny ears where the pink tip fades seamlessly into a white base, or a subtle blend of two complementary colors. It’s a delicate and artistic approach to funny bunny nails that adds depth and sophistication to the sweet theme. This Design looks particularly stunning on well-maintained, slightly longer nails.
Start with two coats of a sheer or light base Polish. Once dry, use a small sponge to dab on two complementary colors onto your fine-tipped brush. Carefully paint the bunny ear shapes, allowing the gradient to form within the ears. You can also paint a light base for the ears, then use a small, dry brush to gently blend a second Color onto the tips of the wet polish. Finish with a clear topcoat to seal the gradient and add a smooth, even finish.
24. Bunny-Blinged Almond Tips
Combine the elegant almond Nail shape with sparkling bunny accents on the tips for a luxurious and playful look. This ensures your funny bunny nails are anything but childish, elevating the cute motif with strategic placement of Bling. Think a single, carefully placed rhinestone to represent a bunny’s eye or tiny glitter-formed bunny ears atop your perfectly shaped almond tip. It’s glamour meets whimsy, creating a dazzling effect.
After perfecting your almond nail shape and applying your base Color, use a strong nail adhesive or a thick layer of topcoat to affix small rhinestones or glitter pieces to create your bunny-inspired Bling. Consider outlining a bunny shape with tiny beads or placing a single, larger gem as a focal point. A final layer of clear topcoat, carefully applied around the bling, will ensure longevity and maximum sparkle.
25. Storybook Bunny Silhouettes with OPI Polish
Transport your nails into a charming storybook with delicate bunny silhouettes painted over a dreamy base of an Opi Polish. Think popular Opi shades like ‘Sweet Heart’ or ‘Mod About You’ as your backdrop, providing a rich and beautiful canvas for your minimalist bunny art. This thoughtful combination of a beloved Color brand and a whimsical Design creates a polished yet playful aesthetic, perfect for all ages and occasions. The quality of the Polish ensures a smooth, lasting finish.
Apply two to three thin coats of your favorite Opi Polish for a flawless, opaque base. Once completely dry, use a fine nail art brush and a contrasting color (black, white, or a dark brown works well) to paint small, elegant bunny silhouettes. Focus on clean lines and distinct shapes to evoke a storybook feel. Finish with a high-gloss Opi topcoat to protect your delicate artwork and enhance its professional look.
26. Painted Bunny Pies
A truly unique and adorable concept, this design features tiny, artistic depictions of bunny-shaped Pies on your nails! Imagine light brown ‘crusts’ with little bunny ears and eyes, perhaps with a rosy pink ‘filling’ peeking through. It’s a sweet, playful, and incredibly creative take on funny bunny nails that’s guaranteed to spark smiles. This detailed Design is a testament to imaginative nail art and works wonderfully with warm, inviting Color palettes.
Begin with a nude-tan or light brown base Polish to represent the pie crust. Once dry, use a fine detail brush and a slightly darker brown to paint the outline of the bunny pie shape. You can add texture with tiny dots or cross-hatching within the ‘crust.’ Use a small amount of pink or red Polish for the ‘filling’ peeking out. A matte topcoat will give it a realistic, baked good look, while a glossy one will make it look glazed and fresh.
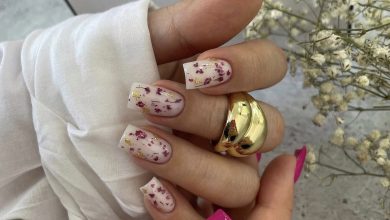
27. Mixed Media Bunny Collage Nails
Unleash your inner artist with a mixed-media approach to funny bunny nails! This design combines different textures and elements like tiny decals, hand-painted details, and even small pieces of foil or glitter to create a captivating bunny-themed collage on each nail. It’s an expressive and unconventional route, allowing maximum creativity and individuality. This Design truly stands out, making each nail a unique piece of art.
Start with a diverse set of supplies: a good base Color, various Polish colors, small bunny decals or appliques, and glitter or foil bits. Layer and combine these elements to create a busy, delightful collage. For instance, paint a bunny outline, then fill it with iridescent glitter, and add a tiny bow decal. Don’t be afraid to experiment with different textures and placements. Finish with a thick, self-leveling topcoat to encapsulate all your mixed-media elements securely.
28. Bunny Belly Laugh Nails

Bring pure joy to your fingertips with bunnies caught in moments of adorable belly laughter! This design features stylized bunnies with wide, happy grins and perhaps even little wiggles lines to suggest movement. It’s a super cheerful and infectious take on funny bunny nails, guaranteed to brighten your day and those of everyone who sees them. Use bright, cheerful Color palettes to enhance the happy vibe of this particular Design.
Choose a vibrant, uplifting base Color like sunny yellow or sky blue. Once completely dry, use a fine detail brush and black or white Polish to paint expressive bunny faces, emphasizing wide, upturned mouths and twinkling eyes. You can add small ‘laugh lines’ or even a tiny rosy blush to their cheeks. A clear, glossy topcoat will seal in the happy design and give it a polished, cheerful finish, really highlighting the playful side of your chosen Nail type.
29. Monochrome Bunny Silhouettes (with design by skin tone range)
Achieve undeniable sophistication with monochrome bunny silhouettes, where the key is selecting the perfect contrasting shades that pop against your unique skin tone range. For lighter skin, a bold black bunny on a creamy white base looks stunning. For medium tones, deep charcoal on a dusty rose works wonders, while richer skin tones can beautifully carry white or silver bunnies on a deep navy or black. It’s a chic and impactful Design that leverages the power of contrast and customizes the Nail type to you.
Pick a base Color that provides a strong contrast to your skin tone. Apply two even coats of Polish and let them dry completely. Then, using a fine detail brush and a sharply contrasting color (e.g., black on light nails, white on dark nails), paint simple, elegant bunny silhouettes. Focus on clean lines and a refined silhouette. Finish with a high-gloss topcoat to enhance the crispness of the monochrome design and ensure lasting wear.
30. Sweet Bunny Paw Pies
This design is an adorable fusion of two cute concepts: bunny paws and delectable Pies! Imagine tiny, round ‘pies’ on your nails, each topped with a perfectly formed, fluffy bunny paw print. You can play with different ‘pie’ flavors represented by various base colors, like fruit Pies (reds, purples) or creamy Pies (tans, yellows). It’s a deliciously cute and unique take on funny bunny nails that’s sure to garner compliments. This imaginative Design creates a truly irresistible edible-inspired aesthetic.
Start by painting your nails with a Color that resembles a pie filling – perhaps a berry red or a rich brown. Once this base is dry, use a small dotting tool and a creamy white or pale pink Polish to create the bunny paw print. One larger dot for the pad, three smaller dots for the toes. You can ‘outline’ the pie with a slightly darker brown polish for added definition. A matte topcoat will give it that authentic ‘baked’ look, or a glossy one for a freshly glazed finish.
Phew! That’s a whole lot of bunny goodness, isn’t it? From subtle chic to full-on playful, funny bunny nails are clearly the trend to watch in 2026. We hope you’re feeling utterly inspired to give these adorable designs a try. Don’t forget to save your favorite ideas to your Pinterest boards or show them to your nail tech. Get ready to rock the cutest manicure of the year!