26 Dreamy Milky White Nail Designs You Need to Try in 2026 That Will Elevate Your Look
Ready to refresh your manicure game? Milky white nails soft designs 2026 are here to stay, bringing a breath of fresh air and understated chic to your fingertips. This trend is all about subtle elegance, combining that dreamy, translucent white with delicate designs that whisper rather than shout. From minimal accents to intricate details, these looks are perfect for anyone craving a sophisticated yet fun vibe. Get ready to fall in love with these gorgeous nail ideas that are blowing up everywhere from runways to your favorite Instagram feeds!
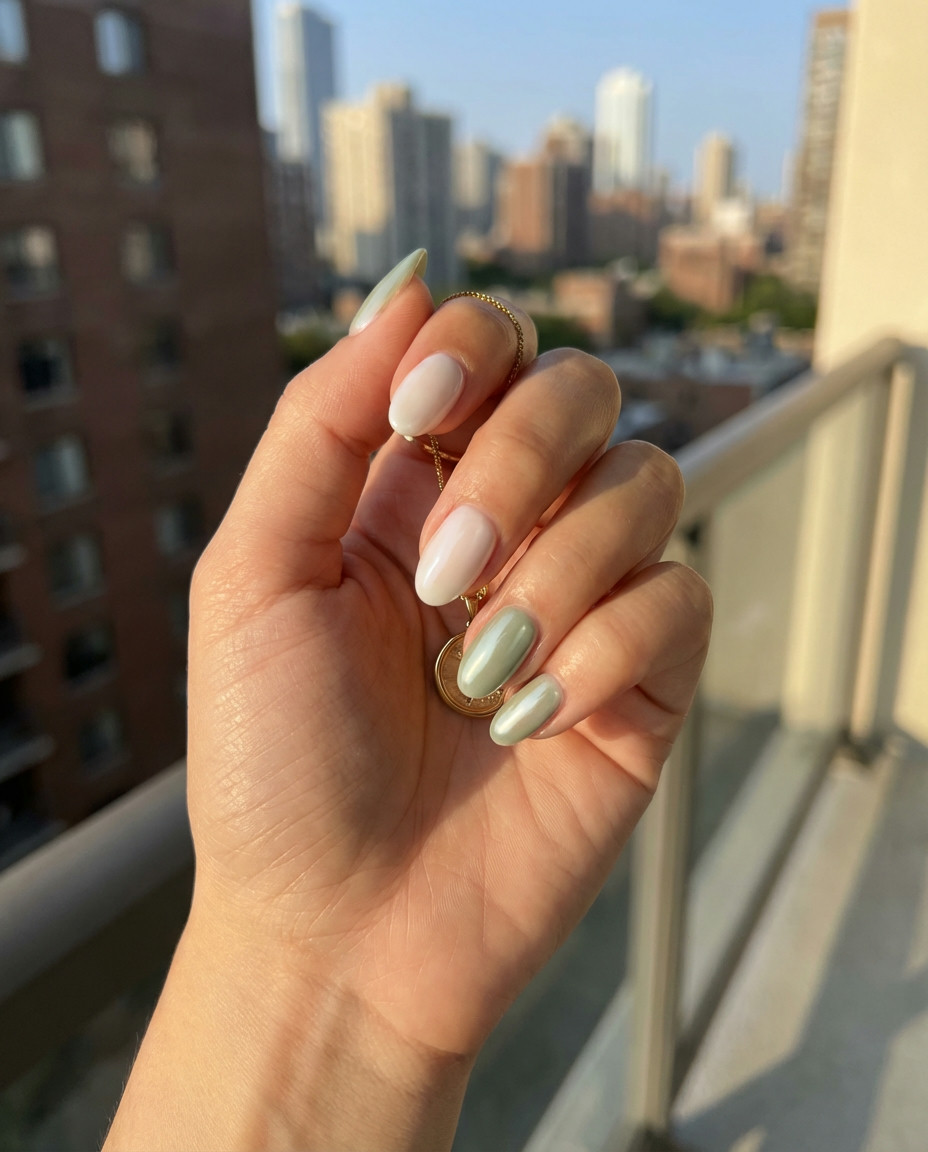
1. Sheer Milky Almond Tips
This minimalist yet luxurious look features a translucent milky white base on a chic Almond Nail shape, providing a soft glow that enhances the natural beauty of your nails. The subtle sheerness adds a touch of modern sophistication, making it perfect for everyday wear or special occasions where you want understated elegance. It’s a clean and polished Nail type that never goes out of style, offering a fresh take on classic simplicity.
To achieve this ethereal transparency, opt for a gel polish specifically designed to be sheer, or mix a tiny drop of white polish into a clear top coat. For the perfect almond shape, file evenly from both sides, rounding the tip gently. Finish with a high-shine top coat to lock in that glossy, dreamlike effect.
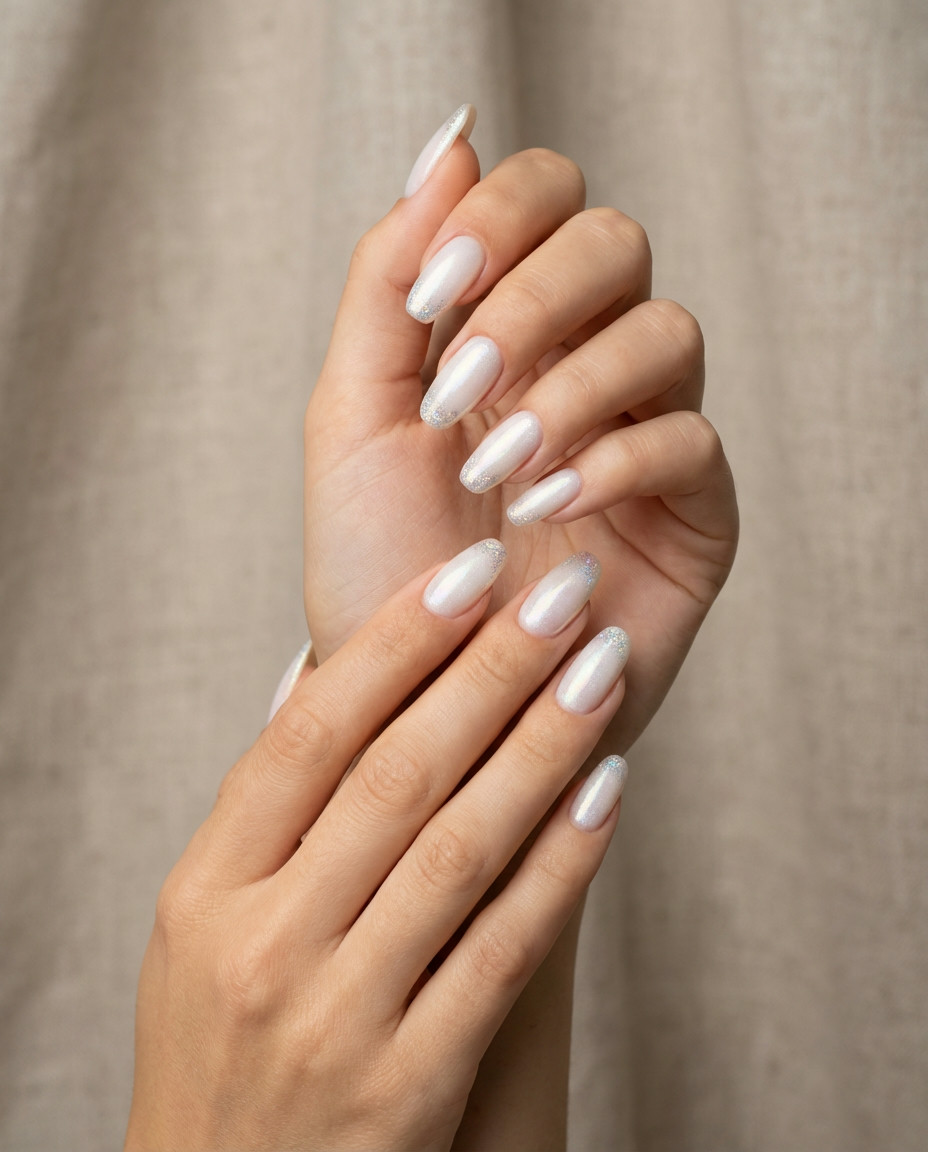
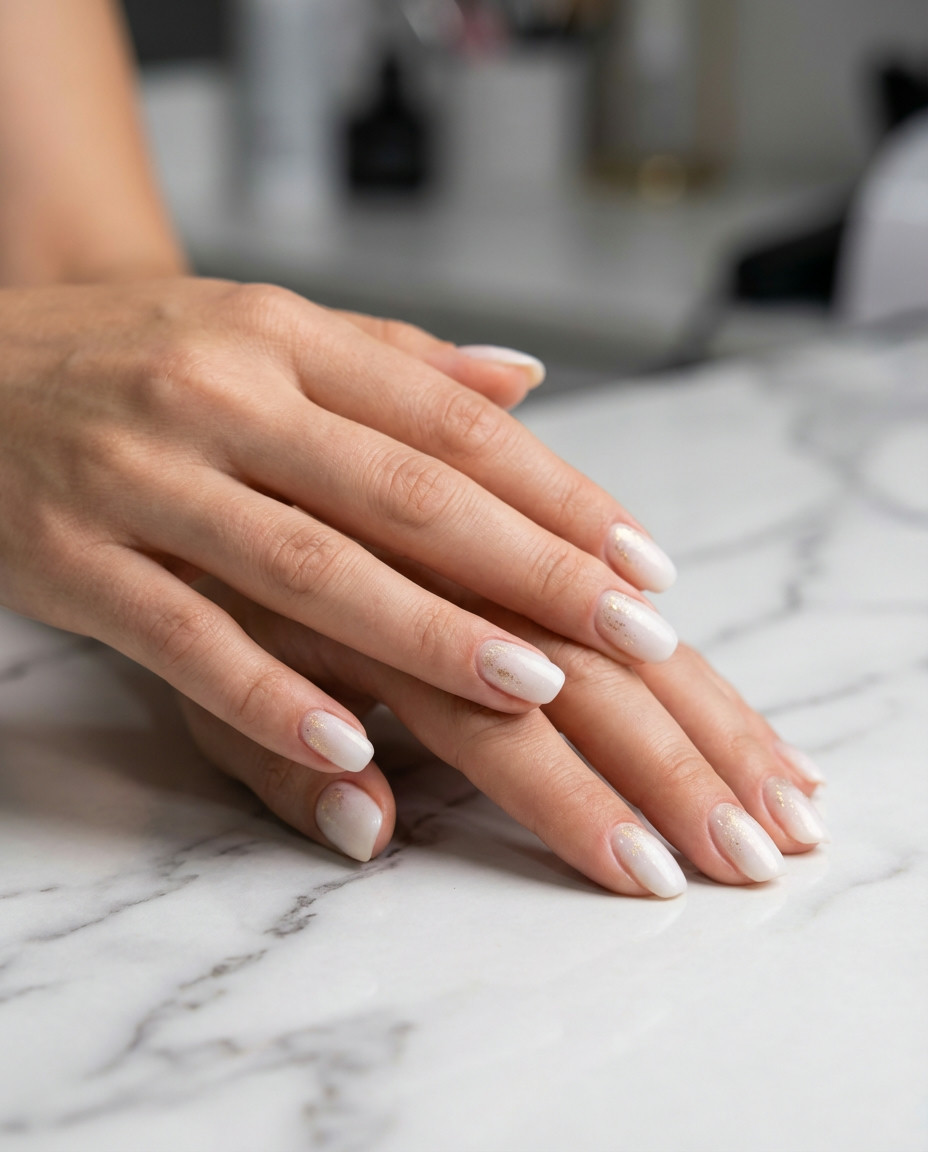
2. Pearl Dust Milky Coffin Nails

Elevate your milky white nails with a hint of shimmering pearl dust, creating an almost iridescent finish. This delicate Design is incredibly chic on a modern Nail shape like coffin, offering a luxurious yet subdued glamorous feel. The pearlescent sheen catches the light beautifully, making your hands look instantly more refined and put-together, perfect for those who love subtle sparkle.
For the pearl dust effect, apply a thin layer of no-wipe top coat over your milky white base, then gently rub in a chrome or pearl pigment powder with an applicator or your fingertip. Seal with another layer of no-wipe top coat for durability and maximum shine. Coffin nails require precise filing to keep their sharp, tapered edge.
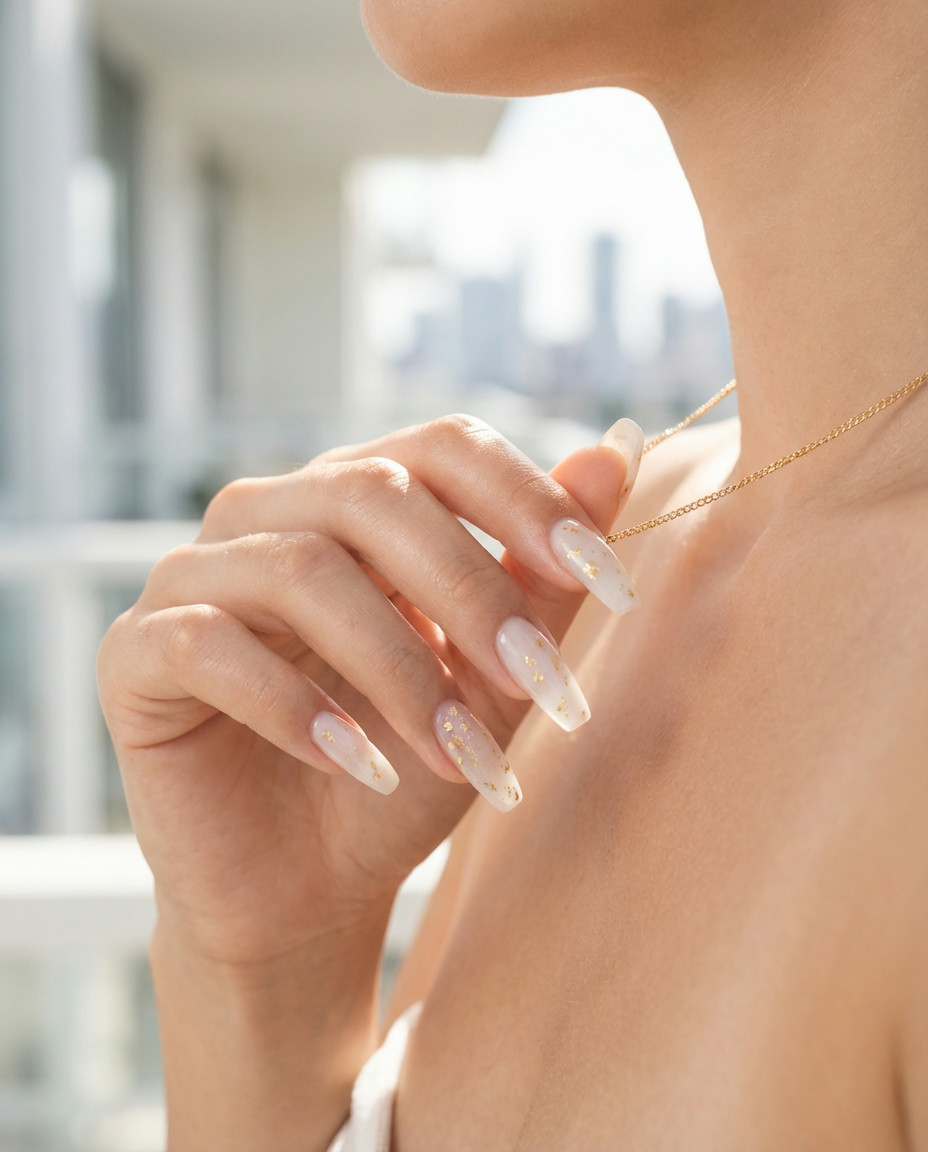
3. Delicate Gold Flake Oval Nails
Imagine soft milky white nails adorned with tiny specks of Gold flake, creating a sophisticated and ethereal Design. The delicate flakes add a touch of luxury without being overpowering, enhancing the natural beauty of an elegant Nail shape like oval. It’s a subtle way to incorporate a hint of shimmer and glamour into your everyday look. This design is perfect for those who appreciate understated opulence.
When applying the gold flakes, use a dotting tool or a fine brush to carefully place them onto a tacky layer of polish before curing. For optimal longevity, ensure each flake lies completely flat and is fully encased by a clear top coat. Maintain your oval shape with consistent filing, ensuring symmetry and a smooth curve.
4. Minimalist White Bloom Square-etto

This charming Design features tiny, understated Flowers painted in a slightly whiter hue than the milky base, creating a seamless, artistic effect. Paired with a stylish “square-etto” (a soft square) Nail shape, this look is both playful and elegant. It’s a beautiful way to embrace nature-inspired aesthetics without being too bold, perfect for a fresh and youthful vibe on your milky white nails.
For these delicate blooms, use a fine detail brush and a slightly more opaque white gel polish. Start with small dots for petals, then gently drag them outwards. Practice on a nail swatch before applying to your actual nails. The square-etto shape is achieved by combining the strength of a square with the softer edges of an oval – file straight across the top, then subtly round the corners.
5. Chrome Halo Milky Round Tips

Step up your milky white nails with an exquisite Chrome halo effect around the edges, particularly stunning on round-shaped nails. This subtle metallic border adds a futuristic yet soft touch, enhancing the natural contour of your finger. It’s a contemporary Design that brings a quiet sophistication, perfect for those who love a modern twist on classic elegance. The gentle shine elevates the simple milky base.
To create the chrome halo, apply chrome powder meticulously along the very edge of your round nail using a small, firm brush or an eyeshadow applicator. Ensure your base color is properly cured and has a no-wipe top coat applied before adding the chrome. Seal everything with another layer of no-wipe top coat to prevent chipping and maintain that mirror-like finish.
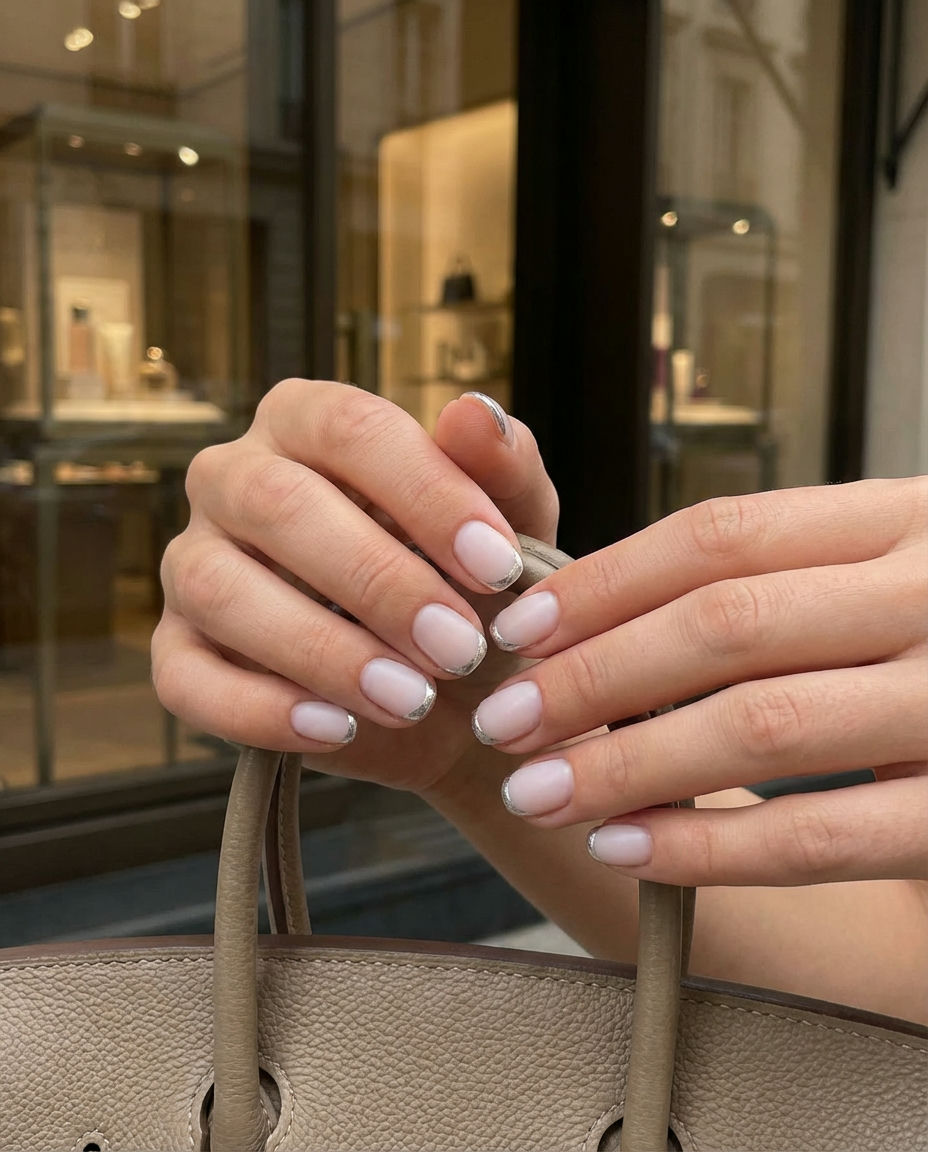
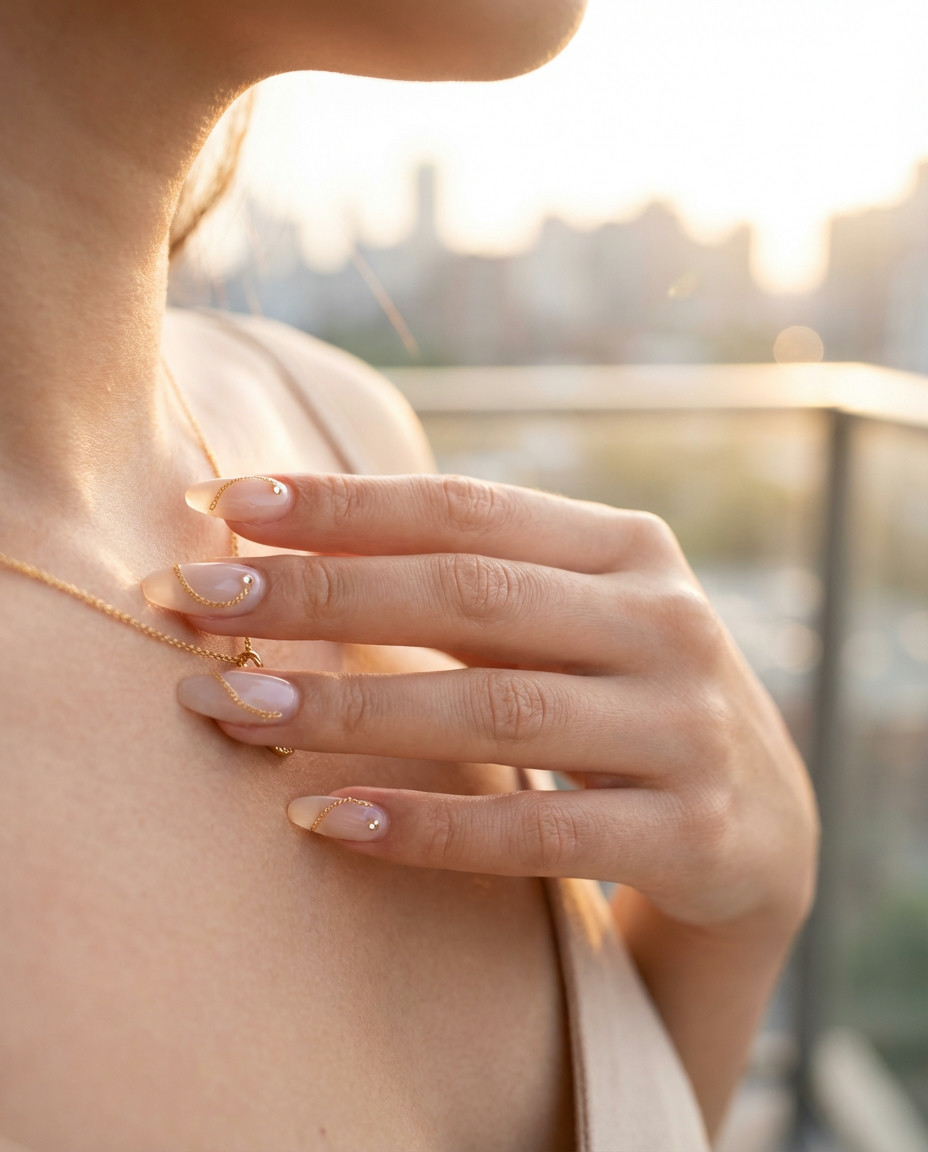
6. Subtle Silver Line Squoval Nails
A delicate silver line gracefully outlines a single nail, adding a touch of understated glamour to your milky white nails. This elegant Design is particularly striking on a well-maintained squoval Nail shape, merging sophistication with a hint of modern artistry. It’s a beautifully refined way to introduce a metallic accent without overwhelming the soft base, proving that sometimes less truly is more.
Achieving a perfectly straight silver line requires a very thin striping brush and a steady hand. Use a metallic gel polish for crispness or silver transfer foil for a more reflective finish. For squoval nails, file the sides straight and then gently round off the corners, avoiding a sharp edge. A good base and topcoat are essential for this Nail type to ensure longevity.
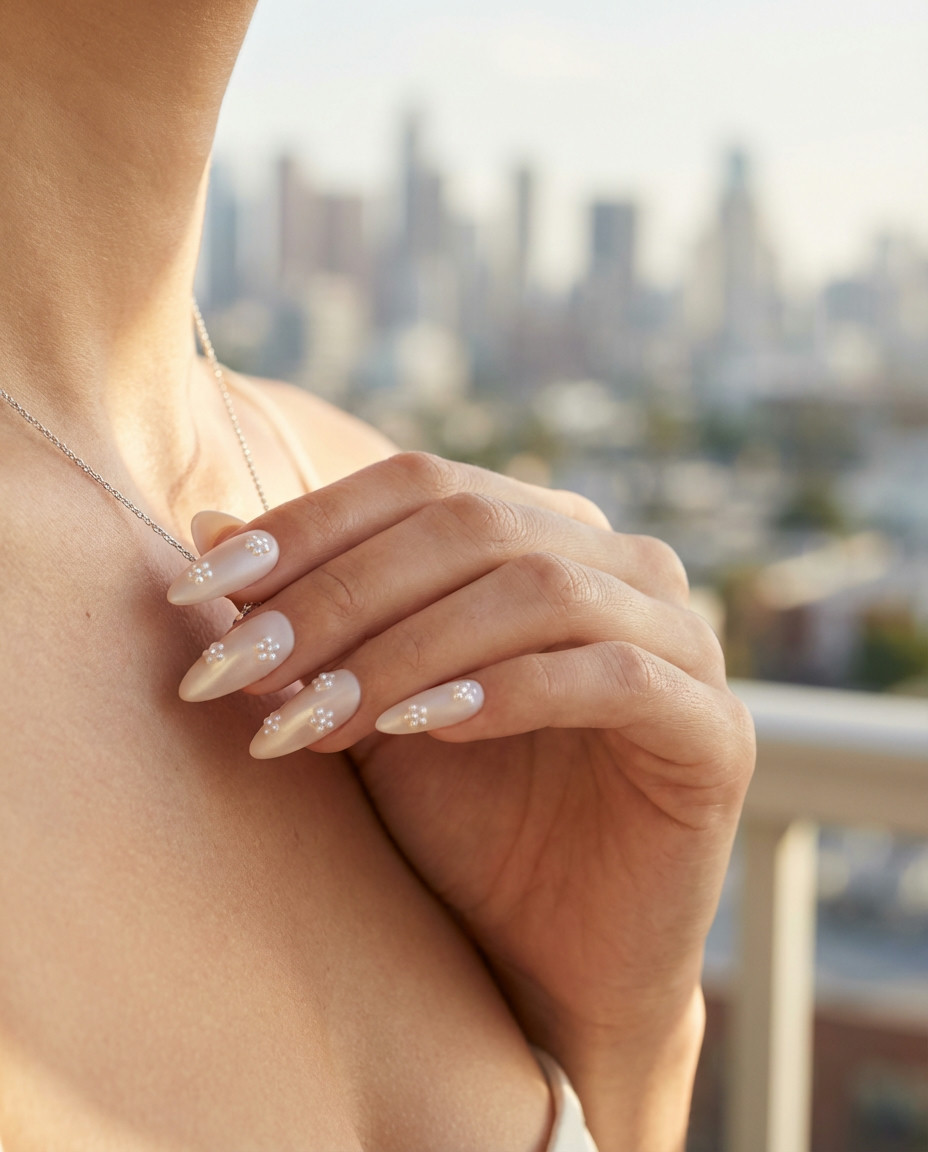
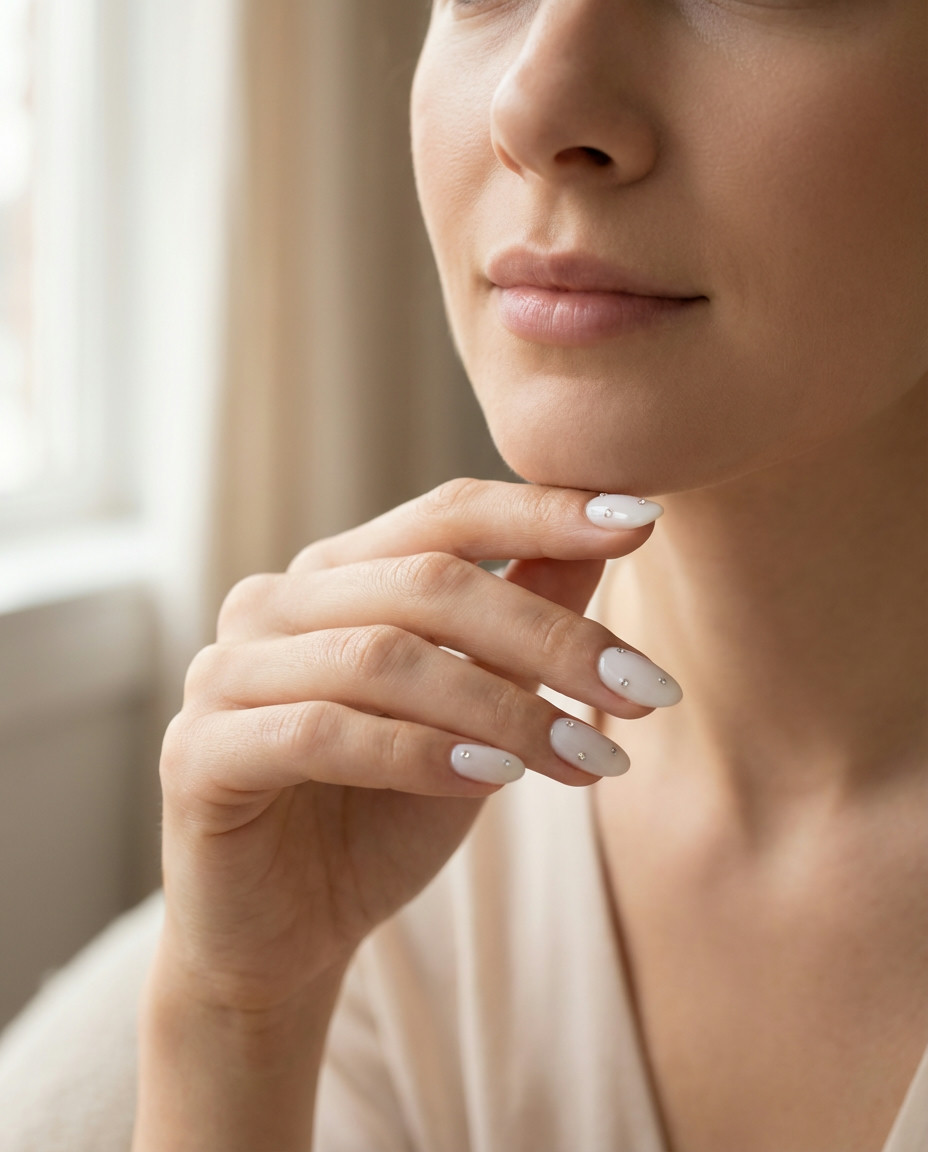
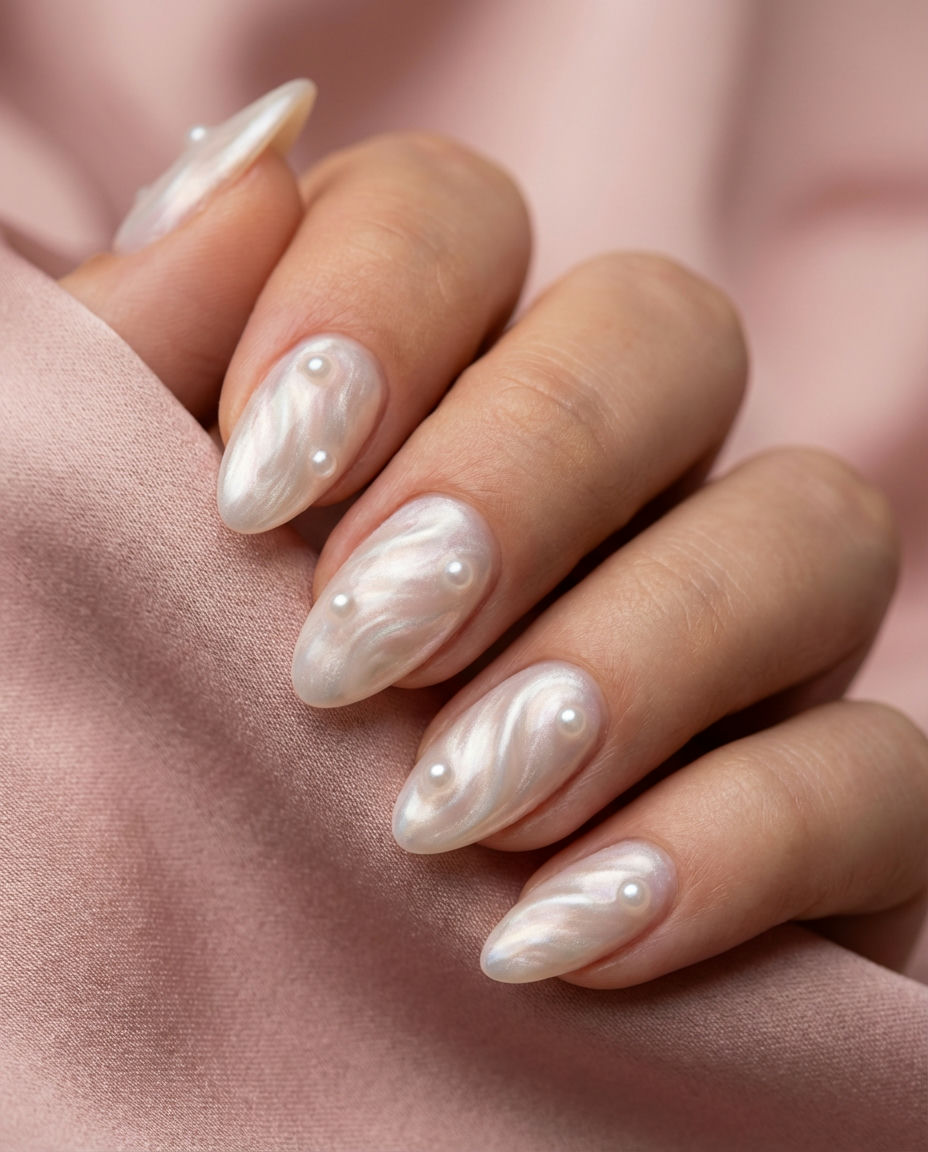
7. Micro-Pearl Accent Stiletto Nails
Embrace ethereal elegance with tiny, delicate micro-pearls strategically placed on your Stiletto Nail shape, paired with a soft milky white base. This subtle Bling adds a touch of luxury and texture without overpowering the sophisticated look. It’s a perfect choice for those who love a hint of glamour and an unexpected detail on an edgy yet refined Nail type. It creates a beautiful interplay of light and texture.
To adhere micro-pearls securely, use a tiny dot of nail glue or a clear, thick builder gel. Apply pearls one by one with a wax pencil or a dampened dotting tool, pressing them gently into place. Stiletto nails require a strong nail plate to prevent breakage, so consider builder gel or acrylic for added strength if you have weaker nails.
8. Glossy “Glazed Donut” Rounded Square
Inspired by the viral trend, these milky white nails boast an incredibly high-gloss, almost translucent finish, reminiscent of a freshly glazed donut. This minimalist yet impactful Design is perfect for a clean, rounded square Nail shape, offering a chic and polished look that’s effortlessly stylish. It’s a subtle statement that shines with understated elegance, making it a perfect everyday luxury Nail type.
To achieve the “glazed donut” effect, apply a thin layer of sheer milky white polish, then follow with a magnetic chrome powder (often labeled as pearl chrome) or a pearlescent top coat. Rub the powder in gently, then seal with a super high-shine top coat. The rounded square shape should have straight sides with softly curved corners for a modern, wearable edge.
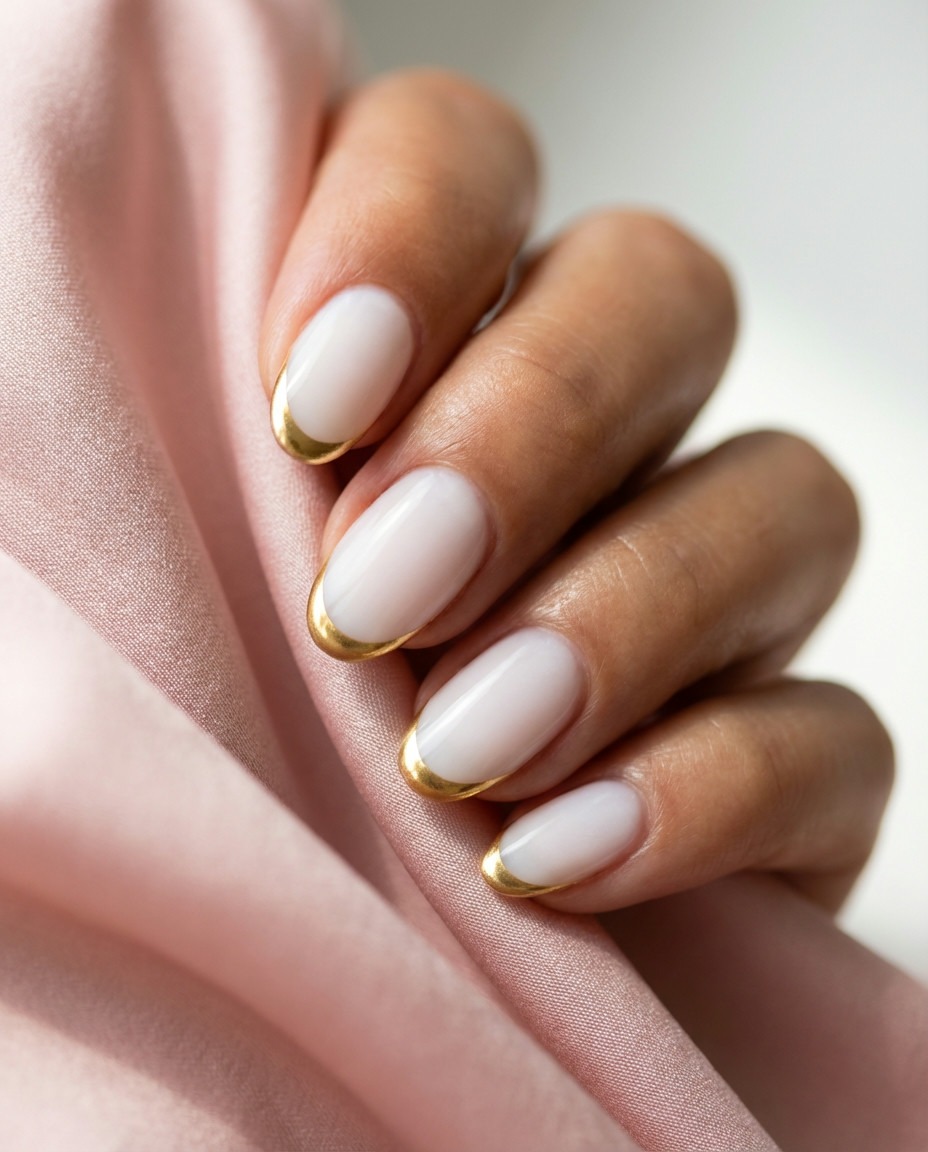
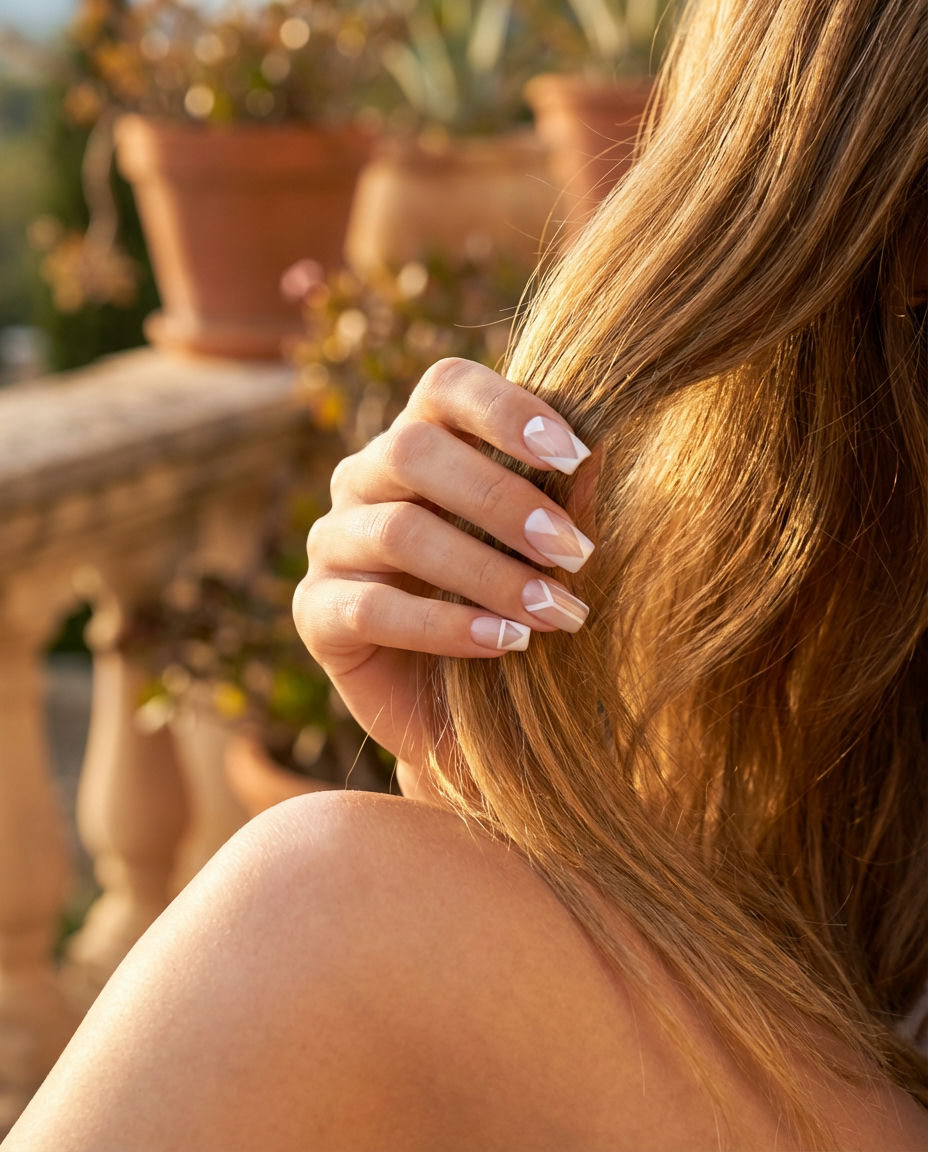
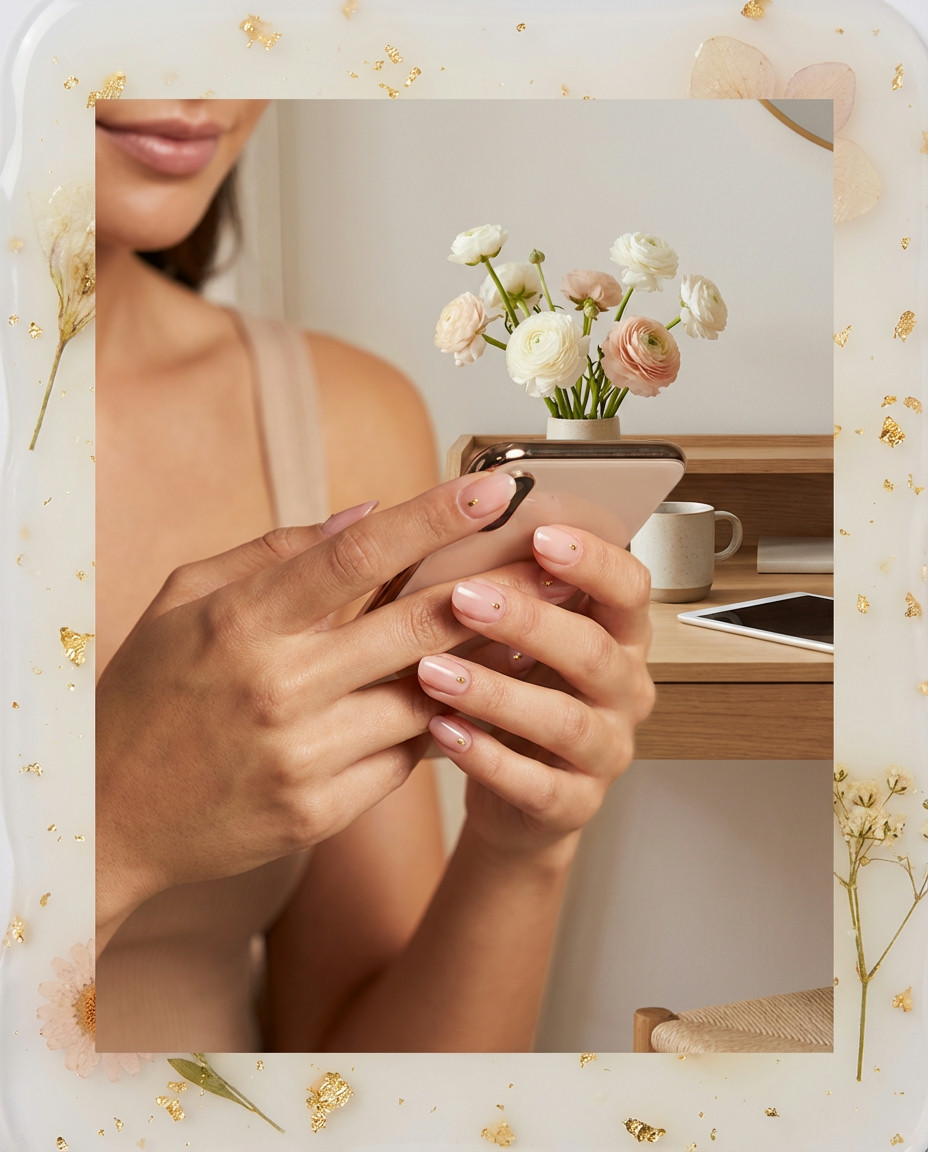
9. Single Gold Dot French Tip
A classic French tip gets a modern and whimsical update with a single, perfectly placed Gold dot on the accent nail, over a delicate milky white base. This elegant Design adds a pop of sophisticated charm without being overly flashy. It’s a delightful way to introduce a touch of individuality to your milky white nails, keeping the overall aesthetic soft and refined, a subtle yet memorable detail.
For a crisp French tip, use a striping brush or a French tip guide sticker. Once dry, use a fine dotting tool and a gold gel polish or metallic nail polish for the single dot. Ensure the dot is completely dry before applying a top coat to prevent smudging. This Design looks fantastic on almost any Nail shape, from oval to square.
10. Textured Milky Swirl Art
Dive into subtle artistry with delicate textured swirls embedded within a soft milky white base. This unique Design adds an intriguing dimensional element to your Nail type, making your nails a true conversation starter without being overly bold. It’s a sophisticated way to play with patterns and textures, elevating the simple milky canvas into something truly special and modern. This design works wonderfully on a natural Nail shape.
To create textured swirls, apply a slightly thicker gel polish in a swirling motion over your base color, without fully curing the first layer. Then, gently drag a thin detail brush through it to create depth. You can also use a 3D gel or builder gel for more pronounced texture. Cure thoroughly and finish with a smooth top coat to maintain the soft feel.
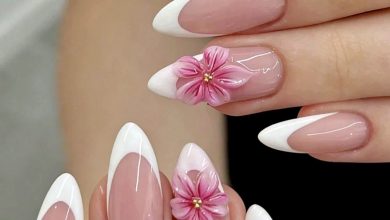
11. Ethereal White Blossom Accent
Imagine graceful white Flowers delicately painted on one or two accent nails, creating an ethereal and romantic look on a milky white base. This intricate Design adds a touch of natural beauty and softness, celebrating the art of delicate floral design. It’s perfect for those who love intricate details and want to infuse their milky white nails with a hint of poetic charm, especially lovely on an Almond Nail shape.
For these delicate blossoms, use a very fine detail brush and a slightly more opaque white gel polish. Build up the petals in thin layers for a watercolor-like effect. Practice painting tiny flowers on a nail art palette first. A matte top coat can enhance the delicate, almost fabric-like texture of the petals, but a glossy finish also works beautifully.
12. Micro-French Tip with Rose Gold Detail

A super subtle micro-French tip in milky white is given a chic upgrade with a thin, almost imperceptible line of Gold (rose gold, specifically) just beneath it. This sophisticated Design adds a touch of warmth and luxury to your natural Nail type, perfect for an understated yet glamorous vibe. It’s a modern twist on a classic, making your milky white nails feel fresh and refined for 2026.
Achieving a perfect micro-French tip requires a very steady hand and a fine striping brush. For the rose gold detail, use a thin line of metallic gel polish or a rose gold striping tape directly underneath your white tip. Ensure each layer is fully cured before proceeding to the next. This minimalist design truly shines on a well-manicured, short rounded Nail shape.
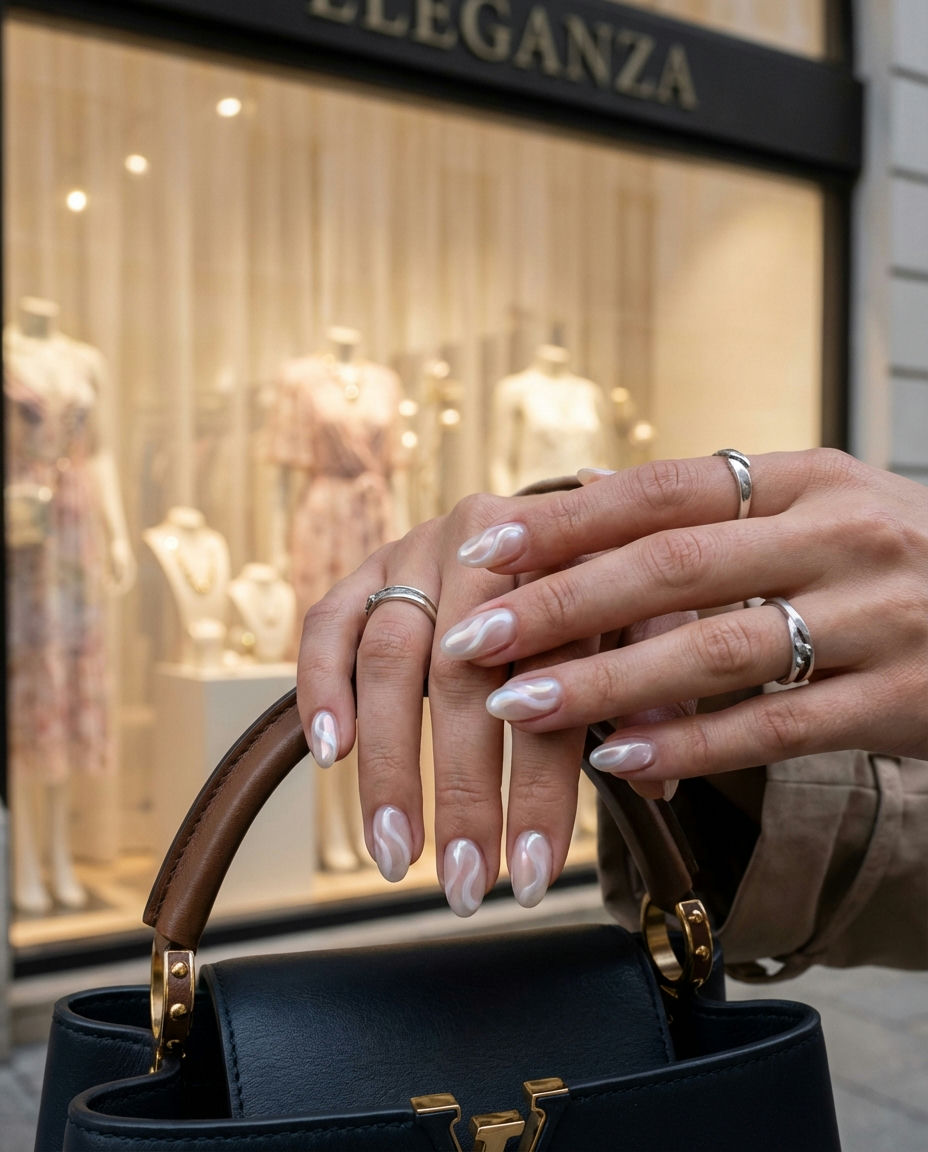
13. Ghostly Swirl Negative Space
Intriguing and modern, this Design features a flowing, almost “ghostly” swirl of milky white across a clear or barely tinted base, leaving negative space to create visual interest. It’s a contemporary take on milky white nails, playing with translucency and form. This artistic Nail type is perfect for those who appreciate abstract art on their fingertips, offering a unique and sophisticated look.
To create these ghostly swirls, use a slightly thicker milky white gel polish on a non-wipe base. Gently drag a thin detail brush through the polish to create soft, organic lines and shapes, ensuring parts of the natural nail show through. Curing each layer quickly will help maintain the crispness of the lines. This design is best showcased on a medium-length Nail shape like oval or almond.
14. Soft Ombre Milky to Clear
Experience the ultimate in soft elegance with an ombre effect that subtly fades from a milky white at the tip to a clear or natural nail bed. This gentle Design creates a seamless transition, giving your nails an elongating and polished look. It’s a sophisticated choice for milky white nails that desire a touch of understated artistry, perfect for almost any Nail shape. This popular Nail type is versatile and chic.
To achieve a smooth ombre, apply a sheer milky white polish to the top half of the nail, then gently dab with a sponge or a fluffy brush to blend it downwards towards the clear base. Repeat this process in thin layers until you reach your desired opacity and blend. A good base and top coat are crucial for this delicate blend to last.
15. Milky White with Subtle Chrome Accents
Elevate your classic milky white with delicate Chrome accents, perhaps a fine line or a small geometric shape on an accent nail. This subtle Design adds a modern, almost futuristic touch without overpowering the soft base. It’s a refined way to incorporate trending metallics into your milky white nails, giving them an understated edge and sophisticated sparkle. This versatile Nail type shines on any shape.
For subtle chrome accents, apply your milky white base and top coat, then use a thin striping brush to apply a no-wipe top coat in your desired shape. Rub a pearl or silver chrome powder over just that area, then gently dust off the excess. Seal with another thin layer of no-wipe top coat to protect the chrome and add shine.
16. Tiny Gold Heart Accent Ring Finger
A sweet and delicate touch, a tiny Gold heart artfully placed on the ring finger adds a romantic whimsical charm to your milky white nails. This adorable Design is perfect for personalizing your manicure with a hint of sentimentality and subtle sparkle. It’s a lovely way to add personality, making your hands feel special and cared for, especially beautiful on a natural, rounded Nail shape.
Use a very fine detail brush or a small dotting tool to paint the tiny gold heart. If painting freehand is tricky, consider using a small gold nail sticker. Ensure the gold is completely dry before applying a top coat to prevent smudging. This simple yet effective Design idea works best when kept minimal, drawing attention to that one special accent.
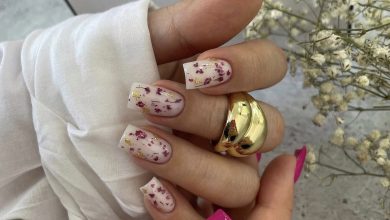
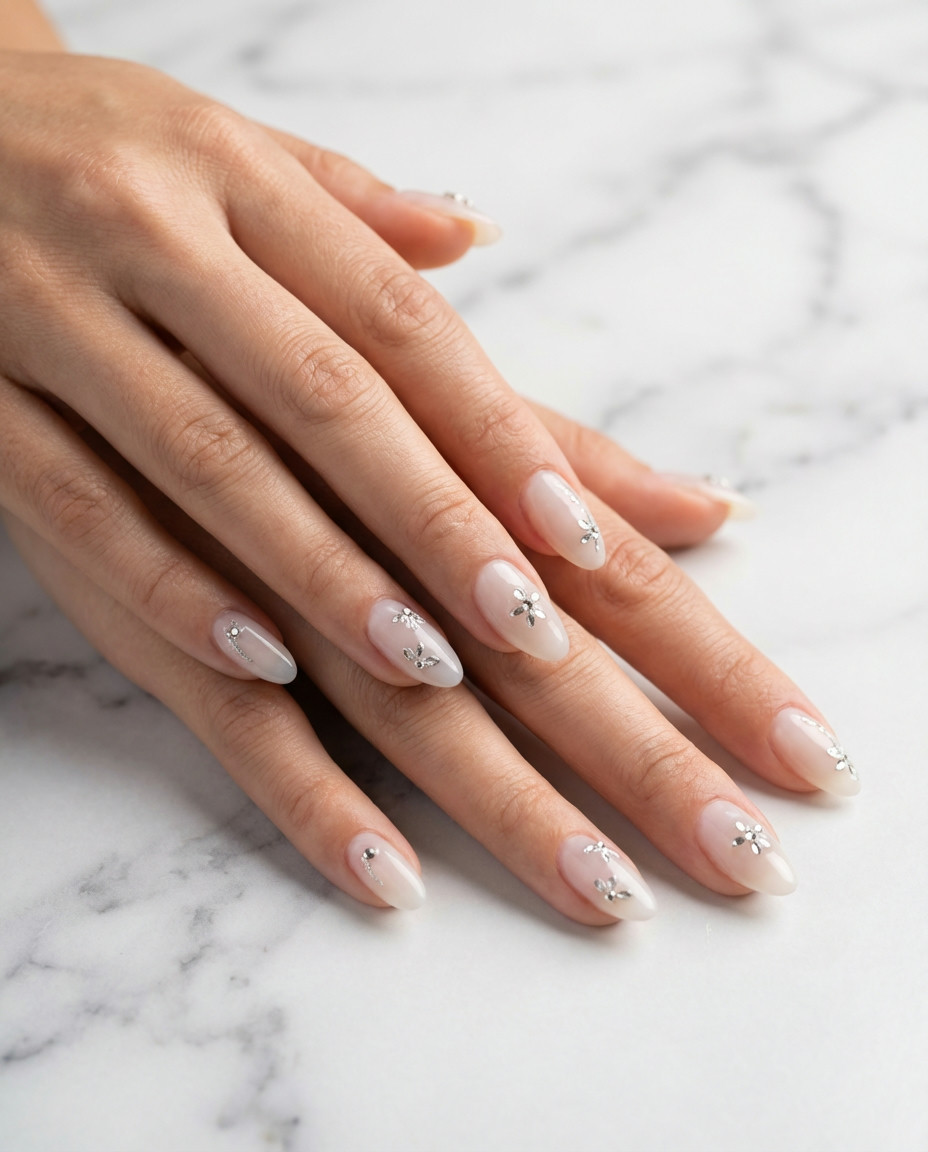
17. Milky Glass With Encapsulated Bling
Imagine a clear, almost glass-like milky white base with tiny pieces of subtle Bling, like crushed Opals or holographic glitter, encapsulated within the gel. This mesmerizing Design creates a multi-dimensional effect, offering a sophisticated sparkle that’s smooth to the touch. It’s a chic way to add subtle glamour to your milky white nails, making them truly unique and captivating on an Almond Nail shape.
To encapsulate bling, apply a thin layer of builder gel or clear gel polish over your milky base. Carefully place your chosen glitter or crushed pearl pieces into the wet gel. Cure, then apply another thin layer of builder gel to fully seal and smooth out the texture. Finish with a high-gloss top coat for maximum clarity and shine, ensuring the Nail type remains strong and durable.
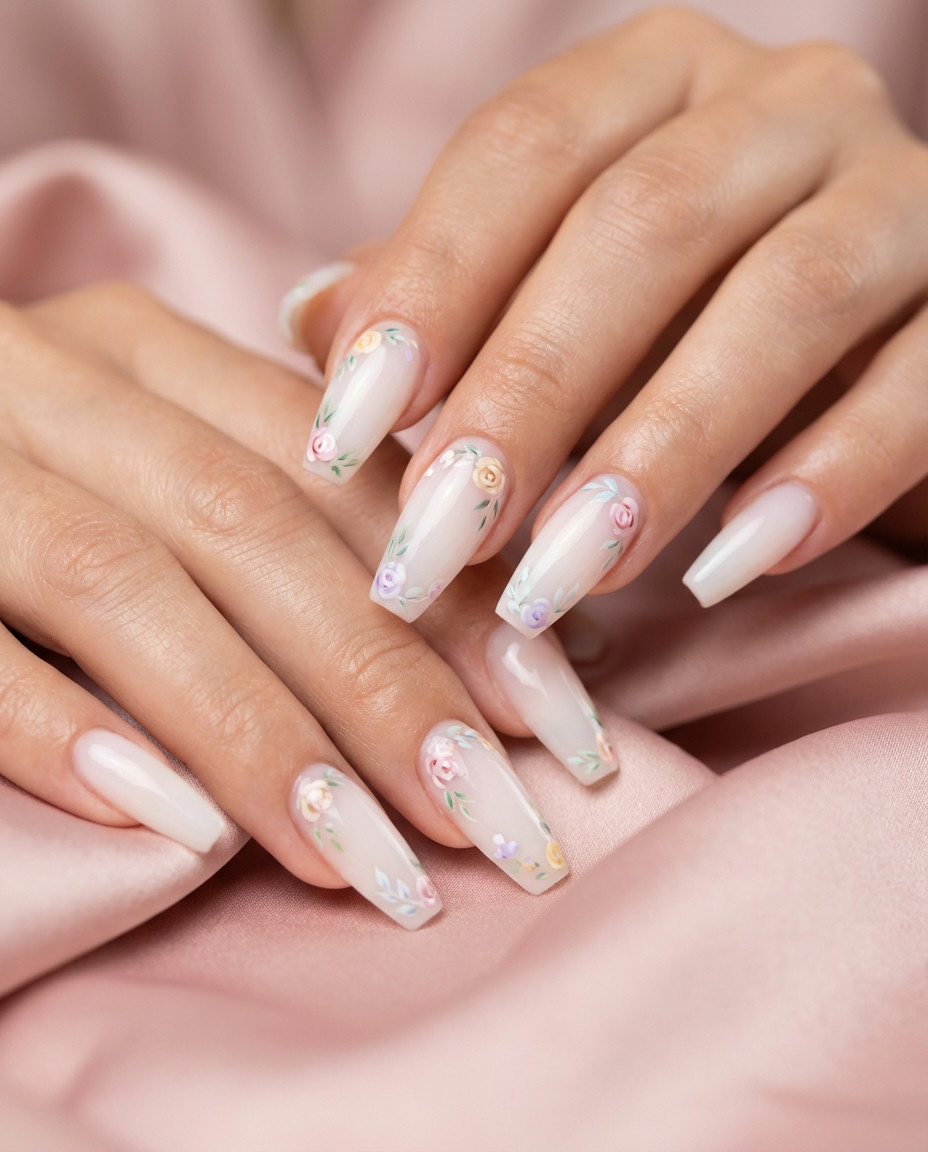
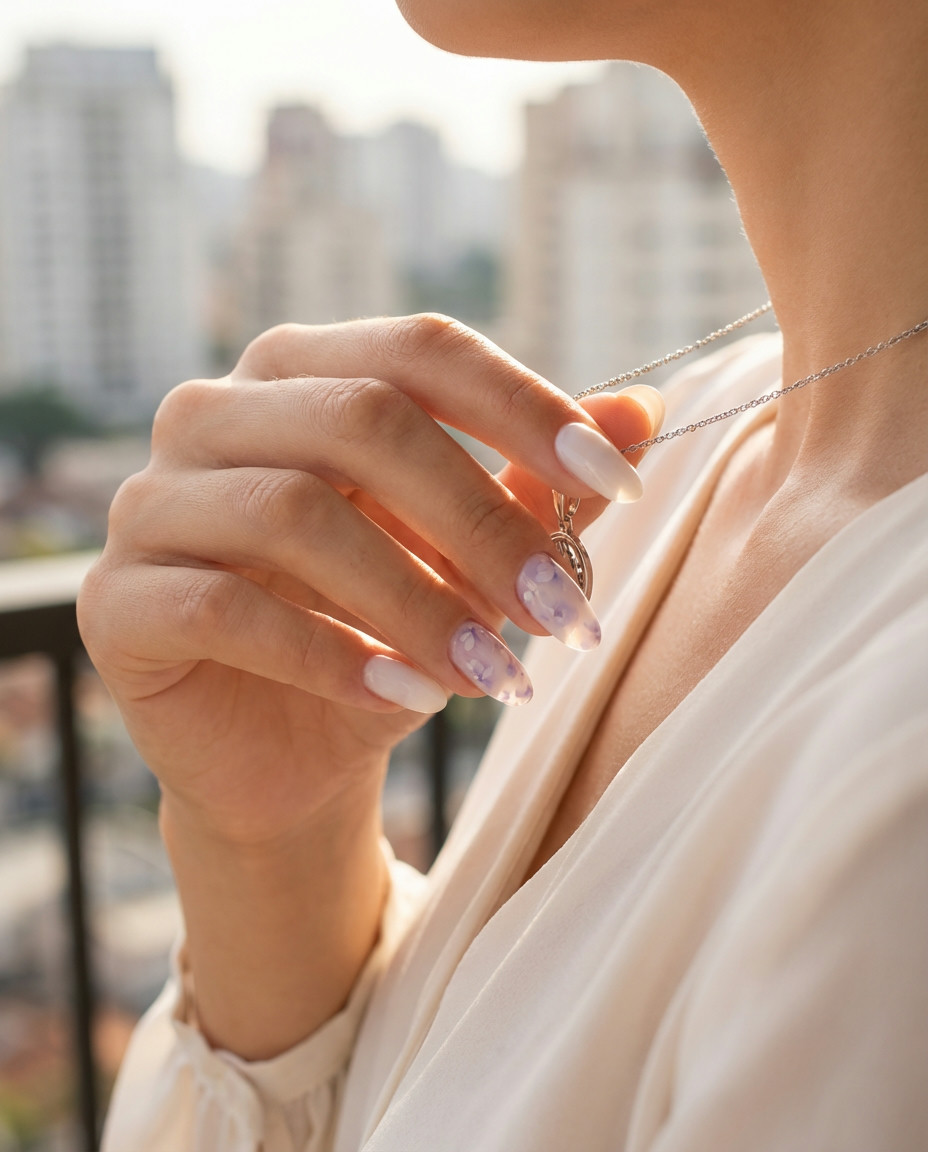
18. Watercolour Inspired Floral Tips
This artistic Design features soft, watercolour-inspired Flowers painted delicately on the tips of your milky white nails. The gentle blending of colors, primarily whites and very pale pastels, creates an airy and romantic aesthetic. It’s a fresh and unique take on floral nail art, offering a sophisticated yet whimsical touch perfect for spring and summer, especially on an elegant oval Nail shape.
To achieve a watercolour effect, use diluted gel polishes or even acrylic paints mixed with a clear medium. Apply tiny dots, then use a clean, slightly dampened brush to gently blend the edges for that soft, diffused look. Ensure each layer is completely dry before sealing with a top coat. This detailed Design idea looks best on a slightly longer nail bed to showcase the artwork.
19. Vertical Gold Stripe Accent
A single, minimalistic vertical Gold stripe graces one or two nails, creating an elegant and elongating effect on your milky white nails. This sophisticated Design is incredibly chic, offering a subtle touch of luxury and modernity. It’s perfect for those who appreciate clean lines and a hint of glamour, seamlessly blending with any outfit or occasion, particularly striking on a tapered Nail shape like coffin or stiletto.
For a perfectly straight vertical stripe, use a thin striping brush and a metallic gold gel polish or nail art striping tape. Apply a base coat, then your milky white, securing everything with a top coat before applying the stripe. Once the stripe is in place, apply another top coat to seal and protect it. A quick cure under UV/LED light is essential for gel striping.
20. Milky Swirls on a Pale Chrome Base

Experience a mesmerizing depth with soft milky white swirls artfully painted over a pale, shimmery Chrome base. This innovative Design combines two popular trends, creating a unique, almost liquid effect that’s both modern and ethereal. It’s a sophisticated upgrade to traditional milky white nails, offering a captivating interplay of light and texture, perfect for an almond Nail shape or classic oval.
To create this look, first apply a sheer pale chrome polish or clear base with chrome powder, then seal with a no-wipe top coat. Using a slightly thicker milky white gel polish, draw freehand swirls onto the surface. Don’t overwork the swirls to maintain their soft definition. Cap with a glossy top coat to enhance the depth and shine of the entire Nail type.
21. Frosted Milky Ballerina Shape

Achieve a chic, frosted effect on your milky white nails by opting for a matte top coat over a sheer, milky base. This sophisticated Design is particularly stunning on a strong Ballerina Nail shape, offering a velvety, non-reflective finish that exudes understated luxury. It’s a modern and elegant way to embrace the milky trend, making your nails look polished and incredibly soft. The unique Nail type adds to the allure.
For the perfect frosted look, apply a thin layer of milky white gel polish, cure, then finish with a high-quality matte top coat. Ensure even application of the matte top coat to avoid streaks. The Ballerina shape, which is similar to coffin but with a softer, slightly rounded square tip, requires precise filing to maintain its elegant lines and strength.
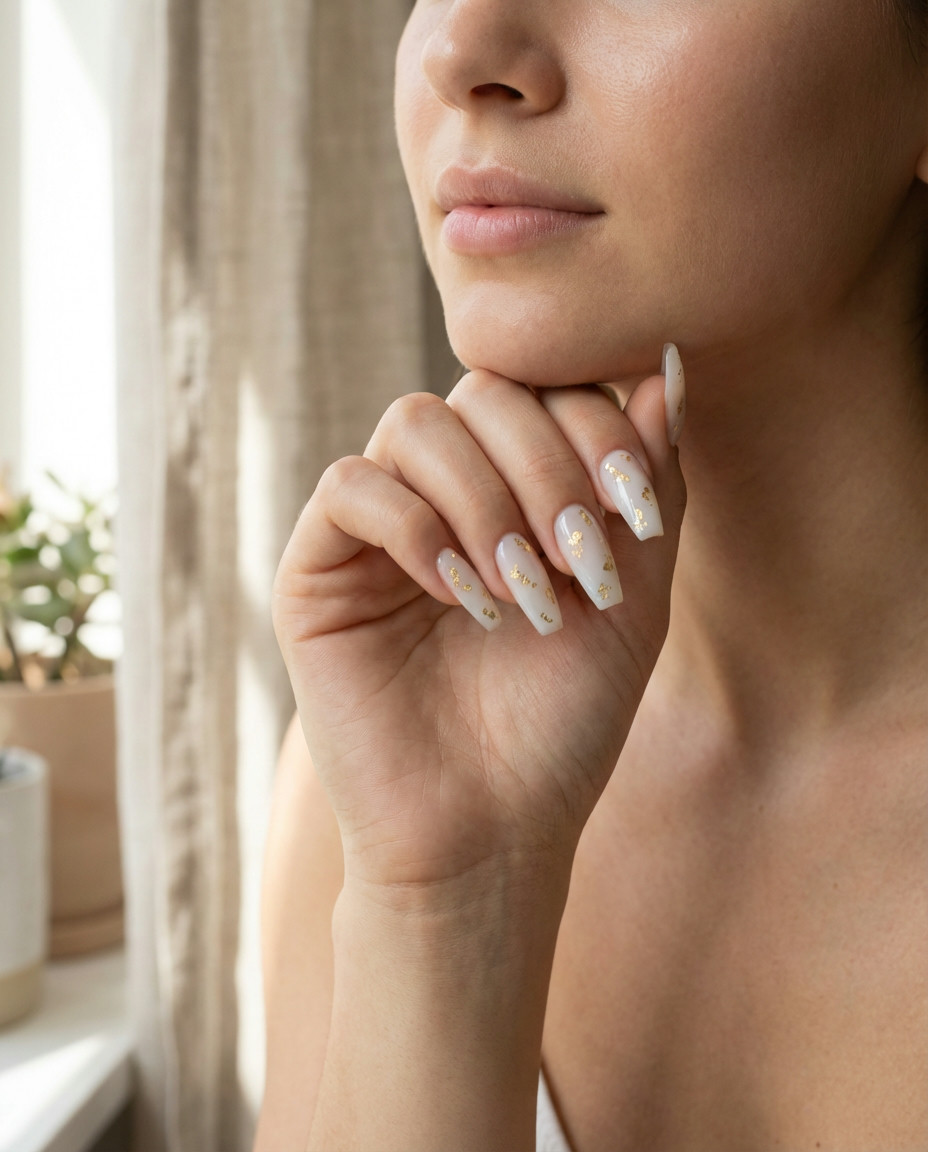
22. Abstract Gold Leaf Overlay
This artistic Design idea involves randomly placed, delicate pieces of Gold leaf over a soft milky white base, creating an abstract and luxurious pattern. The irregular placement of the gold gives each nail a unique, modern art feel, while the milky base keeps it grounded and elegant. It’s a sophisticated way to incorporate sparkle, elevating your milky white nails into a statement, especially beautiful on a classic oval Nail shape.
To apply gold leaf, use a fine tweezer or an orange wood stick to pick up small pieces and gently press them onto a tacky layer of gel polish. Once placed, gently pat them down to ensure they lie flat. Encapsulate with a clear builder gel or two layers of top coat to prevent lifting and ensure a smooth finish. This Design works best with a high-gloss top coat to really make the gold pop.
23. Gradient Milky Pinky Transition
A soft, seamless gradient transitions from a delicate milky white at the tip to a sheer, almost transparent pink at the nail bed. This charming Design offers a natural yet polished look, reminiscent of a healthy, glowing nail. It’s a truly subtle and elegant approach to milky white nails, perfect for any occasion and particularly flattering on a natural oval Nail shape, embracing the soft aesthetic.
Achieving this gradient requires a careful blending technique. Apply a sheer pink to the bottom half of the nail, then a sheer milky white to the top. Using a sponge or a blending brush, gently dab and blend where the two colors meet. Repeat in thin layers until the transition is smooth and flawless. A quality top coat is essential for protecting the delicate blend of this Nail type.
24. Sculpted White Gel Petals
Bring your milky white nails to life with delicate, sculpted Flowers created using 3D gel, forming subtle raised petals on an accent nail. This exquisite Design adds incredible texture and artistry, making your nails a miniature work of wearable art. It’s a sophisticated and unique way to integrate floral elements, perfect for those who dare to be different with their manicure, especially on a longer Nail type.
For sculpted petals, use a specific 3D sculpting gel or a thick builder gel. Apply small beads of gel and use a fine-tipped brush or dotting tool to gently mold them into petal shapes. Cure each petal as you go to maintain its form. Finish with a smooth top coat around the petals, or leave the petals matte for a different textural contrast. This intricate Design idea requires patience and a steady hand.
25. Geometric Silver Sparkle Line

A striking yet delicate geometric silver sparkle line gracefully crosses over the soft milky white base, adding a modern and artistic edge. This elegant Design introduces a subtle touch of Bling and structure, perfect for those who love clean lines and a hint of unexpected shimmer. It transforms simple milky white nails into a contemporary fashion statement, especially impactful on a sharp coffin Nail shape.
To create the straight sparkly line, use a striping brush with silver glitter gel polish or apply a thin strip of silver glitter tape. Ensure your base color and top coat are fully dry before applying the line. Seal with another layer of clear top coat to protect the glitter and prevent snagging. This Design idea is a fantastic way to add dimension without overwhelming the nail.
26. Milky White with Subtle Chrome French Tip

A classic French tip takes a sophisticated turn with a soft milky white base and an almost imperceptible hint of Chrome on the free edge. This modern Design offers a luminous glow, giving your milky white nails a high-end, polished finish that’s utterly chic. It’s a subtle yet impactful way to elevate an iconic look, making it fresh and trendy for 2026, especially stunning on a square Nail shape.
After applying your sheer milky white base, create a thin French tip using a slightly more opaque white. Cure, then rub a small amount of pearl or silver chrome powder onto just the tip, using a soft applicator. Dust off excess, then seal with a non-wipe top coat to lock in the chrome finish for this stunning Nail type. Precision is key for a crisp French line.
There you have it, 26 stunning ways to rock milky white nails with soft designs in 2026! Whether you’re into subtle shimmer, delicate artwork, or minimalist lines, there’s a look here for everyone. Save your favorite Design ideas and bring them to your next nail appointment, or get creative and try them at home. Your nails are your ultimate accessory, so let them shine with these ethereal, chic styles!